


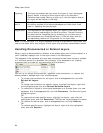


Working With GIS
87
Backing Up a Database
Restoring a Backed Up Database
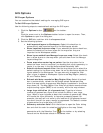
Connecting to a Server
This Help topic describes features that are available in XMap
Professional, XMap GIS Editor, and XMap GIS Enterprise.
You can use Database Manager to connect to single or multiple SQL servers.
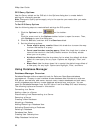
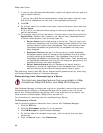
To Connect to a Server
Use the following steps to connect to a server with Database Manager.
1. Click the GIS tab.
2. Click the Workspace subtab if it is not selected.
3. Click DB Manager to open Database Manager.
4. From the Server menu, click New Connection.
The Connect dialog box opens.
5. Type the name of the server in the Server text box.
Note If SQL Server was installed on your local machine, type
localhost\xmap6 (or localhost\delormemapping if SQL Server was installed in
a previous version of XMap). If you are connecting to a remote server, see
your Database Administrator to obtain the server name information.
6. Select the authentication method; Windows Authentication or SQL Server
Authentication.
7. If you selected SQL Server Authentication, type the appropriate login name
and password in the applicable text boxes.
8. Click Connect.
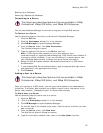
Adding a User to a Server
This Help topic describes features that are available in XMap
Professional, XMap GIS Editor, and XMap GIS Enterprise.
Once you connect to a SQL server, you can give users access to the databases on
the server. The Server Administrator can modify a user's role on that server to be
Server User (default), Database Creator, or Server Administrator.
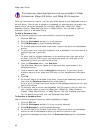
To Add a User to a Server
Use the following steps to add a user to a server.
1. Click the GIS tab.
2. Click the Workspace subtab if it is not selected.
3. Click DB Manager to open Database Manager.
4. On the left side of the window (tree view), click the server to which you want
add a new user.
5. From the Server menu, click New User.
The Add Server Account dialog box opens.
6. Type the individual's network user name in the User Name text box.