


Working With GIS
153
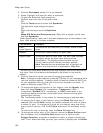
6. To change the opacity of the color of your feature, from the Opacity drop-
down list, select Opaque (0% transparent), Transparent (100%
transparent), Blended (50% transparent), or XOR (combination of the
source and background pixels—most useful when records with the same
symbolization overlap).
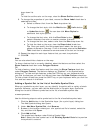
7. To change the line color of your feature, click the Color button and select a
standard or custom line color. Then, select a line width from the Width drop-
down list and a line style from the Style drop-down list.
8. To change the outline color of your feature, click the Outline Color button
and select a standard line color or create a custom line color. Then, select
how wide you want your outline to display from the Width drop-down list and
an outline style from the Style drop-down list.
Note An outline is placed underneath a line. Therefore, if the outline is
thinner than the line, the outline may not be visible. To ensure an outline will
be visible, make sure the outline is at least 1 pixel greater than the line.
Tip By outlining a line, you can make a line look like a highway.
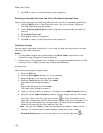
9. To change the properties of your label, ensure the Show Label check box is
selected and then:
a. Select a different font from the Font drop-down list.
b. To change the font style, click the Bold button
, Italic button , or
Underline button
. You can also click More Styles for additional font style
options.
Tip Select the Outline option under More Styles to outline the text with white,
making the text easier to read on the map.
c. To change the font color, click the Font Color button
and select a
standard font color or create a custom font color.
d. To change the font size, select a size from the Size drop-down list.
e. To hide the label on the map, clear the Show Label check box.
Tip Once you modify the font properties of labels, the text may appear
cluttered on the map. If this is the case, ensure the Declutter Text check box
is selected to remove some of the text on the map.
10. Repeat the steps for each layer feature you want to symbolize.
11. Click OK.
Note
You can also show/hide a feature on the map:
To show a feature that is currently disabled, select the feature and then select the
Show Feature check box under Line Feature.
OR
To hide a feature, select the feature and then clear the Show Feature check box
under Line Feature. The feature displays as “Disabled” in the Symbolization dialog
box. To hide multiple features, press the CTRL key on your keyboard while you click
the features you want to hide and then clear the Show Feature check box. To hide
a block of features, press the SHIFT key on your keyboard while you click the first
and last records in the block.