


Working With GIS
105
4. Click the Close button in the upper-right corner of the Redline toolbox to
close the toolbox.
Note You can access the full range of draw options for each symbol type in the
Redline toolbox by selecting the same option in the Draw tab.
Sending Redline Edits to the Source Database
This Help topic describes features that are available in XMap
Professional, XMap GIS Editor, and XMap GIS Enterprise.
Once you create redline edits in the GIS layers included in a subscription, you can
send those edits to the source database by clicking the Synchronize button
on
the toolbar. This also refreshes the layers that were part of your subscription and
retrieves the most recent changes.
Viewing Redline Edits
This Help topic describes features that are available in XMap
Professional, XMap GIS Editor, and XMap GIS Enterprise.
After users synchronize their redline layers with the redline GIS layer in the
enterprise database, those users with permissions to view the redline GIS layer can
review all of the redlines created by those users.
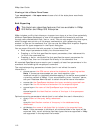
1. Add the redline GIS layer to your workspace.
2. Once the redline layer is in your workspace, select the check box next to the
layer in the Workspace view.
Outlined boxes display on the map (red indicates incomplete redline edits and
blue indicates completed redline edits), depicting the map bounding
rectangles for each redline record.
3. Click the Attributes subtab.
4. If it is not already in Datasheet View mode, click the Datasheet View button
.
The attributes of the layer display. Each record in the redline layer has the
user's name, date, and a copy of the original redline file (.an1).
5. To view a specific redline draw layer:
Click its hyperlink in the Redline Layer column.
A message asks if you want to save or open the file.
OR
Hover your cursor in the specific cell in the Redline Layer column.
A floating arrow displays. Click the arrow and then select Open.
A message asks if you want to save or open the file.
6. Click Save to save the file to your hard drive (ensure that the Open in XMap
check box is selected).
The draw layer is added to your project and displays on the map.
OR
Click Open to open the file from its current location (ensure that the Open in
XMap check box is selected).
The draw layer is added to your project and displays on the map.