


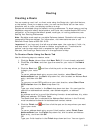


Routing
313
the name of an address book contact, user-added waypoint, or address.
Notes
An address must be in one of the following formats: street address, city, state
OR street address, ZIP/Postal Code.
The Book check box (underneath the Address Book buttons in the Find tab)
must be selected to search for address book contact names.
5. Select a calculation method — the program adjusts the default calculation
values based on your selection:
Driving–Use this method to calculate the route when you are driving a
vehicle.
Cycling–Use this method to calculate a bicycle route.
Walking/running–Use this method to calculate routes when you are
on foot.
6. Select a route type (Road-Shortest, Road-Quickest, Trail, or Direct) from
the drop-down list.
7. If the Auto check box is not selected, click Calculate.
If the program is unable to find an exact match for the item that you typed, a
dialog box opens with a list of the closest matches. Scroll through the list of
search results until you find the one you want to locate, click the item to
select it, and then click OK.
8. Click Directions to view the route directions.
AND/OR
Click Advanced to display the advanced routing options.
AND/OR
Click Back on Track to add your current GPS position as a stop to the
current route.
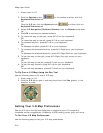
To Create a Route Using the Right-click Function
Use the following steps to create a route.
1. Right-click the map location where you want to begin your route, point to
Create Route, and click Set as Start.
2. Right-click the map location where you want to end your route, point to
Create Route, and click Set as Finish.
3. If the route doesn't automatically calculate, right-click the route, point to
Manage Route, and click Calculate Road Quickest, Calculate Road
Shortest, Calculate Trail, or Calculate Direct.
Note If the program is unable to find an exact match for the item that you
typed, a dialog box opens with a list of the closest matches. Scroll through
the list of search results until you find the one you want to locate, click the
item to select it, and then click OK.
4. Optional. Click the Route tab. Then click the Directions subtab to view the
route directions, the Advanced subtab to display advanced routing options,
Plan Trip to assign end of day or fuel breaks to your route, or Back on
Track to add your current GPS position as a stop to the current route.
To Create a Route Using the Toolbar
Click here to view the steps for creating a route using the toolbar.