


XMap User Guide
194
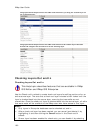
percentages for your photo zoom level display under the Photo
Zoom drop-down list.
• If you want to use other tabs and functions but not lose your current
print area or other settings, select the Lock Print Center check box.
Selecting this check box locks the print area and changes the tab label
to red.
• Select the Print Preview check box to zoom the map and view the
entire print area. Clear the check box to return to your previous data
zoom level.
• Add text or graphics to your map
7. To change printers or make choices for transparent/yellow background, paper
orientation, paper size, and paper source, click Setup. The Print Setup dialog
opens.
Note From the Setup dialog box, click Properties to view additional
options. If the options are available, set the graphics mode to use raster
graphics and set TrueType fonts to print as graphics. Consult your printer
manual for additional information.
8. Click the Print button to print your map.
Tips
• To save a map to a file, see Saving a Map as a Bitmap or JPEG Image.
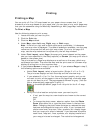
• To adjust the print area of a Page map, select the Lock Print Center check
box, select the Select tool
, and then drag the frame to the new
position.
Printing a Route and Directions
You can print maps of your route and route directions for any route you create.
Additionally, you can save your directions or along the way results in a text file. For
more information, see Saving Route Directions as Text.
For specific recommendations on best printing results, see your printer manual.
To Print a Route
Use the following steps to print an existing route.
1. Click the Print tab and then click the Route subtab.
Note If you do not have a route on this project, the route options are
unavailable.
2. Optional. Click Setup to open the Print Setup dialog box and select a printer,
change printer properties, select a transparent/yellow background, select
paper size, and select paper orientation. Click OK when finished.
If the options are available under Printer Properties, set the graphics mode
to use raster graphics and set TrueType fonts to print as graphics.
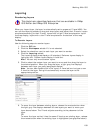
3. Select the route you want to print from the Name drop-down list. Only routes
contained in the current project display in this list.
4. Under Options, select from one of the following choices:
• Overview–Provides an optimized map of your route and the route
summary—trip distance, trip time, start, total stops, and finish.
• Travel Package–Provides maps of the route with corresponding
directions.