


Using XData
285
• dBase (.dbf)
• Text files (.txt, .csv, .tab, and .asc)
• XData labels, names, and URLs cannot be more than 255
characters.
To Import a Database
Use the following steps to import a database into the current map file.
1. Click the XData tab.
Each dataset included in the current map file is listed under Available
Datasets.
Note If the check box is selected, it indicates that the dataset is displayed on
the map. Clear the check box to hide the dataset's symbols on the map.
2. Click Import to open the Import Wizard.
3. On the Select Data Source screen, click Data Source to locate and select the
file from the Open dialog box and then click Next.
Note If your file is not available in the directory as expected, you may need
to change the file type in the Files of Type drop-down list.
4. If your data source is a .csv or .txt file, complete this step. If not, go to step
5.
The Select Schema screen displays. Verify how the data displays in the
columns. If it is not displaying correctly, under Schema Type, select the
option that separates your data into the appropriate columns. If your first row
is not a header row, clear the First Row is Header check box. Click Next.
The Assign Field Types screen displays.
Notes
• Select Other under Schema Type to use a non-standard file schema
definition. You can then select any combination of Tab, Space, Comma,
and Other. If you select Other under Delimiter, type the character(s) that
separate your data in the text entry box.
• The First Row is Header check box is selected by default. The program
attempts to automatically assign field names based on the data in the first
row.
5. Select the column you want to display as a label on the map using the
available radio buttons.
Note You can clear a selection to have no label displayed on the map.
6. Click the Assignment header for each column and select the appropriate
field option from the menu.
The Status text box indicates how your data will be geoplaced on the map.
7. Select how you want to locate your field information (street address or
ZIP/Postal Code).
Note The available Locate By options are based on which fields have been assigned
to the columns.
8. Click
Next.
The Select
Data Symbol screen displays.
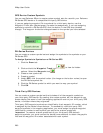
9. Under Match Status, click Exact, Street Name, Area, or ZIP Center and
then select the unique symbol and text properties you want to display for each
match status.
Assigning different symbols/text to your records based on match status shows a