


Chapter 4 Initial Data Collection 93
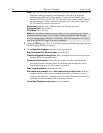
➧ Click on the
RUN
button in the Interactive Camera dialog box. The camera will
begin acquiring pictures at the fastest possible rate will and the image will be
displayed on the video monitor. Note that the image will not be displayed on the
computer monitor while the Interactive Camera dialog box is open.
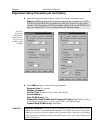
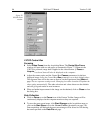
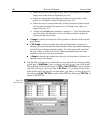
➧ Focus the system optics and set the Interactive Camera dialog box
Exposure Time
,
RS170 Scaling
and
Offset
adjustments for the best viewed image. In addition to
the Exposure Time, Intensity Scaling and Offset parameters, the Pattern parameters
determine which CCD pixels will be displayed on the video monitor. Note that, in
Focus mode, the images will not appear at the computer but only at the video
monitor. If the number of pixels on the CCD is very much larger than the number of
video pixels, you can use the Pan function to select any one of nine different subsets
to display. The Zoom function gives additional control. One-to-one mapping from
the selected region to the screen occurs with 2× selected. You may additionally have
the option of selecting Binning, in which a wider view is achieved by combining
adjacent pixels, or Decimation, in which pixels are discarded according to an
algorithm.
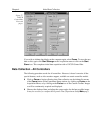
The exposure time will be the same as that set via the Experiment Setup
Main
tab
page. The two exposure settings track. Changing it at either location will update the
other setting automatically. The Intensity Scaling, together with the Offset,
determines how the image data is mapped to the 256 gray-scale levels. Begin with
the Intensity Scaling set to “1 to 4096” (slider all the way to the right). Similarly, the
Offset setting should initially be set to 2 (slider all the way to left).
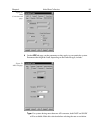
➧ When no further improvement in the observed image can be obtained, click on
Stop
in the Interactive Camera Operation dialog box to halt focus-mode operation.
➧ Click on
Close
to close the Interactive Camera Operation dialog box and return to
the Experiment Setup window.
Data Collection
➧ Click on
Focus
to begin collecting data. A Run can be initiated by means of the
Focus
button in the Experiment Setup window, by clicking on
Focus
on the
Acquisition Menu, or by clicking on the
Focus
icon of the Custom Toolbar. Images
will be continuously acquired and displayed on the computer screen and on the video
monitor.
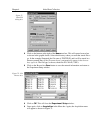
➧ To store the most recent image, click
Start Storage
on the Acquisition menu or
click on the
Start Store
icon on the
Custom Toolbar
(see description on page 239).
Data acquisition will halt and the most recent image will be stored in a file having
the name specified on the
Data File
tab page.
➧ If you wish to initiate another data acquisition, select
Focus
again. To store the new
data to disk, again click
Start Storage
on the Acquisition menu or click on the
Start Store
icon. This completes initial data acquisition with a MicroMAX or an
ST-133 Controller.
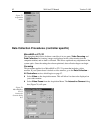
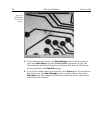
PentaMAX
The procedure that follows for the PentaMAX Controller is in two parts,
Focusing
and
Data Collection
. In focusing, images are displayed on the video monitor and no data is