


Chapter 15 Menus and Dialog Boxes 279
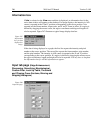
If there are eleven or more strips of data, they will be displayed as a normal
image, such as that shown in Figure 80 (page 101).
If there are at least three data strips but less than eleven, the data will be
plotted as a 3D Graph as shown in Figure 84 (page 107).
If there are only two strips of data, they will be displayed as graphs stacked
in a two-dimensional plot, the same as for a 3D Graph of two strips. See
Figure 100 (page 117).
A single strip
will always
be plotted as a simple X vs. Y plot. Note that from two
to ten strips, the intensity (Y axis) scale shifts position as required to read true
for the selected strip.
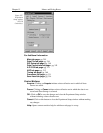
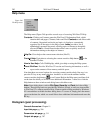
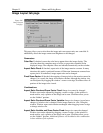
Axes:
There are two check boxes, horizontal and vertical. If a box is checked, the
corresponding axis will be plotted.
Cross Sections:
There are two check boxes, horizontal and vertical, allowing cross-
sectional intensity profiles to be displayed for either or both axes. The vertical
image intensity profile at the cursor position will be displayed to the left and the
horizontal image intensity profile at the bottom. If the cursor position is changed
by clicking the mouse a new location, the cross-sectional graphs will change to
reflect the profiles at the new coordinates. After each change, auto-scale so that
the profile will be properly scaled.
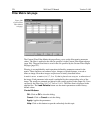
Info Bar:
Causes the information bar, which contains the X, Y, Z coordinates and the
intensity at the cursor position to be displayed beneath the data window.
Tool Bar:
Causes the Data Window Toolbar to be displayed beneath the data window.
See page 249 for detailed information about the Data Window Toolbar buttons.
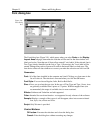
Keep Window Placement:
Fixes the window size and position for graph and 3-D
Graph displays. Does not work with image displays. To use this feature, it is
first necessary to display a data set as a graph. Then size and position the data
box as desired and click on OK. All subsequent data windows will then be sized
and located the same as the first, instead of being cascaded or tiled. Unselect the
box to restore normal display behavior.
When you leave the Display Layout General page with the Keep Window
Placement checked, it will remember the location of the active window at that
time (before you had to close the window to store the location). It will also
update the location when the window is closed. Finally, it will remember the last
location of "live" data (just before "STOP" is clicked).
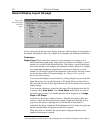
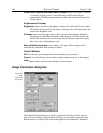
Save as Default check box:
Saves settings on all pages. These settings will be
automatically established when software is started.
Control Buttons:
OK:
Executes the layout settings and closes the Display Layout window.
Cancel:
Closes the Display Layout window without implementing any of the
changes.
Help:
Opens context-sensitive help for Display Layout window.