FUEL SYSTEM (DFI) 3-33
Self-Diagn osis
Self-diagn osis Outline
Self-diagnos is Outline
The self-diagnosis system has three modes and can be
switched to another mode by grounding the self-diagnosis
terminal.
User Mode:
The ECU notifies the rider of troubles in DFI system and
ignition system by lighting the FI indicator when DFI system
and ignition system parts are faulty, and initiates fail-safe
function. In case of serious troubles, the ECU stops the
injection/ignition/starter motor operation.
Dealer Mode 1:
The FI i ndicator LED light emits service code(s) to show
the problem(s) which the DFI system and ignition system
has at the moment of diagnosis.
Dealer Mode 2:
The FI i ndicator light LED emits service c ode(s) to show
the problem(s) which the DFI system and ignition system
had in the past.
Self-diagn osis Procedures
Self-diagnosis Procedures
○
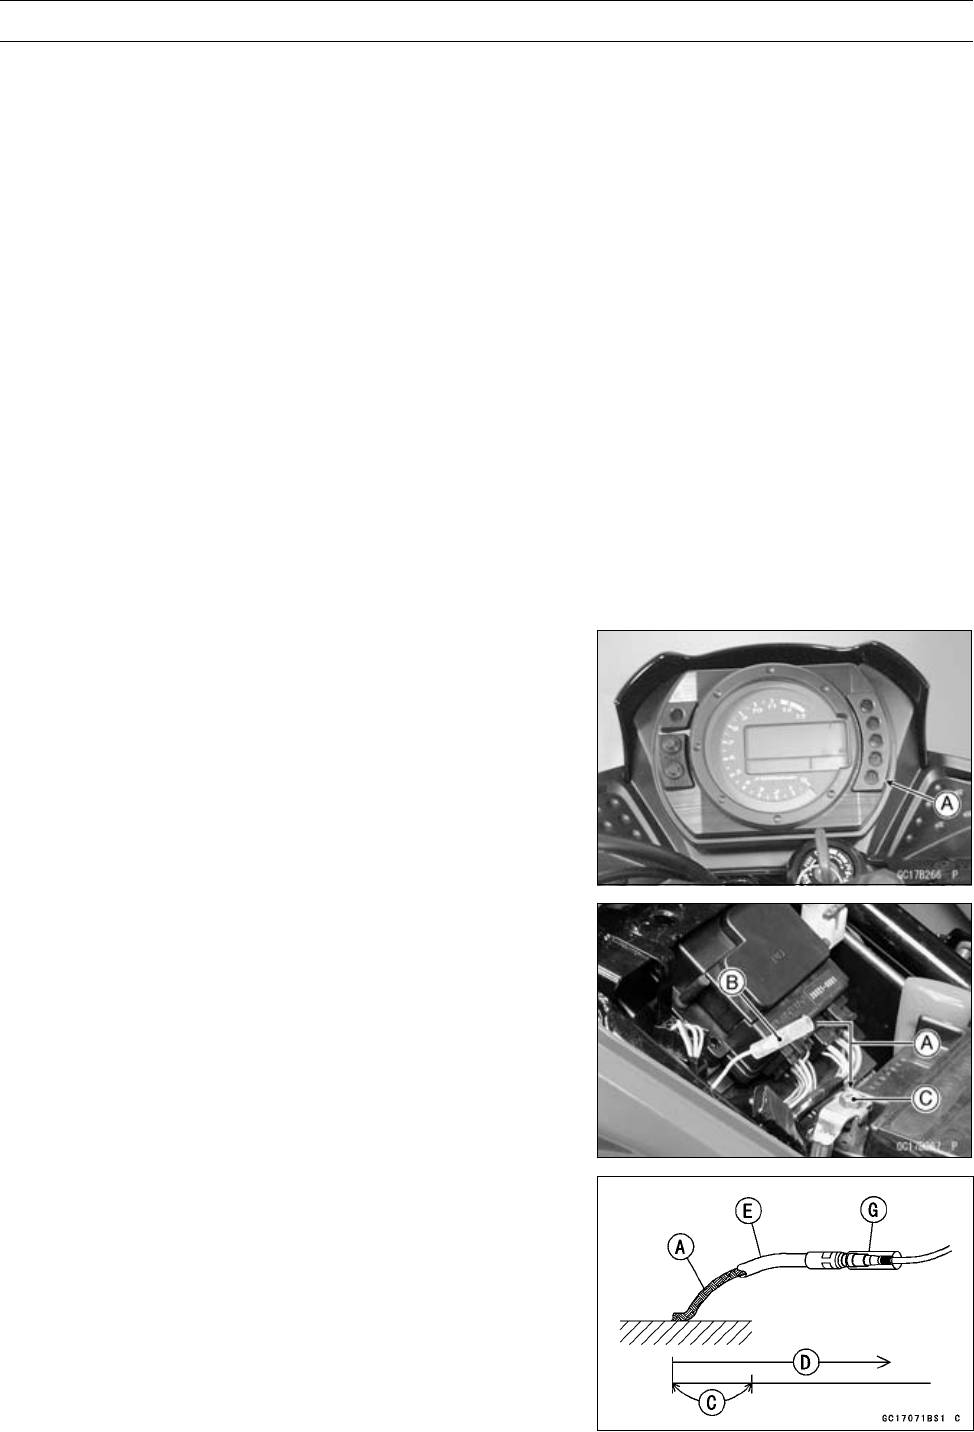
When a problem occurs with the DFI system and ignition
system, the DFI indicator LED light [A] goes on.
NOTE
○
Use a fully charged battery when conducting
self-diagnosis. Otherwise, the LED light blinks very
slowly or doesn’t blink.
○
Keep the self-diagnosis terminal grounded during self
-diagnosis, with an auxiliary lead.
•
Remove the seats (see Frame chapter).
•
Ground [A] the self-diagnosis terminal [B] (yellow lead) to
the battery (–) t erminal [C] or battery (–) lead connector,
using a wire.
•
Turn on the ignition switch.
•
Connect an auxiliary lead [E] to the self-diagnosis terminal
[G] for grounding.
•
To enter the s elf-diagnosis dealer mode 1, ground [A] the
self-diagnosis indicator terminal to the battery (–) terminal
for more than 2 seconds [C], and then keep it grounded
continuously [D].
○
Count the blinks of the LED light to read the service code.
Keep the auxiliary lead ground until you finish r eading the
service code.


