CLUTCH 6-13
Clutch
Clutch Plate, Wear, Damage Inspection
•
Visually inspect the friction and steel plates for signs of
seizure, overheating (discoloration), or uneven wear.
•
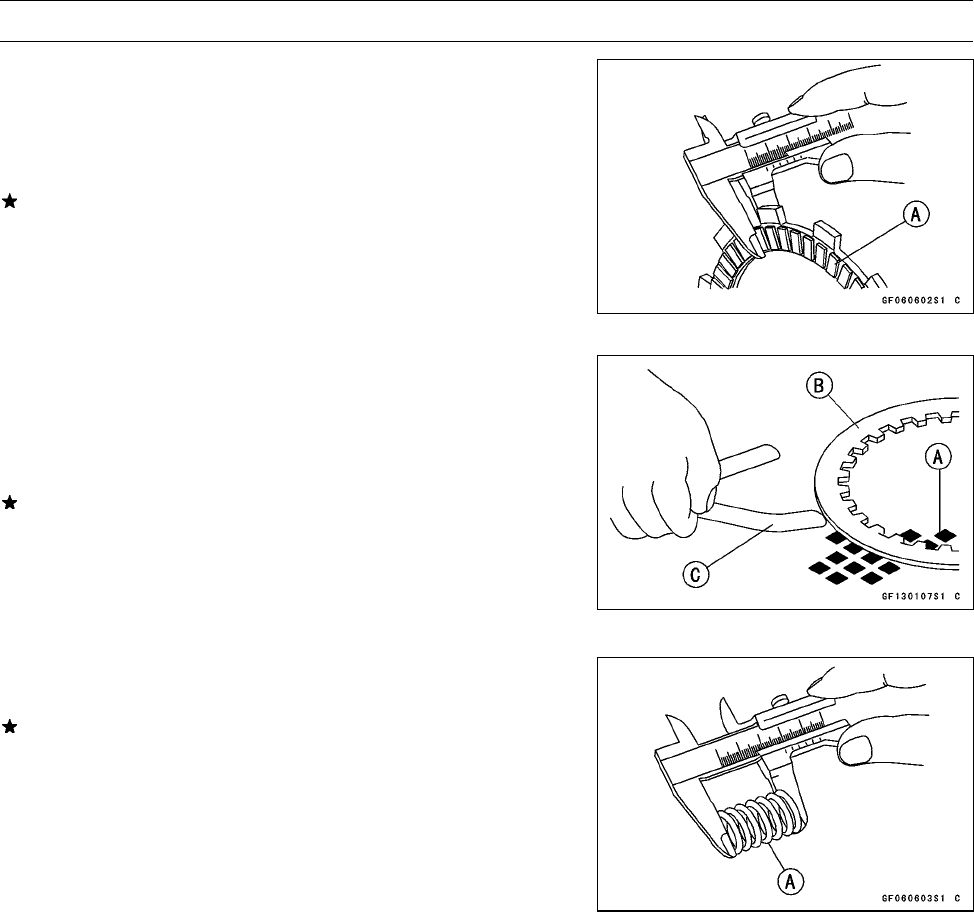
Measure the thickness of each friction plate [A] at several
points.
If any plates show signs of damage, or if they have worn
past the service limit, replace them with new ones.
Friction Plate Thickness
Standard: 2.72 ∼ 2.88 mm (0.107 ∼ 0.113 in.)
Service Limit: 2.4 mm (0.094 in.)
Clutch Plate Warp Inspection
•
Place each friction plate or steel plate on a surface plate
and m easure the gap between the surface plate [A] and
each friction plate or steel plate [B] with a thickness gauge
[C]. The gap is the amount of friction or steel plate warp.
If any plate is warped over the service limit, replace it with
a new one.
Friction and Steel Plate Warp
Standard: 0.2 mm (0.008 in.) or less
Service Limit: 0.3 mm (0.012 in.)
Clutch Spring Free Length M easurement
•
Measure the free length of the clutch springs [A].
If any spring is shorter than the service limit, it must be
replaced.
Clutch Spring Free Length
Standard: 80.6 mm (3.17 in.)
Service Limit: 76.6 mm (3.02 in.)


