


8-8 ENGINE REMOVAL/INSTALLATION
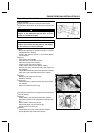
Engine Removal/Installation
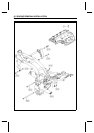
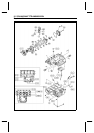
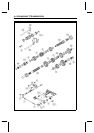
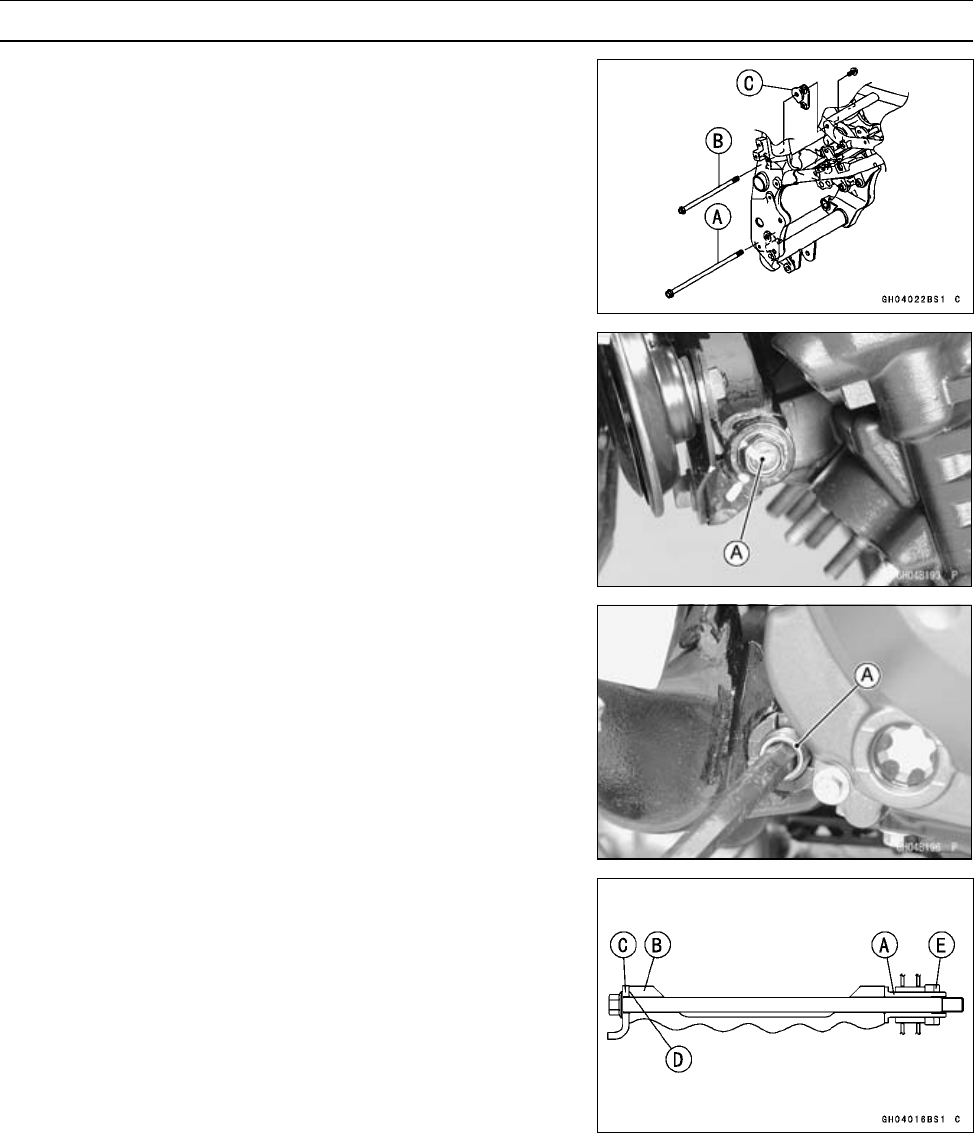
•
Install the engine mounting bolts and nuts, following the
specified installing sequence.
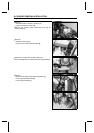
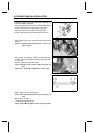
○
First, hang the drive chain over the output shaft just before
moving the engine into its final position in the frame.
○
Second, insert the lower engine mounting bolt [ A].
○
Third, insert the middle engine mounting bolt [B].
○
Fourth, install the rear engine bracket [C] temporarily.
○
Fifth, install the left upper engine m ounting bolt [A] and
tighten it.
Torque - Left Upper Engine M ounting Bolt : 4 4 N·m (4.5
kgf·m, 33 ft·lb)
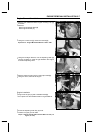
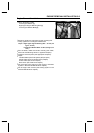
○
Sixth, tighten the adjusting collar [A] until the clearance
between the crankcase [B] and frame bracket [C] come
to 0 mm [D].
○
Seventh, tighten the collar locknut [E].
Torque - Adjusting Collar Locknut: 49 N·m (5.0 kgf·m, 36
ft·lb)
Special Tool - Engine Mount Nut Wrench : 57001–1450
○
Eighth, tighten the rear bracket bolts.
Torque - Rear Engine Bracket Bolts: 25 N·m (2.5 kgf·m, 18
ft·lb)
○
Ninth, tighten securely:
Middle Engine Mounting Nut
Lower Engine Mounting Nut
Torque - Engine Mounting Nuts: 44 N·m (4.5 kgf·m, 33 ft·lb)