CRANKSHAFT/TR ANSMISSION 9-21
Starter Motor Clutch
Starter Motor Clutch Removal/Installation
•
Refer to the Alternator Rotor Removal and Installation in
the Electrical S ystem chapter.
Starter Motor Clutch Assembly
•
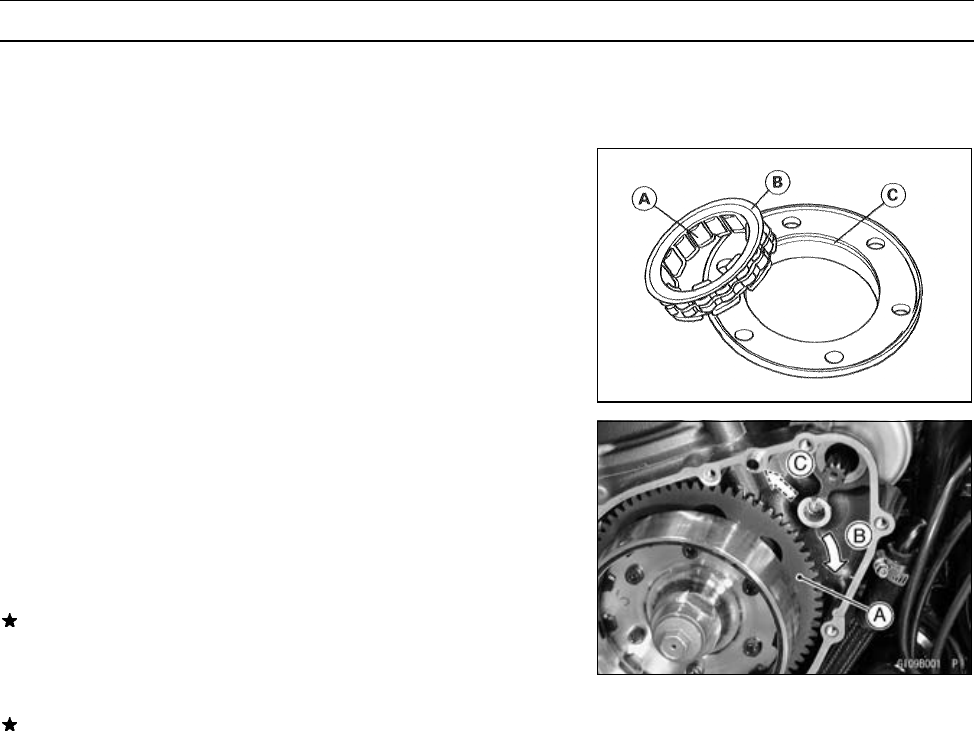
Be sure to install the one-way clutch [A] so that its flange
[B] fits in the holder recess [C].
•
Apply a non-permanent locking agent to the threads of
the starter motor clutch bolts, and tighten them.
Torque - Starter Motor Clutch Bolts: 12 N·m (1.2 kgf·m, 104
in·lb)
Starter Motor Clutch Inspection
•
Remove:
Alternator Cover ( see Electrical System chapter)
Starter Idle G ear
•
Turn the starter motor clutch gear [A] by hand. The starter
motor clutch gear should turn clockwise [B] freely, but
should not turn counterclockwise [C].
If the clutch does not operate as it should or if it makes
noise, go to the next step.
•
Remove and disassemble the starter motor clutch, and
visually inspect the clutch parts.
If there is any worn or damaged part, replace it.
NOTE
○
Examine the starter motor clutch gear as well. Replace
it if it is worn or damaged.


