


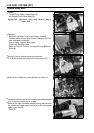


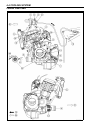

FUEL SYSTEM (DFI) 3-97
Fuel Tank
Fuel Tank Installation
•
Note the above WARNING (see Fuel Tank Removal).
•
Route the hoses correctly (see Appendix chapter).
•
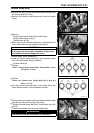
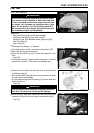
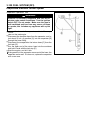
Check that the rubber dampers [A] are on the frame and
the f uel tank.
Front [B]
•
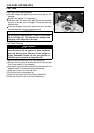
Check that the dampers [A] are in place on the fuel tank
as well.
Front [B]
If the dampers are damaged or deteriorated, replace
them.
If the dampers are damaged or deteriorated, replace
them.
•
For California Model, note the following:
○
To prevent the gasoline from flowing into or out of the
canister, hold the separator perpendicular to the ground.
○
Connect the hoses according to the diagram of the sys-
tem (see Cable, Wire, and Hose Routing section in the
Appendix chapter). Make sure they do not get pinched or
kinked.
○
Route hoses with a minimum of bending so that the air or
vapor will not be obstructed.
•
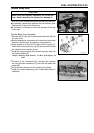
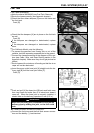
Insert the pump outlet hose joint [A] straight onto the de-
livery pipe [B] until the hose joint clicks [C].
Front [D]
•
Push and pull [A] the hose joint [B] back and forth m ore
than two times and make sure it is locked and doesn’t
come off. When the hose joint is correctly i nstalled, it
should slide on the delivery pipe about 5 mm (0.2 in.).
WARNING
Make sure the hose joint is installed correctly on the
delivery pipe by sliding the joint, or the fuel could
leak.
If it does not slide, reinstall the hose joint.
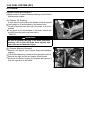
•
Connect the fuel pum p and the fuel level sensor connec-
tors and the battery (–) lead terminal.