


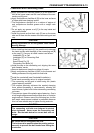
CRANKSHAFT/TRANSMISSION 9-9
Crankcase Splitting
Crankcase Splitting
•
Remove the engine (see Engine Removal/Installation
chapter).
•
Set the engine on a clean surface and hold the engine
steady while parts are being removed.
•
Remove:
Crankshaft Sensor (see Electrical System chapter)
Clutch (see Clutch chapter)
External Shift Mechanism (see External Shift Mecha-
nism Removal)
Starter Motor (see Electrical System chapter)
Oil Pump (see Engine Lubrication System chapter)
Alternator Rotor (see Electrical System chapter)
Oil Filter (see Periodic Maintenance chapter)
Oil Cooler (see Engine Lubrication System chapter)
If the crankshaft is to be removed, remove the pistons
(see Engine Top End chapter).
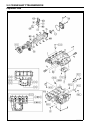
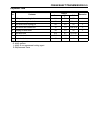
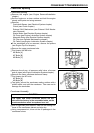
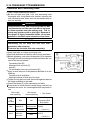
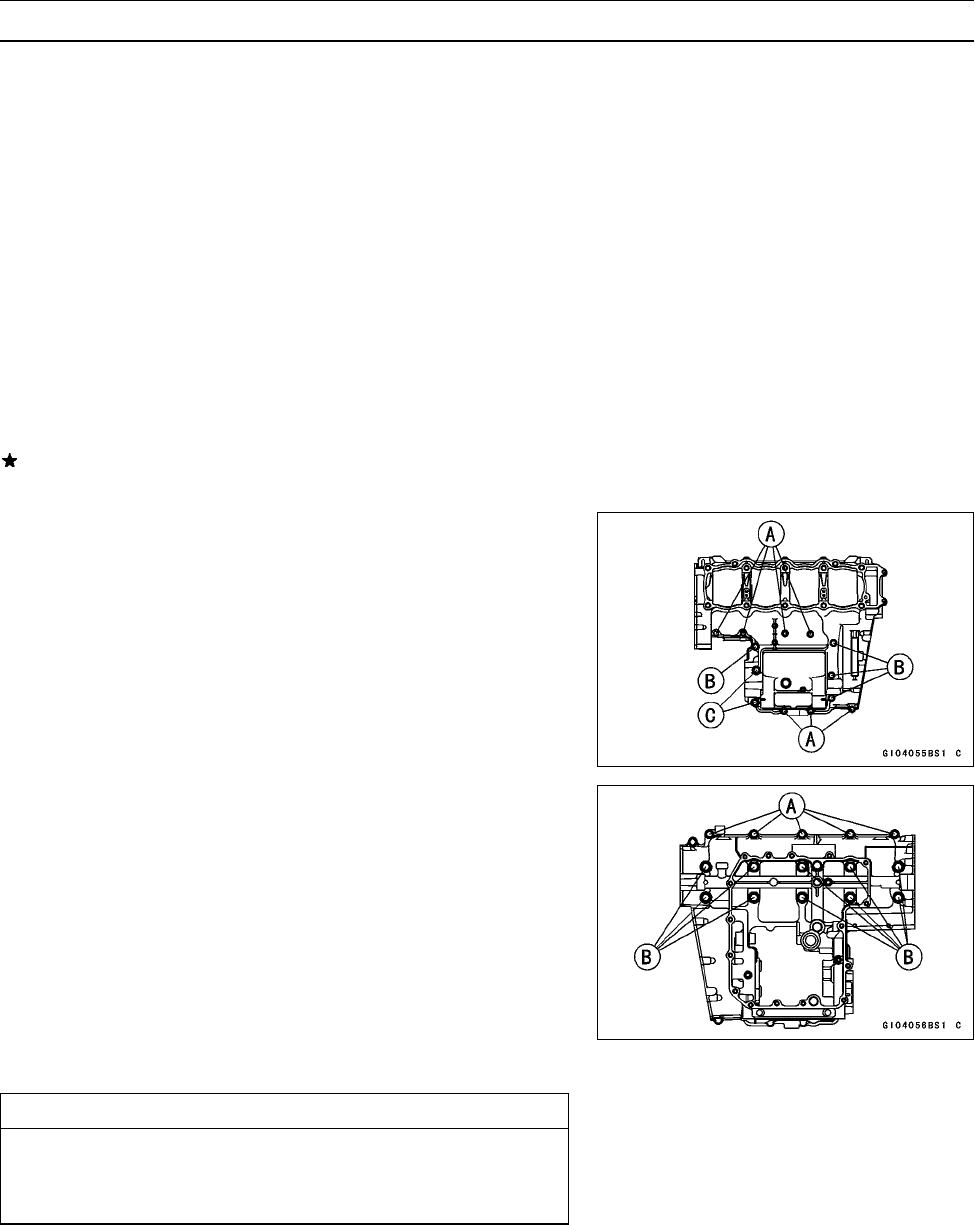
•
Remove the upper crankcase bolts.
○
First loosen the M6 bolts.
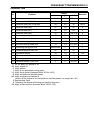
M6 Bolts [A]
M7 Bolts [B]
M8 Bolts [C]
•
Remove the oil pan, oil pressure relief valve, oil screen
and oil pipes (see Engine Lubrication System chapter).
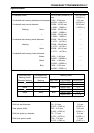
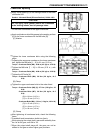
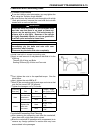
•
Remove the lower crankcase bolts and clamp.
○
First loosen the M7 bolts.
M7 Bolts [A]
M9 Bolts [B]
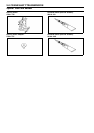
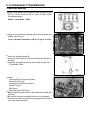
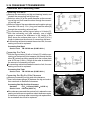
•
Tap l ightly around the crankcase mating surface with a
plastic mallet, and split the crankcase. Take care not to
damage the crankcase.
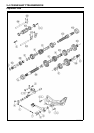
Crankcase Assembly
CAUTION
The upper and lower crankcase halves are ma-
chined at the f actory in the assembled state, so the
crankcase halves must be replaced as a set.
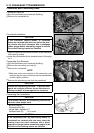
•
With a high-flash point solvent, clean off the mating sur-
faces of the crankcases halves and wipe dry.
•
Using compressed air, blow out the oil passages in the
crankcase halves.