towards the engine. Slip the belt off the
pulleys. If this is difficult, turn the crankshaft
pulley using a spanner on its retaining nut
while pressing the belt over the edge of the
pulley rim. Use this method to fit the new belt
after first having engaged it with the coolant
pump and alternator pulley grooves.
5 Tension the belt as previously described.
6 The tension of a new belt should be
checked and adjusted after the first few
hundred miles of running.
9 Coolant pump - removal,
overhaul and refitting
4
Note: The design of the pump differs between
the 903 cc and the other two engines, but the
removal, overhaul and refitting operations are
essentially similar.
1 To gain access to the coolant pump, open
the bonnet and remove the air cleaner.
2 Slacken the alternator pivot and adjustment
nuts, push the alternator in towards the
engine and slip the drivebelt from the coolant
pump pulley. Unplug and remove the
alternator.
3 Drain the cooling system as previously
described.
4 Disconnect the hoses from the coolant
pump, also the metal coolant transfer pipe
(photo).
5 Unscrew and remove the coolant pump
securing bolts, and lift the pump from the
engine. Peel away and discard the old gasket.
6 Clean away external dirt.
7 The pump is likely to need overhaul for
worn or noisy bearings, or if the gland is
leaking. There is a drain hole between the
gland and the bearings to prevent
contamination of the bearing grease by leaks,
and possible damage to the bearings. Gland
leaks are usually worse when the engine is not
running. Once started, a leak is likely to get
worse quickly, so should be dealt with soon.
Worn bearings are likely to be noted first due
to noise. To check them, the pulley should be
rocked firmly, when any free movement can
be felt despite the belt. But if the bearings are
noisy, yet there is not apparently any free
play, then the belt should be removed so the
pump can be rotated by hand to check the
smoothness of the bearings.
8 Dismantling and assembly of the pump
requires the use of a press, and it is preferable
to fit a new pump.
9 For those having the necessary facilities,
overhaul can be carried out as follows.
10 Remove the retaining nuts and separate
the two halves of the pump.
11 The pump shaft is an interference fit in the
impeller, bearings, and pulley boss. How the
pump is dismantled depends on whether only
the gland needs renewing or the bearings as
well, and what puller or press is available to
get everything apart.
12 Assuming complete dismantling is
required, proceed as follows. Supporting it
close in at the boss, press the shaft out of the
pulley. Pull the impeller off the other end of
the shaft.
13 Take out the bearing stop screw.
14 From the impeller end, press the shaft
with the bearings out of the cover half of the
housing.
15 Press the shaft out of the bearings, take
off the spacer, the circlip, and the shouldered
ring.
16 Do not immerse the bearings in cleaning
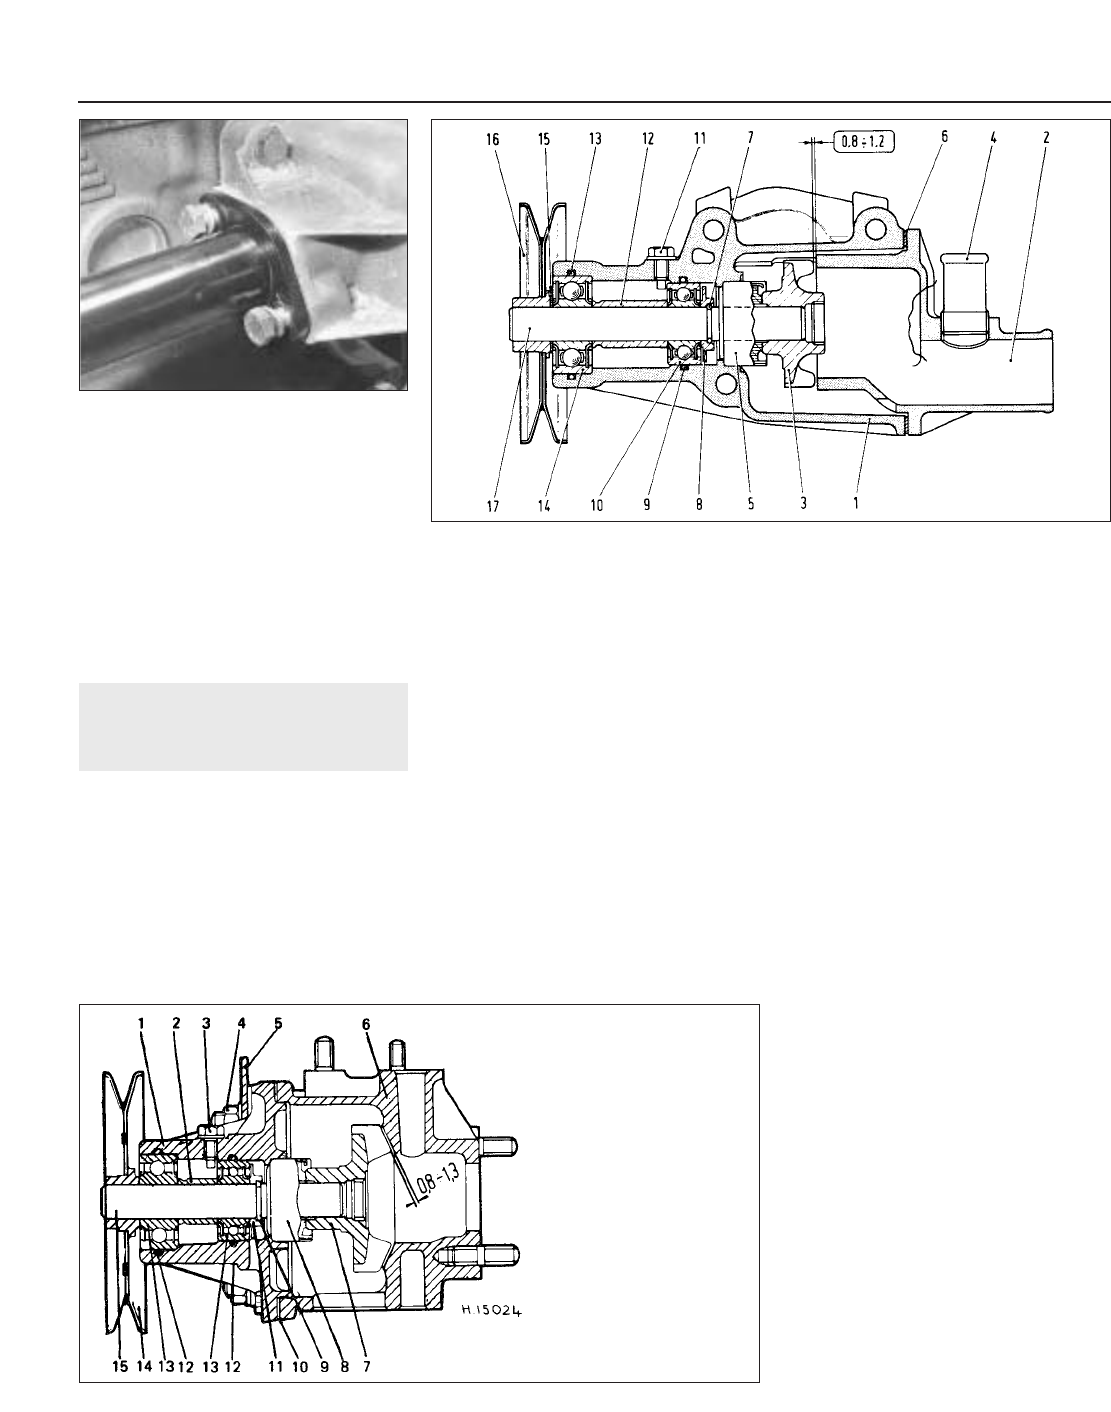
2•4 Cooling and heating systems
1 Pump body
2 Pump cover
3 Impeller
4 Connector for hose from
outlet to pump
5 Seal
6 Gasket
7 Circlip
8 Bearing shoulder washer
9 Inner seal
10 Inner bearing
11 Bearing retainment screw
and lock washer
12 Spacer
13 Outer seal
14 Outer bearing
15 Lock washer
16 Pulley
17 Pump shaft
Fig. 2.5 Sectional views of 1116 cc and 1301 cc engine coolant pump (Sec 9)
Fig. 2.4 Sectional view of 903 cc engine coolant pump (Sec 9)
9.4 Coolant distribution tube at rear of
pump
1 Pump cover
2 Bearing spacer
3 Bearing stop screw
4 Cover nuts
5 Lifting bracket
6 Housing
7 Impeller
8 Gland (seal)
9 Circlip
10 Gasket
11 Shouldered ring
12 Grommets
13 Bearing
14 Pulley
15 Shaft