


require maintenance other than general
inspection for wear in the linkage joints. If
excessive wear is found in any of the joints, they
can be individually detached and renewed.
13 Access to the control rods is eased by
detaching and lowering the exhaust system
from the exhaust manifold.
14 If a new adjustable control rod is to be
fitted, remove the original rod as a unit, but do
not alter its adjustment for length. The new
rod can then (if required) be set to the same
length as the original in order to maintain the
original setting. Do so by loosening off the
locknut and turning the balljoint as required;
ensure that the angle of the joint is correct
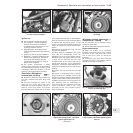
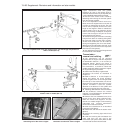
before tightening the locknut.
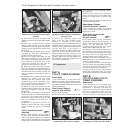
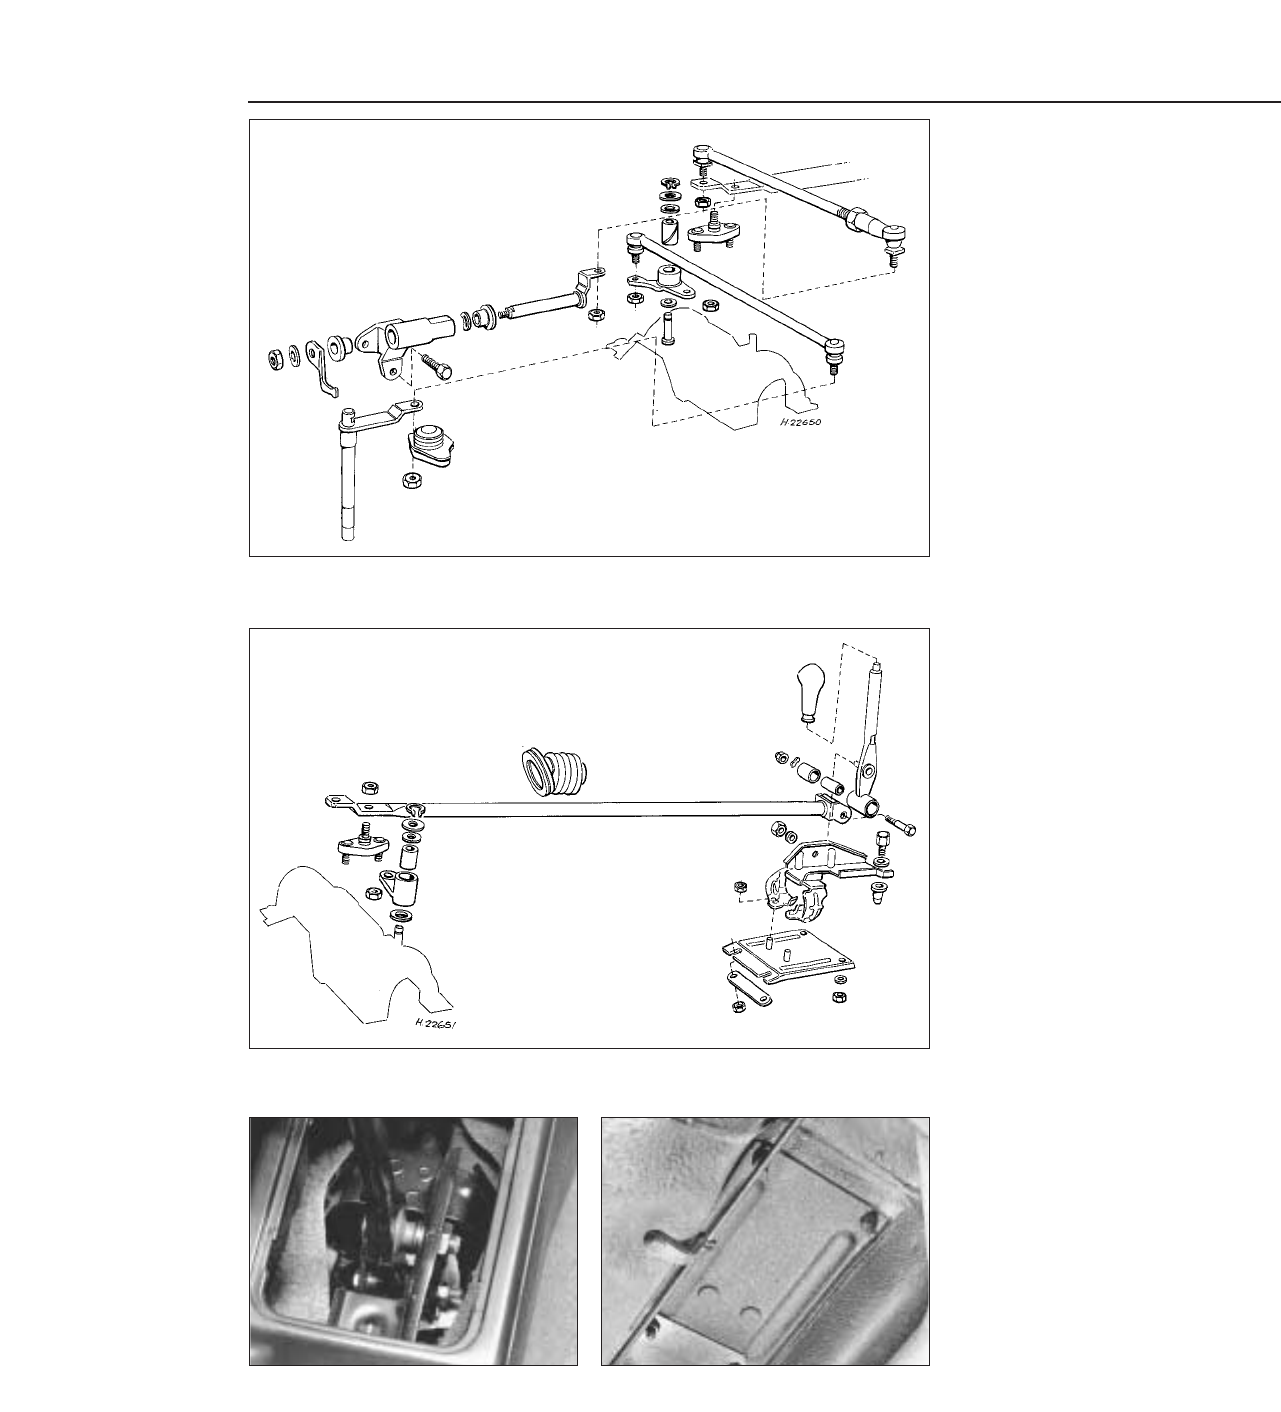
15 Access to the gear lever/main connecting
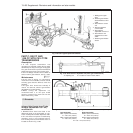
rod joint from above is made by prising back
the gear lever gaiter from the centre console.
Access from underneath can be made by
raising and supporting the car on axle stands.
Working from the underside of the lever, undo
the retaining nuts and remove the inspection
plate from the floor (photos).
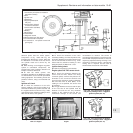
16 Any adjustment to the gear linkage should
be entrusted to a FIAT dealer.
Transmission -
removal and refitting #
17 The transmission can be removed
together with the engine and then separated
as described in Section 7, or on its own (as
described below), leaving the engine in
position in the car. Before starting to remove
the transmission, it should be noted that
suitable equipment will be required to support
the engine during this procedure.
18 Disconnect the battery negative lead.
19 Remove the bonnet as described in
Chapter 12.
20 Refer to Section 11 in this Chapter for
details and detach the clutch operating
cylinder together with its mounting bracket
from the top of the transmission, but do not
disconnect the hydraulic fluid hose from the
cylinder connection. Leave the cylinder
attached to the bracket. Tie the cylinder and
bracket up to support them out of the way.
21 Reaching down between the transmission
and the bulkhead, unscrew the knurled
retaining nut and withdraw the speedometer
cable from the transmission.
22 Remove the front roadwheel trims, then
loosen off the front wheel retaining bolts.
Raise the vehicle and support it on axle
stands at a suitable height to allow working
underneath and eventual transmission
removal from under the front end.
23 Drain the transmission oil as described
previously in this Section.
24 Disconnect and remove the starter motor
(photos).
25 Detach the reversing light switch lead
connector.
26 Undo the retaining bolt and detach the
earth lead from the rear end of the
transmission (see photo 7C.33). Refit the bolt
once the lead has been disconnected.
13•96 Supplement: Revisions and information on later models
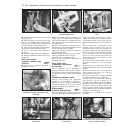
12B.15B Access cover to gear lever lower
connection to rod on the 1372 cc engine
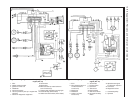
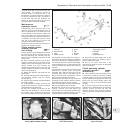
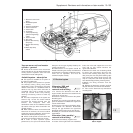
Fig. 13.92 Exploded view of the gear selector and control road assembly components
fitted to 1372 cc models (Sec 12)
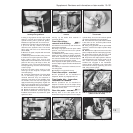
12B.15A Gear lever connection to the main
connecting rod on the 1372 cc engine
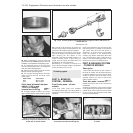
Fig. 13.91 Exploded view of the gear selector lever, rod and linkage components on
1372 cc models (Sec 12)