


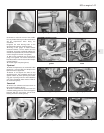
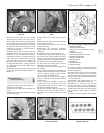

8 Fit the new belt. Start at the crankshaft
drive pulley and, taking care not to kink or
strain the belt, slip it over the camshaft pulley.
The camshaft may have to be turned slightly
to mesh the pulley with the teeth on the belt.
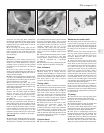
Fit the belt on the tensioner pulley last; if this
is difficult, do not lever or force the belt on,
recheck the belt (photo).
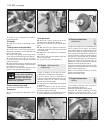
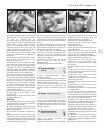
9 Release the tensioner nut and rotate the
crankshaft through two complete revolutions.
Retighten the nut. The belt tension may be
checked by twisting it through 90º with the
finger and thumb. It should just turn through
this angle without undue force. Note: The
above procedure serves only as a rough guide
to setting the belt tension - having it checked
by a FIAT dealer at the earliest opportunity is
recommended.
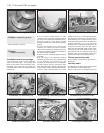
10 Refit the timing belt cover (photo). Fit and
tension the alternator drivebelt (Chapter 2,
Section 8).
29 Cylinder head -
removal and refitting
3
1 Drain the cooling system (see Chapter 2).
2 Disconnect the battery.
3 Disconnect and plug the carburettor fuel
hoses.
4 Disconnect the throttle and choke linkage
from the carburettor.
5 Disconnect the HT leads from the spark
plugs.
6 Disconnect the brake servo vacuum hose
from the intake manifold.
7 Disconnect the coolant hoses from the
thermostat housing.
8 Disconnect the crankcase ventilation
system hoses from the rocker cover and
carburettor.
9 Unbolt and remove the timing belt cover.
10 Release the timing belt tensioner pulley
bolt, then lever the pulley against the spring
plunger and retighten the bolt to retain the
tensioner pulley in the non-tensioned position.
Slip the belt from the camshaft sprocket.
11 Disconnect the coolant hoses from the
carburettor and intake manifold.
12 Disconnect the exhaust downpipes from
the manifold.
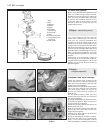
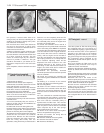
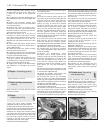
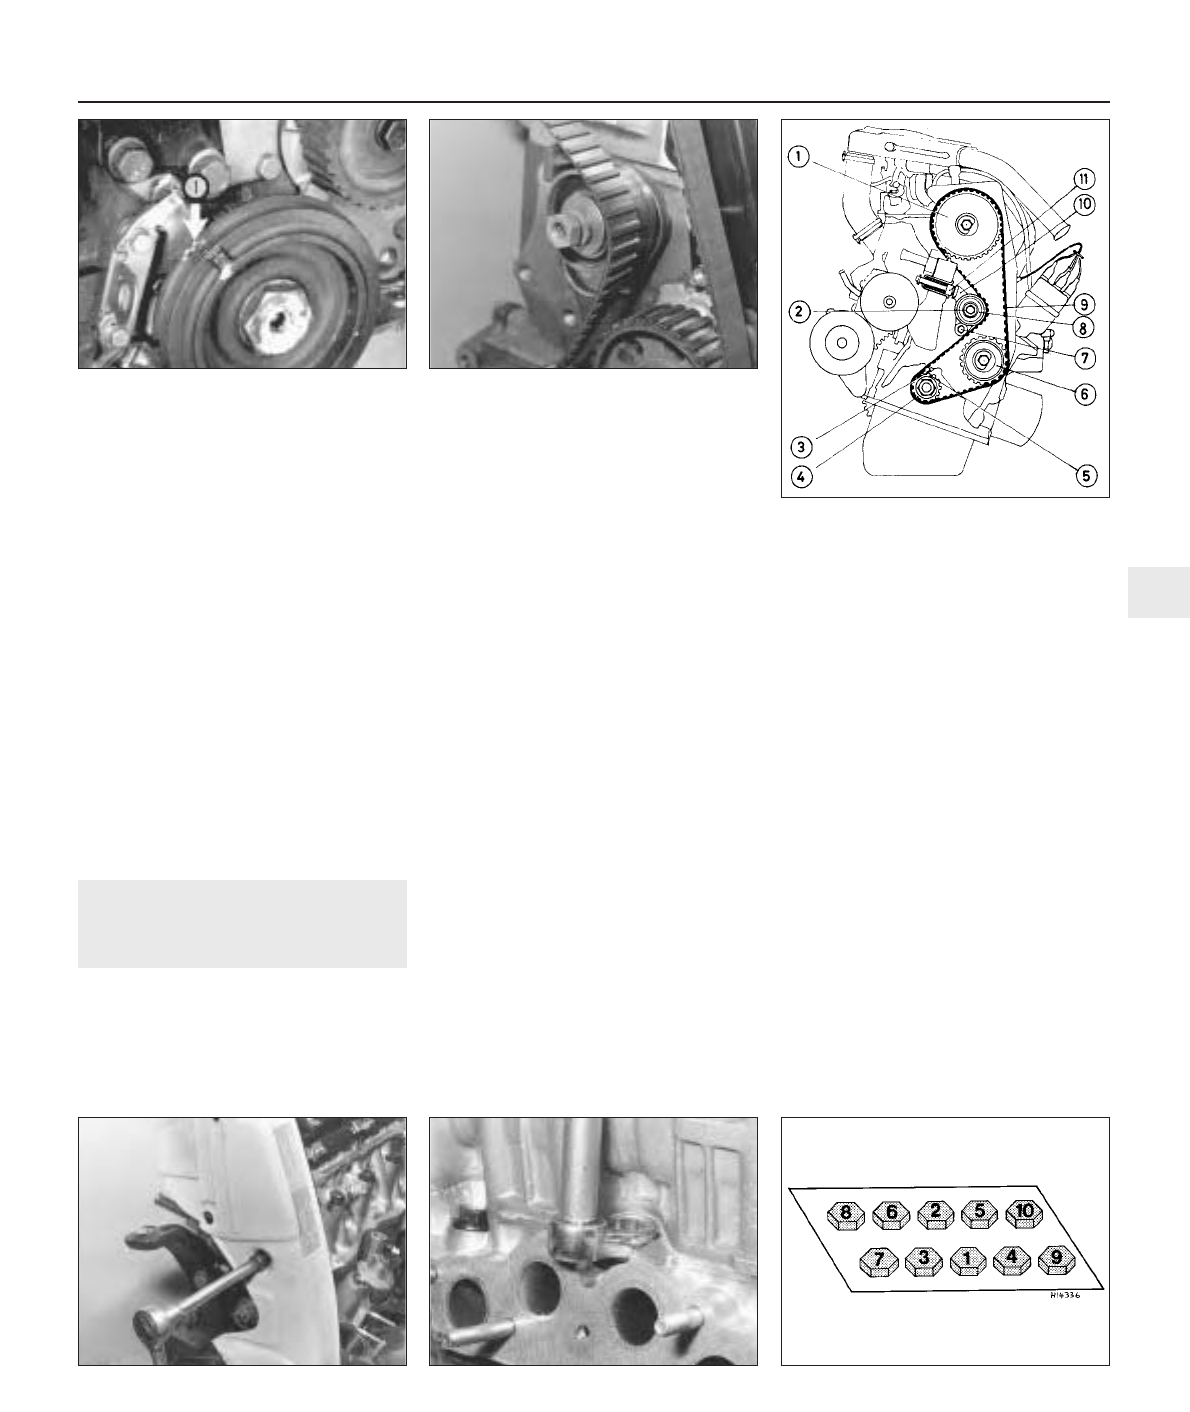
13 If a crowfoot type wrench is available, the
cylinder head nuts and bolts can be removed
and the complete cylinder head camshaft
carrier assembly withdrawn (photo).
14 If this type of wrench is not available
however, remove the carrier first as described
in Section 27.
15 If a crowfoot is available, unscrew the
cylinder head nuts and bolts evenly and
progressively starting with the centre ones
and working towards both ends.
16 Rock the cylinder head by gripping the
manifolds. Note: Do not insert a lever in
the gasket joint to prise the head from the
block.
17 Pull the head off the studs and remove it
to the bench. Remove and discard the old
cylinder head gasket.
18 Unbolt and remove the hot air collecting
shield for the air cleaner from the exhaust
manifold. The exhaust and inlet manifolds can
now be unbolted. The carburettor may remain
on the inlet manifold.
19 Overhaul and decarbonising of the
cylinder head is described in Section 39.
20 Refitting is a reversal of the removal
process, but make sure the crankshaft and
camshaft timing marks are set as described in
Section 28 to avoid the valve heads digging
into the piston crowns when the head is
refitted.
21 Always use new gaskets. The cylinder
1116 cc and 1301 cc engine 1•25
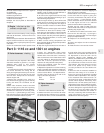
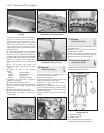
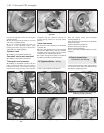
Fig. 1.29 Timing belt arrangement (Sec 28)
1 Camshaft sprocket
2 Tensioner pulley locknut
3 Timing mark on crankshaft front oil seal
retainer
4 Crankshaft sprocket
5 Crankshaft sprocket timing mark
6 Auxiliary shaft sprocket
7 Tensioner bracket bolt
8 Tensioner pulley
9 Timing belt
10 Tensioner bracket
11 Tensioner spring
28.8 Slipping timing belt onto tensioner
pulley
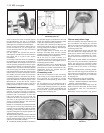
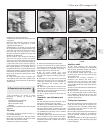
Fig. 1.28 TDC marks (1) at front of engine
(Sec 28)
Fig. 1.30 Cylinder head bolt tightening
sequence (Sec 29)
28.10 Tightening timing belt cover nut 29.13 Using a crowfoot type wrench on a
cylinder head bolt
1