


new oil seal, ensuring that it is correctly
orientated, and drive it squarely into position.
149 Refit all disturbed components.
Flywheel - removal,
inspection and refitting #
150 If not already done, remove the clutch as
described in Chapter 5.
151 Prevent the flywheel from turning by
jamming the ring gear teeth, or by bolting a
strap between the flywheel and the cylinder
block.
152 Make alignment marks on the flywheel
and the end of the crankshaft, so that the
flywheel can be refitted in its original position.
153 Unscrew the securing bolts and remove
the washer plate, then withdraw the flywheel.
Do not drop it, it is very heavy.
154 With the flywheel removed, the ring gear
can be examined for wear and damage.
155 If the ring gear is badly worn or has
missing teeth it should be renewed. The old
ring gear can be removed from the flywheel by
cutting a notch between two teeth with a
hacksaw and then splitting it with a cold
chisel. Wear eye protection when doing this.
156 Fitting of a new ring gear requires heating
the ring to a temperature of 80ºC (176ºF). Do
not overheat, or the hard-wearing properties
will be lost. The gear has a chamfered inner
edge which should fit against the shoulder on
the flywheel. When hot enough, place the gear
in position quickly, tapping it home if
necessary, and let it cool naturally without
quenching in any way.
157 Ensure that the mating faces are clean,
then locate the flywheel on the rear of the
crankshaft, aligning the previously made
marks on the flywheel and crankshaft.
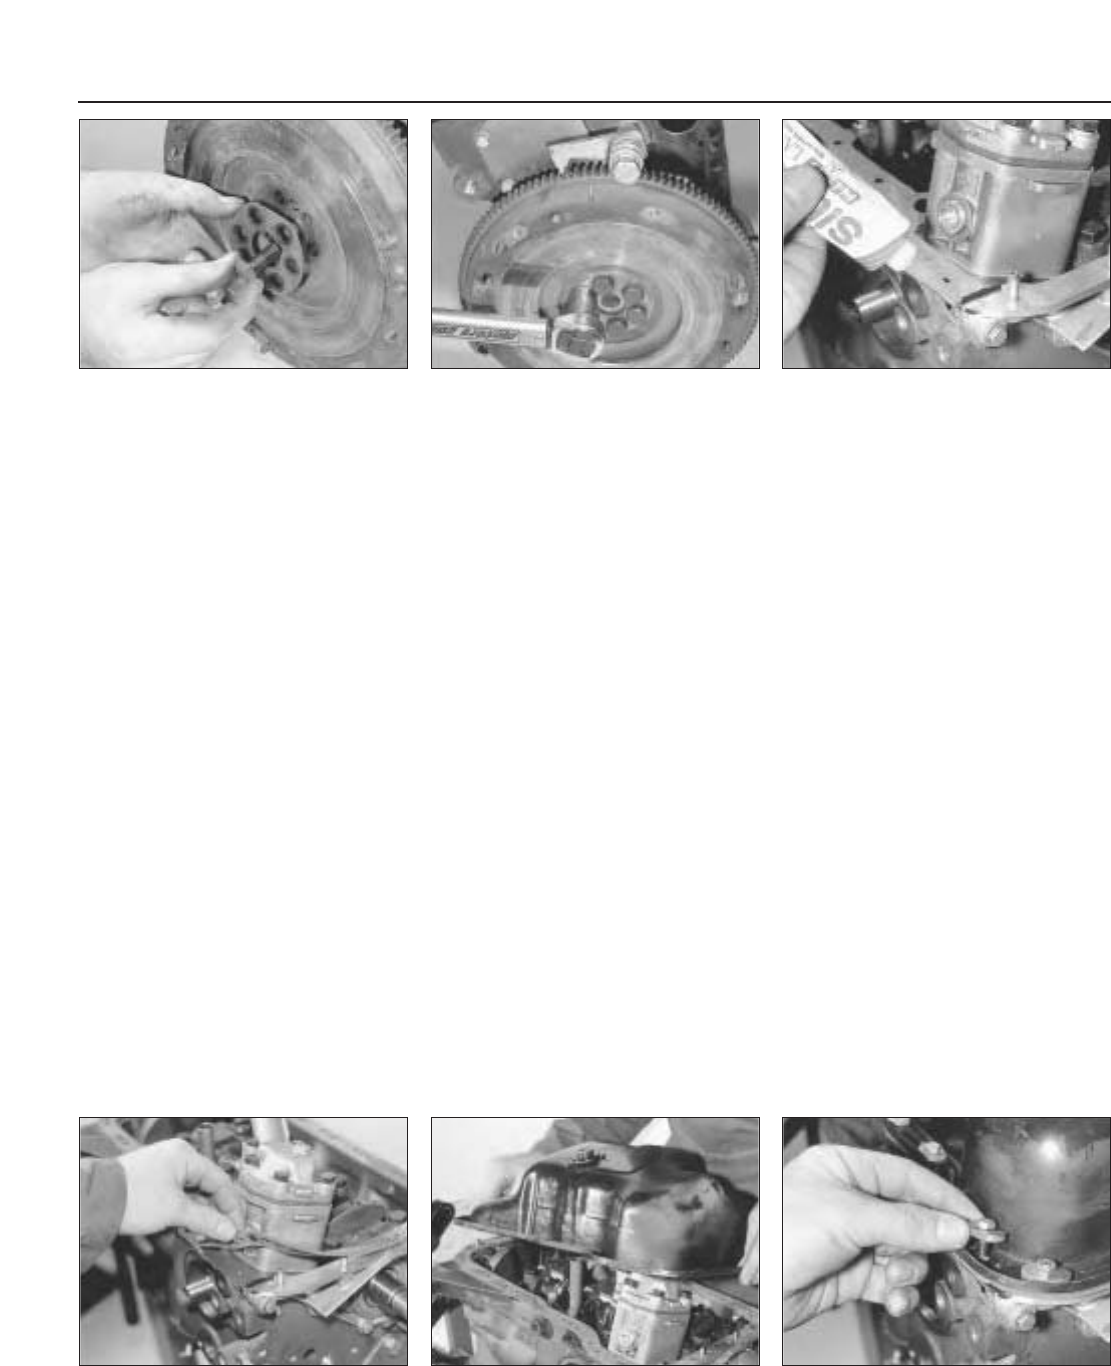
158 Fit the washer plate, and insert the
securing bolts, then prevent the flywheel from
turning as described in paragraph 151 whilst
the bolts are tightened progressively to the
specified torque setting in a diagonal
sequence (photos).
159 If applicable, refit the clutch as described
in Chapter 5.
Sump -
removal and refitting ¡
160 Drain the engine oil from the sump as
described in Chapter 1.
161 Disconnect the lead from the engine oil
level sensor in the sump.
162 Unscrew and remove the bolts retaining the
gear linkage mounting bracket (where applicable)
and the clutch housing lower cover bolts.
Remove the cover from the clutch housing.
163 Unscrew and remove the sump retaining
bolts and nuts and lower the sump from the
crankcase. Recover the gasket.
164 Clean all traces of old gasket from the
sump, crankcase and both oil seal housing
mating surfaces.
165 Commence reassembly by applying
sealing compound (FIAT No. 5882442 or
equivalent) to the joints between the
crankshaft front and rear oil seal housings and
the mating face of the crankcase (photo).
166 Locate the new gasket in position on the
crankcase then fit the sump. As it is fitted it
will need to be twisted to avoid fouling the oil
pump unit. Refit the retaining bolts and nuts
and tighten them to the specified torque
(photos).
167 Check that the sump drain plug is refitted
and fully tightened. If the engine is in the car,
top up the engine oil level.
Oil pump - removal,
checking and refitting ™
168 Drain the engine oil and remove the
sump as described in the previous
sub-Section.
169 Unscrew the retaining bolts then
withdraw the oil pump and intake pipe/filter
from its location within the crankcase.
Remove the gasket.
170 If oil pump wear is suspected, first check
the cost and availability of new parts and the
cost of a new pump. Then examine the pump
as described below and decide whether
renewal or repair is the best course of action.
171 Unscrew the three securing bolts and
remove the oil pump cover (photo). Note that
as the cover is removed, the oil pressure relief
valve components will be released.
172 Recover the oil pressure relief valve,
spring and spring seat.
13•46 Supplement: Revisions and information on later models
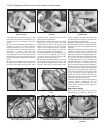
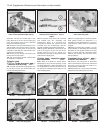
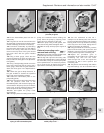
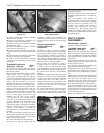
7B.166C . . . and insert the retaining bolts7B.166B . . . refit the sump . . .7B.166A Locate the new gasket . . .
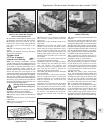
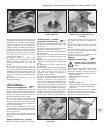
7B.165 Apply sealant to the front oil seal
housing/cylinder block joint
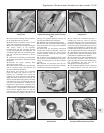
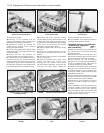
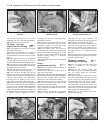
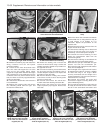
7B.158B . . . tighten the bolts to the
specified torque
7B.158A Locate the flywheel, washer plate
and bolts . . .