


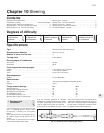
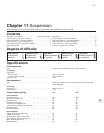
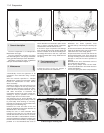

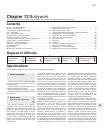
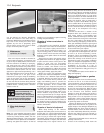
1 General description
The front suspension is of independent
MacPherson strut type.
The rear suspension consists of a beam
axle with trailing arms, coil springs and double
acting gas-filled telescopic shock absorbers.
Operations covering the hubs, roadwheels
and tyres are described in Chapter 7.
2 Maintenance
4
1 Periodically check the tightness of all
suspension nuts and bolts using a torque
wrench.
2 At the intervals specified in “Routine
Maintenance” inspect all suspension rubber
bushes for deterioration or wear. Renew
where necessary.
3 Check for wear in the track control arm to
hub carrier balljoint. Do this by raising the
roadwheel and prising the control arm down.
If the hub carrier is pulled outwards, any up
and down movement or slackness will
necessitate renewal of the track control arm,
although it may be possible to obtain a
balljoint repair kit from a motor factor.
4 A defective strut or shock absorber can
usually be detected by the tendency of the car
to pitch badly when braking or cornering.
However the component can be tested more
thoroughly in the following way.
5 Remove the strut and take off the coil
spring or withdraw the rear shock absorber as
described later in this Chapter.
6 Grip the strut or shock absorber lower
mounting in the jaws of a vice and then fully
extend and contract the unit five or six times,
with the unit held in a vertical attitude. If there is
any lack of resistance, jerkiness or seizure, then
the unit will have to be renewed, no repair being
possible. It is recommended that struts or
shock absorbers are renewed in pairs as axle
sets, in order to maintain similar suspension
characteristics on both sides of the car.
7 Check for signs of hydraulic fluid leakage
from around the front strut spindle gland and
also the condition of the dust excluding boot.
Oil leakage will mean a new unit, a split boot
can be renewed after having withdrawn the
coil spring.
3 Front suspension strut -
removal and refitting
4
1 Raise the front of the car, support it
securely and remove the roadwheel.
2 Release the brake hydraulic hose
from the strut by unscrewing the retaining clip
bolt.
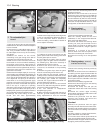
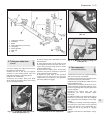
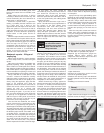
3 Unscrew and remove the two bolts from the
clamp at the bottom of the strut, push the hub
carrier down out of the clamp (photo).
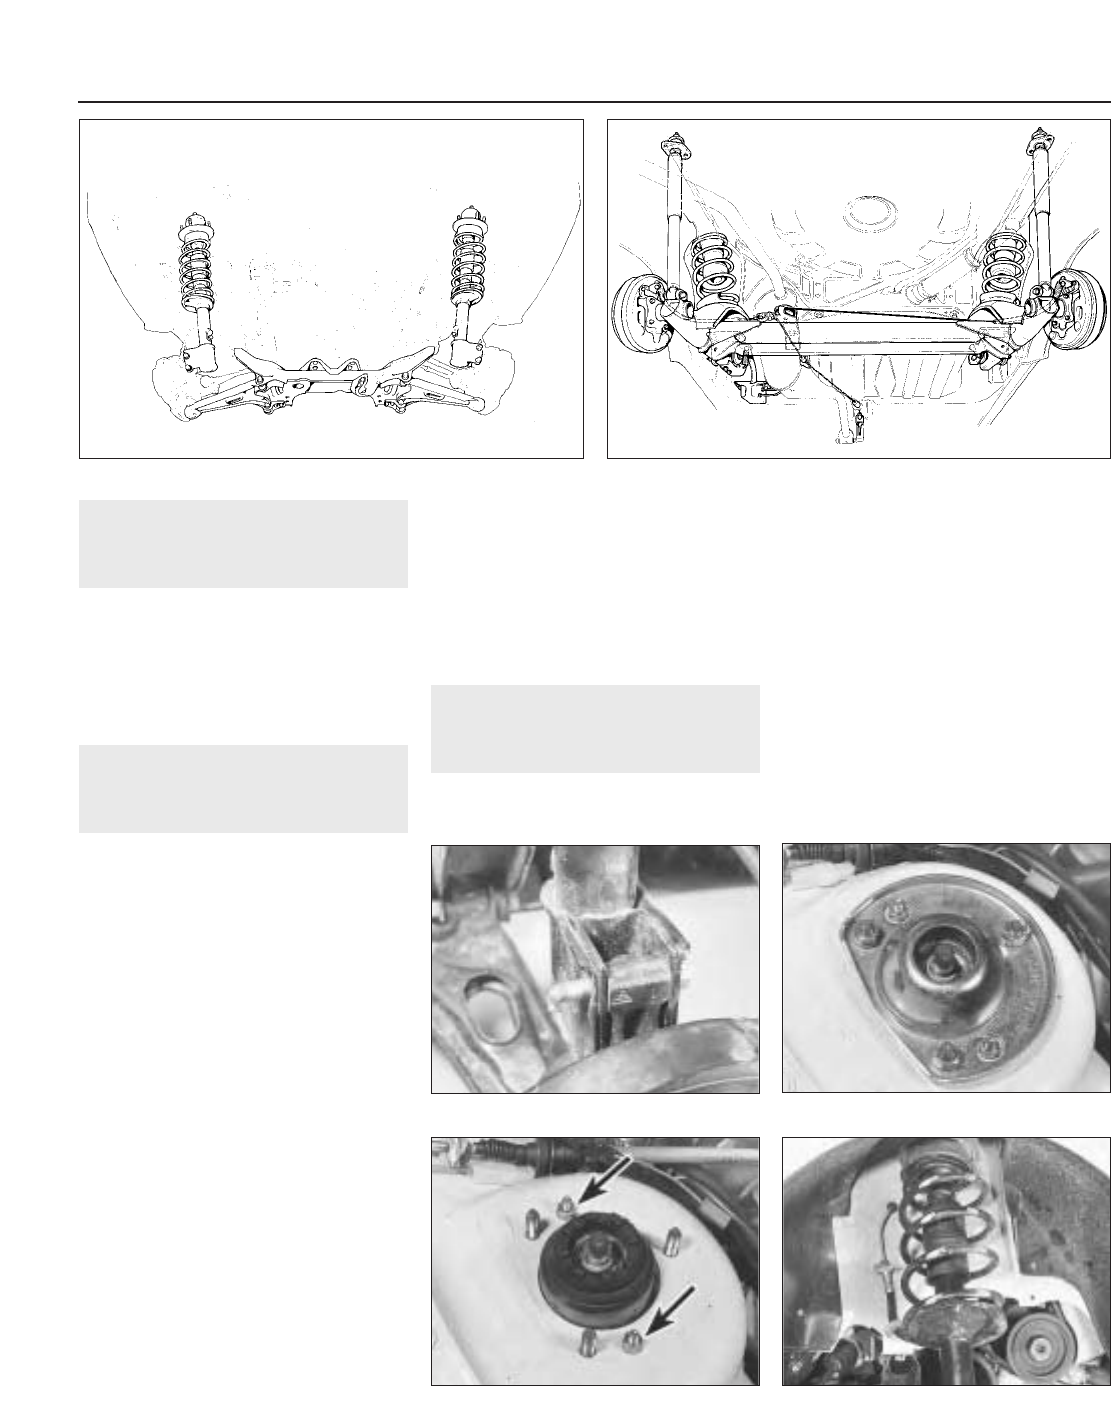
4 Open the bonnet. Unscrew and remove the
domed reinforcement cover. Then remove the
strut top mounting nuts from the turret. Do not
attempt to unscrew the centre spindle nut
(photos).
5 Withdraw the strut downwards and out
from under the wing (photo).
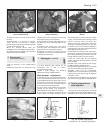
6 Coil spring clamps must now be fitted.
These are available from most motor stores or
can be hired (photo).
7 Once the spring has been compressed to
11•2 Suspension
3.5 Withdrawing a front strut3.4B Strut upper mounting nuts
3.4A Strut reinforcement plate
3.3 Strut clamp bolt
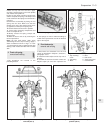
Fig. 11.1 Front suspension arrangement (Sec 1) Fig. 11.2 Rear suspension arrangement (Sec 1)