


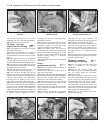
bearing caps with a soft non-fluffy rag, then fit
the lower halves of the bearing shells to their
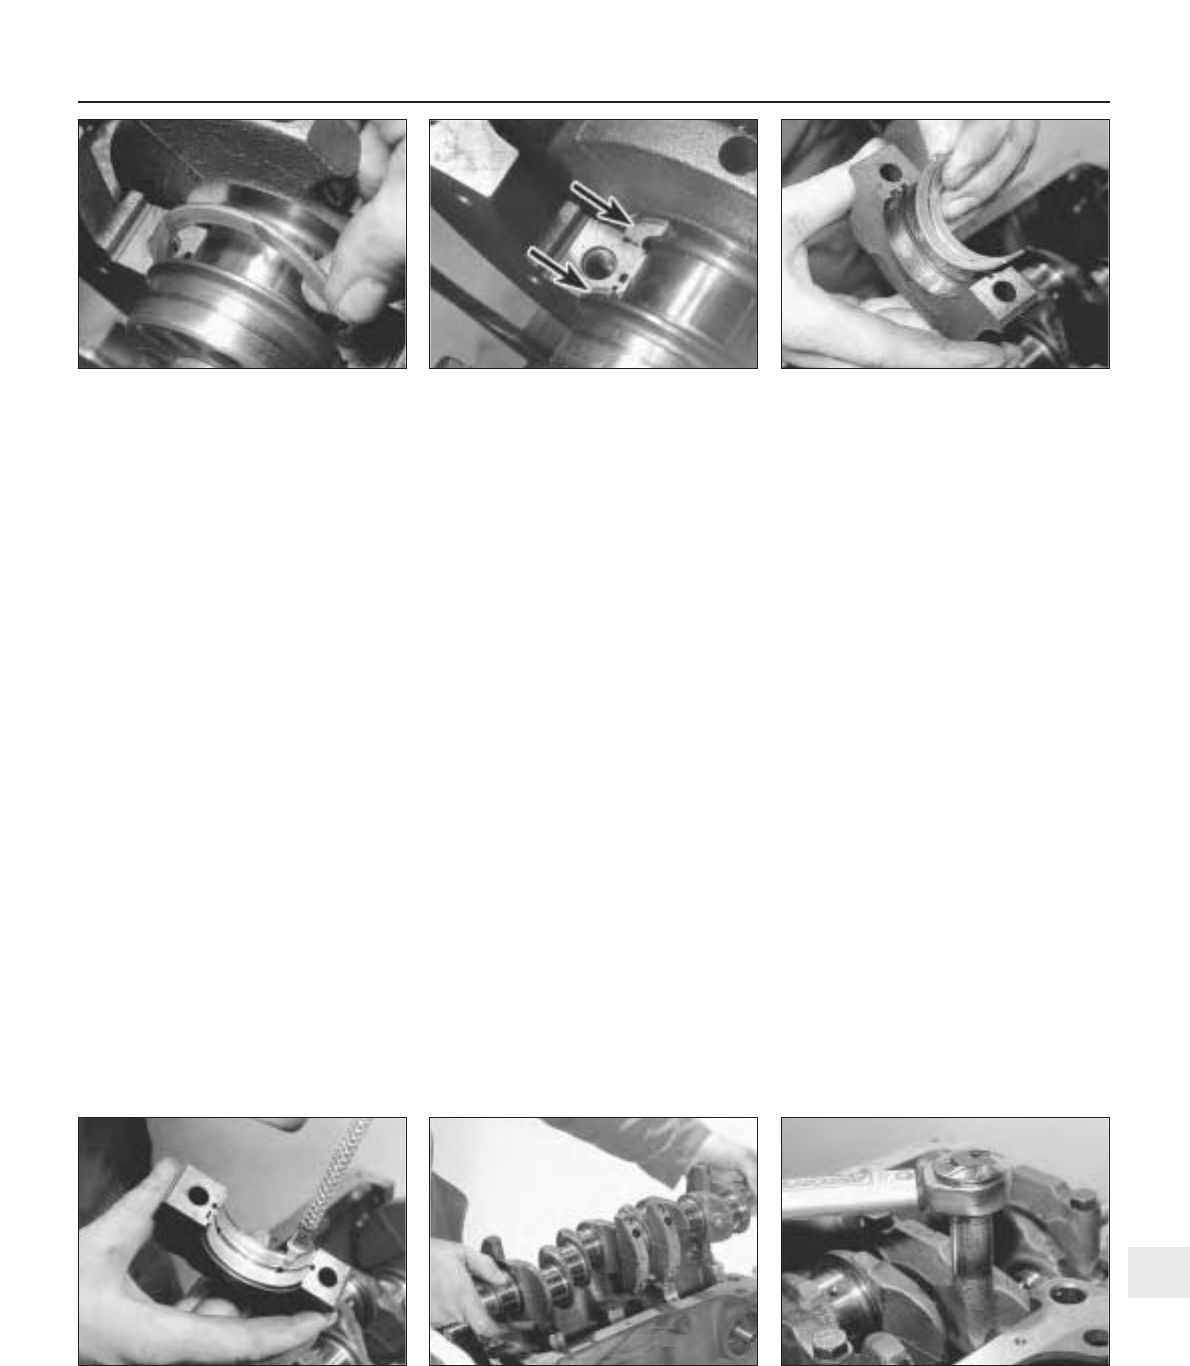
seats. Again, note that the centre (No. 3)
bearing shell is plain, whereas all the other
shells have oil grooves (photo).
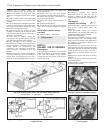
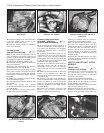
9 Lubricate the crankshaft journals and the
upper and lower main bearing shells with
clean engine oil (photo).
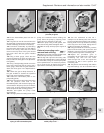
10 Carefully lower the crankshaft into the
crankcase (photo). If necessary, seat the
crankshaft using light taps with a
rubber-faced hammer on the crankshaft
balance webs.
11 Lubricate the crankshaft main bearing
journals again, the fit the No. 1 bearing cap.
Fit the two securing bolts, and tighten them as
far as possible by hand.
12 Fit the No. 5 bearing cap, and as before
tighten the bolts as far as possible by hand.
13 Fit the centre and then the intermediate
bearing caps, and again tighten the bolts as
far as possible by hand.
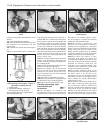
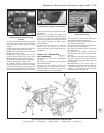
14 Check that the markings on the bearing
caps are correctly orientated as noted during
dismantling - ie the identification grooves
should face towards the timing side of the
engine, then working from the centre cap
outwards in a progressive sequence, finally
tighten the bolts to the specified torque
(photo).
15 Check that the crankshaft rotates freely.
Some stiffness is to be expected with new
components, but there should be no tight
spots or binding.
16 Check that crankshaft endfloat is within
the specified limits, as described in paragraph
70 of Part C in this Section.
17 Examine the condition of the front and
rear crankshaft oil seals and renew if
necessary with reference to Part B of this
Section. It is advisable to renew the oil seals
as a matter of course unless they are in
perfect condition.
18 Lubricate the oil seal lips with clean
engine oil, then carefully fit the front and rear
oil seal housings using new gaskets.
Pistons and connecting rods -
refitting
19 Refer to Part B of this Section.
Oil pump - refitting
20 Refer to Part B of this Section.
Sump - refitting
21 Refer to Part B of this Section.
Flywheel - refitting
22 Refer to Part B of this Section. When the
flywheel is bolted in position, refer to Chapter
5 for details and refit the clutch unit.
Auxiliary shaft - refitting
23 Refer to Part C of this Section.
Cylinder head - refitting
24 Refer to Part B of this Section. Note that
this procedure describes cylinder head
refitting complete with the camshaft housing
assembly and manifolds as a complete unit.
Details of refitting the camshaft housing (and
followers) to the cylinder head will be found
separately in Part B.
Timing belt and covers -
refitting
25 Refer to Part B of this Section.
Engine/transmission -
reconnection and refitting #
Note: A suitable hoist and lifting tackle will be
required for this operation. New locktabs will
be required for the exhaust
downpipe-to-manifold nuts, and suitable
exhaust assembly paste, will be required when
reconnecting the downpipes to the exhaust
manifold.
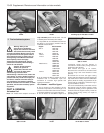
26 Before attempting to reconnect the
engine to the gearbox, check that the clutch
friction disc is centralised as described in
Chapter 5, Section 8. This is necessary to
ensure that the gearbox input shaft splines
will pass through the splines in the centre of
the friction disc.
27 Check that the clutch release arm and
bearing are correctly fitted, and lightly grease
the input shaft splines.
28 Mate the engine and gearbox together,
ensuring that the engine adapter plate is
correctly located, and that the gearbox
locates on the dowels in the cylinder block,
then refit the engine-to-gearbox bolts and the
single nut, but do not fully tighten them at this
stage. Ensure that any brackets noted during
Supplement: Revisions and information on later models 13•53
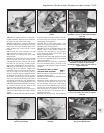
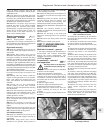
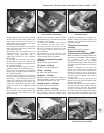
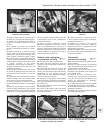
7D.8 Locate the bearing shells into the
main bearing caps . . .
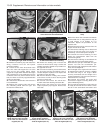
7D.7B . . . sliding them into position each
side of the No. 5 main bearing
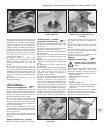
7DS.14 Tighten the main bearing cap bolts
to the specified torque setting
7D.10 Lower the crankshaft into position7D.9 . . . and lubricate the shells
13
7D.7A Locate the thrust washer . . .