Add a Local Room Managing Meeting Rooms
Polycom, Inc. 453
To add a local room
1 Go to Admin > Rooms.
2 On the Rooms page, click Add.
The Add New Room dialog box appears.
3 If you are logged into a domain other than the Local domain, click
Manually Define.
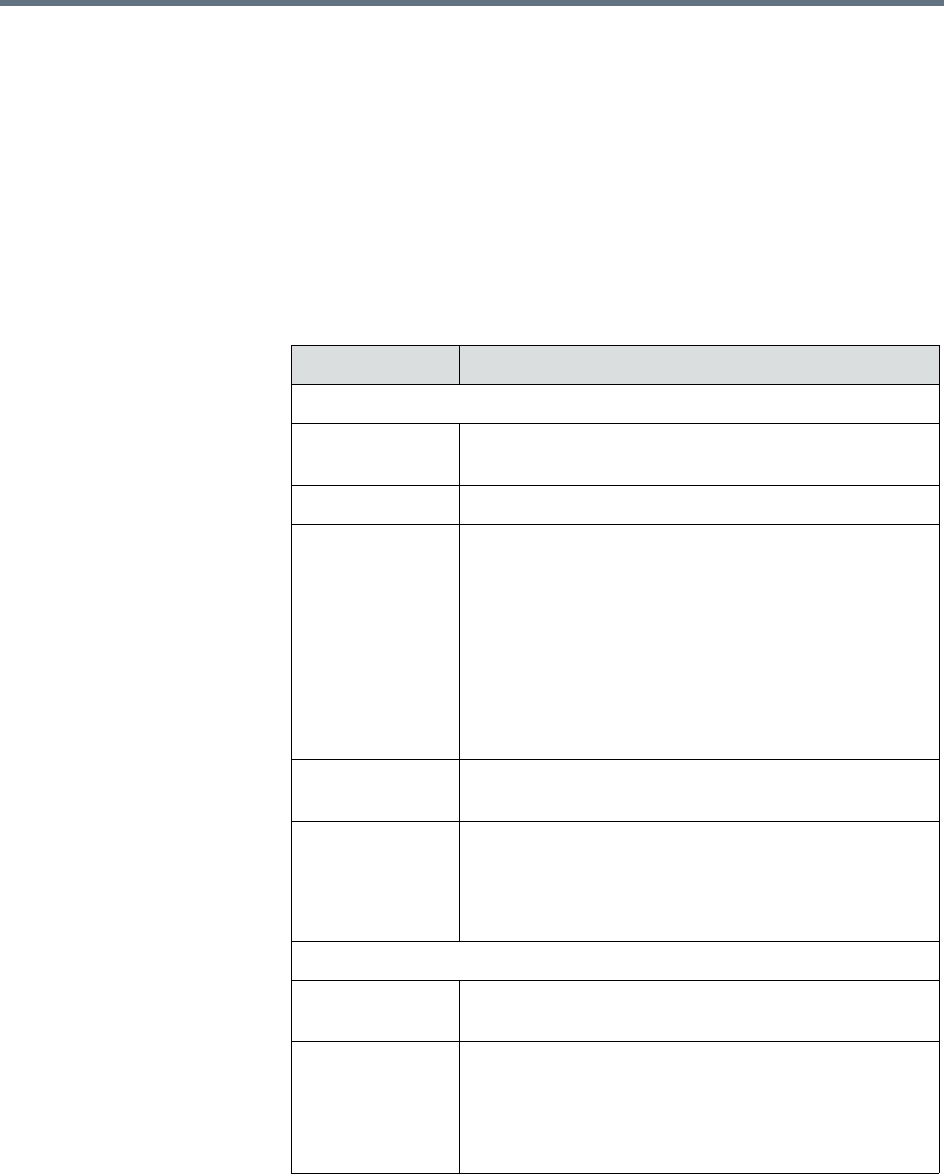
4 Complete the General Info and Associated Endpoints sections of the
Add New Room dialog box. The following table shows the room
information in the RealPresence Resource Manager system records.
Field Description
General Info
Room Name The name of the room, which appears in the address
book for associated endpoints.
Description (Optional) A useful description (ASCII only) of the room.
Site The site in which the room is located.
Note
• Rooms and the endpoint associated with them must
be assigned to the same site.
• When areas are enabled on your system, this field
shows a value of Restricted if you do not have
permission to manage the area to which the site is
assigned.
Email (Optional) The E-mail address of the room
administrator.
Assign Area Select an area to which to assign this room.
This field is only visible when Areas are enabled.
A user can only view area-specific information for an
area(s) that he has permission to manage.
Associated Endpoints
Available
Endpoints
The list of unassigned endpoints that are managed by
the RealPresence Resource Manager system.
Selected
Endpoints
The list of endpoints assigned to the room. The
endpoint at the top of the list is the primary endpoint.
You can change the order of endpoint priority by
selecting a endpoint and clicking Move Up or Move
Down.


