


CRANKSHAFT / TRANSMISSION 8-7
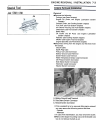
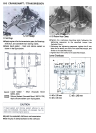
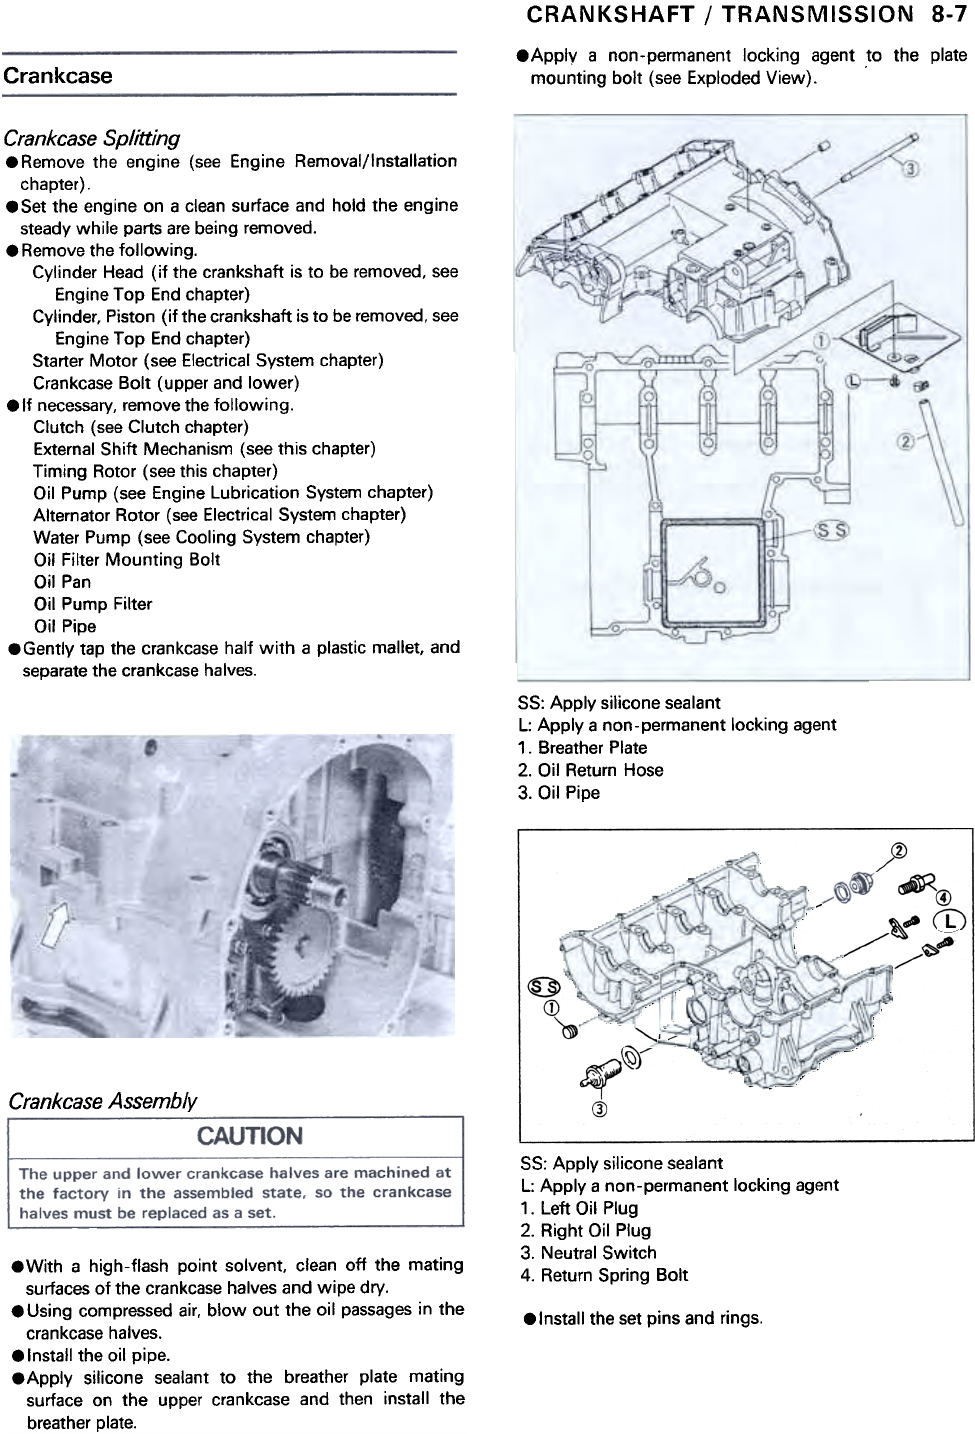
.Apply a non-permanent locking agent to the plate
mounting bolt (see Exploded View). .
Crankcase
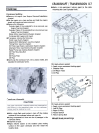
Crankcase Splitting
.Remove the engine (see Engine Removal/Installation
chapter) .
.Set the engine on a clean surface and hold the engine
steady while parts are being removed.
.Remove the following.
Cylinder Head (if the crankshaft is to be removed, see
Engine Top End chapter)
Cylinder, Piston (if the crankshaft is to be removed, see
Engine Top End chapter)
Starter Motor (see Electrical System chapter)
Crankcase Bolt (upper and lower)
.,f necessary, remove the following.
Clutch (see Clutch chapter)
External Shift Mechanism (see this chapter)
Timing Rotor (see this chapter)
Oil Pump (see Engine Lubrication System chapter)
Alternator Rotor (see Electrical System chapter)
Water Pump (see Cooling System chapter)
Oil Filter Mounting Bolt
Oil Pan
Oil Pump Filter
Oil Pipe
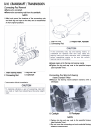
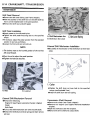
.Gently tap the crankcase half with a plastic mallet, and
separate the crankcase halves.
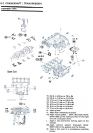
ss: Apply silicone sealant
L: Apply a non-permanent locking agent
1 .Breather Plate
2. Oil Return Hose
3. Oil Pipe
fi)
~@
~~ (C
~
,/
O
CD
~
/
~f
J!JiiII;f;«
Q)
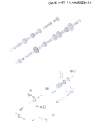
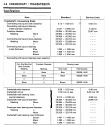
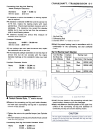
Crankcase Assembly
SS: Apply silicone sealant
L: Apply a non-permanent locking agent
1 .Left Oil Plug
2. Right Oil Plug
3. Neutral Switch
4. Return Spring Bolt
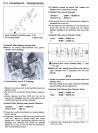
.Install the set pins and rings.
.With a high-flash point solvent, clean off the mating
surfaces of the crankcase halves and wipe dry.
.Using compressed air, blowout the oil passages in the
crankcase halves.
.Install the oil pipe.
.Apply silicone sealant to the breather plate mating
surface on the upper crankcase and then install the
breather plate.