


BRAKES 11-9
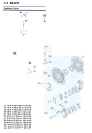
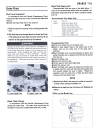
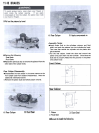
C. Caliper Mounting Bolts
A. Caliper Assembly Bolts
A. Banjo Bolt
B. Caliper Assembly Bolts
.Remove the piston insulator and the O-rings.
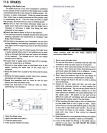
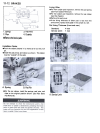
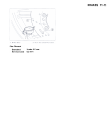
.Using compressed air, remove the pistons. One way to
remove the pistons is as follows.
O Install a wooden board more than 10 mm thick and a
rubber gasket on the caliper half as shown. Leave one
of the oil passages open.
Caliper Installation
.Tighten the caliper mounting bolts to the specified
torque (see Exploded View).
.Connect the brake hose to the caliper putting a new flat
washer on each side of the brake hose fitting.
.Tighten the banjo bolt to the specified torque (see
Exploded View).
.Check the fluid level in the master cylinder (reservoir),
and bleed the brake line (see Bleeding the Brake).
.Check the brake for good braking power, no brake drag,
and no fluid leakage.
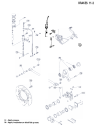
1. Bolt and Nut
2. Rubber Gasket
3. Wooden Board
4. Oil Passage sealed
by Rubber Gasket
5. Oil Passage
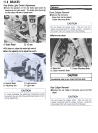
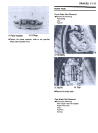
O Lightly apply compressed air to the oil passage until the
pistons hit the rubber gasket. Block the hose joint
opening during this operation.
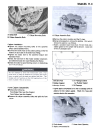
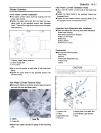
Front Caliper Disassembly
.Remove the following.
Front Brake Pads (see this chapter)
Front Caliper (see this chapter)
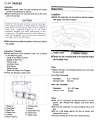
.Remove the caliper assembly bolts and split the front
caliper.
c. Hose Joint Opening
A. Push down
B. Apply compressed air.