


BRAKES 11-13
Master Cylinders
Rear Master Cylinder Installation Notes
.Use a new flat washer on each side of the brake hose
fitting.
.Tighten the banjo bolts to the specified torque (see
Exploded View) .
.Tighten the rear master cylinder mounting bolts (2) to
the specified torque (see Exploded View).
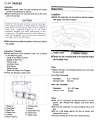
Front Master Cylinder Installation
.The master cylinder clamp must be installed with the
arrow mark upward.
.Tighten the upper clamp bolt first and then the lower
clamp bolts to the specified torque (see Exploded
View). There will be a gap at the lower part of the clamp
after tightening.
Inspection and Adjustment after Installation
.Check and adjust the following items after installation.
Brake Pedal Position
Rear Brake Light Switch Position
Brake Line Air Bleed
Brake Drag
Braking Power
Brake Fluid Leakage
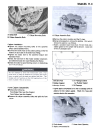
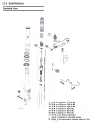
Disassembly
.Remove the following parts.
Dust Cover
Retainer
Piston with Secondary Cup
Primary Cup
Spring
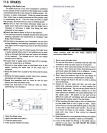
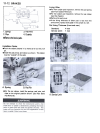
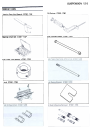
1. Tighten upper clamp bolts first.
2. Lower Clamp Bolt
3. Arrow Mark
.Use a new flat washer on each side of the brake hose
fitting.
.Tighten the banjo bolts to the specified torque (see
Exploded View).
(5)
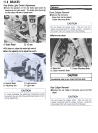
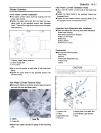
Rear Master Cylinder Removal Notes
.Remove the cotter pin and then pull the joint pin out of
the push rod clevis and brake pedal.
Cf
~
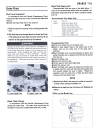
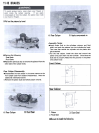
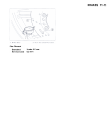
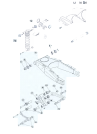
5. Brake Lever Pivot Bolt, Nut
6. Front Brake Light Switch
7. Boot
1. Primary Cup
2. Piston
3. Secondary Cup
4. Retainer
A. Clevis
B. Cotter Pin
c. Joint Pin
.Remove the master cylinder by taking off the mounting
bolts.