


9 - AUX PAGES
184
190-00357-00 Rev E
culated directly from the GPS satellites’ signals and
cannot be changed. If you prefer to use local time,
simply designate the offset by adding or subtracting
the correct number of hours.
Not all time zones are offset from UTC by a whole
number of hours (e.g., Newfoundland, Central
Australia, India, Iraq, ...)
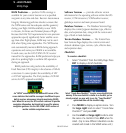
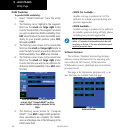
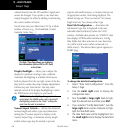
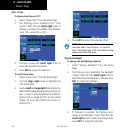
The Date / Time Page allows you to display
time information (such as ETA) in UTC (zulu)
or local time.
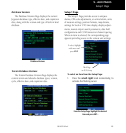
Display Backlight — allows you to adjust the
display for optimum viewing in any condition.
Automatic backlighting is available which uses a
built-in photocell (at the top right corner of the dis-
play bezel) to make the proper display adjustments
without any user intervention. You may select
manual control of the display backlighting to tailor
the 500W-series unit display to your needs.
NOTE: Display backlighting changes are not
saved when the 500W-series unit is turned off.
Backlighting reverts to the “Auto” setting the
next time the unit is turned on.
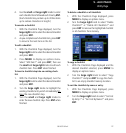
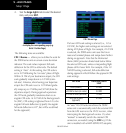
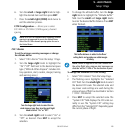
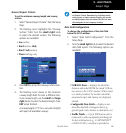
Nearest Airport Criteria — defines the minimum
runway length and surface type used when deter-
mining the 25 nearest airports to display on the
Nearest Airport Page. A minimum runway length
and/or surface type may be entered to prevent
airports with small runways, or runways that are not
of appropriate surface, from being displayed. The
default settings are “0 feet (or meters)” for runway
length and “any” for runway surface type.
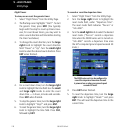
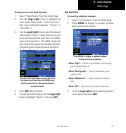
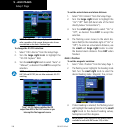
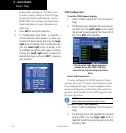
Data Field Configuration — determines the
information type that is displayed in the user-
selectabledataelddirectlybelowtheVLOC
window.Availabledataoptionsare:VOR/LOCdata
thatdisplaysVOR/Localizerinformation,Cong
DataFieldsthatallowselectionofanavdataitem,
or a traffic watch screen (when connected to a
traffic sensor). The selected data option appears on
EVERYpage.
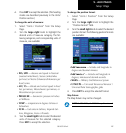
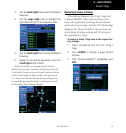
To change the data field configuration:
1. Select “Data Field Configuration” from the
Setup 1 Page.
2. Turn the small right knob to display the
configuration items.
3. Turn the small or large right knob to high-
light the desired item and then press ENT.
4. If you selected “Config Data Fields”, turn the
large right knob counter-clockwise to high-
light the data field name.
5. The data field name will be highlighted. Turn
the small right knob to display the data field
items.
Setup 1 Page