


9 - AUX PAGES
171
190-00357-00 Rev E
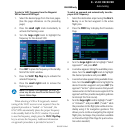
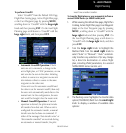
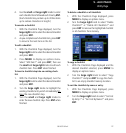
your altimeter. Press ENT when finished.
Use the small and large right knobs to enter
the indicated altitude.
3. The flashing cursor moves to the calibrated
airspeed (CAS) field. Use the small and large
right knobs to enter the airspeed from your
airspeed indicator. Press ENT when finished.
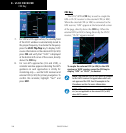
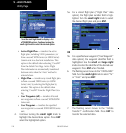
4. The flashing cursor moves to the barometric
pressure (BARO) field. Use the small and
large right knobs to enter the barometric
pressure (altimeter setting). Press ENT when
finished.
5. The flashing cursor moves to the total air tem-
perature (TAT) field. Use the small and large
right knobs to enter the temperature. Press
ENT when finished.
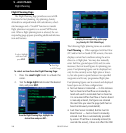
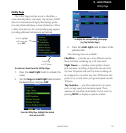
Use the small and large right knobs to enter
the total air temperature (TAT). TAT is the
temperature, including the heating effect
of speed, read on an outside temperature
gauge.
6. The flashing cursor moves to the aircraft head-
ing (HDG) field. Use the small and large right
knobs to enter the aircraft heading from the
directional gyro or compass. Press ENT when
finished.
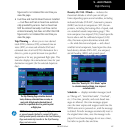
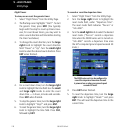
7. With all variables entered, the following infor-
mation is provided:
• DENALT—Densityaltitude
• TAS—Trueairspeed
• WIND—Winddirectionandspeed
• HEAD/TAILWIND—Magnitudeofhead
wind or tail wind component
NOTE: If your installation includes components
(such as an air/data sensor) to provide any of
the variables above, the Density Alt / TAS / Winds
Page data defaults to the values provided by
these components.
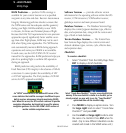
To enter a scheduled message:
1. Select “Scheduler” from the Flight Planning
Page.
2. The flashing cursor highlights the first message
field. If necessary, turn the large right knob
to highlight the first blank message field.
Flight Planning