


9 - AUX PAGES
169
190-00357-00 Rev E
Flight Planning
identifier is entered, press ENT to accept the
waypoint. The flashing cursor moves to the
“to” waypoint. Again, turn the small and
large right knobs to enter the identifier of
the “to” waypoint and press ENT to accept
the waypoint.
OR,
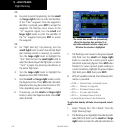
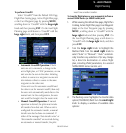
3c. For “flight plan leg” fuel planning, turn the
small right knob to select the desired flight
plan (already stored in memory), by number.
Turn the large right knob to highlight the
“LEG” field and turn the small right knob to
select the desired leg of the flight plan, or select
“Cum” to apply fuel planning calculations to
the entire flight plan.
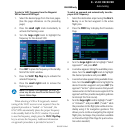
4. If your fuel management system does not enter
the data automatically, turn the large right
knob to highlight the fuel on board (FOB)
field.
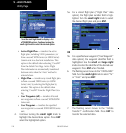
5. Use the small and large right knobs to enter
the amount of fuel on board. Press ENT when
finished.
6. The flashing cursor moves to the fuel flow (FF)
field. Use the small and large right knobs
to enter the fuel flow rate. Press ENT when
finished. Note that if a fuel system is providing
current fuel flow, the fuel flow defaults to this
value.
7. The flashing cursor moves to the ground speed
(GS) field. Use the small and large right
knobs to override the current ground speed
(and enter a planning figure). Press ENT when
finished. (To return ground speed reading to
current conditions, highlight the ground speed
[GS] field, press CLR, then press ENT.)
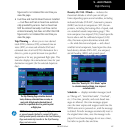
8. With all variables entered, information such as
fuel required (REQ), range (RNG), and endur-
ance (ENDUR) is provided. You can change the
information displayed on the page by pressing
MENU and selecting the “Change Fields?”
option. If your 500W-series unit installation
includes connection to fuel sensors, additional
information items are presented when the
“Change Fields?” option is selected.
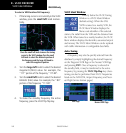
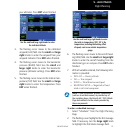
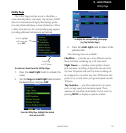
To perform trip planning operations:
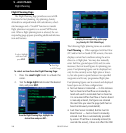
1. Select “Trip Planning” from the Flight Planning
Page.
2. The current trip planning “leg mode” is dis-
played at the top of the page: “POINT TO
POINT” or “FPL LEG” (for a flight plan leg). To
change the leg mode, press MENU to display
an options window for the other leg mode, then
press ENT to accept the other leg mode.
Press MENU and use the options window to
select the other leg mode: Point-to-Point or
Flight Plan.
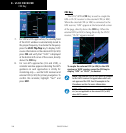
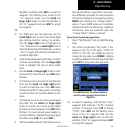
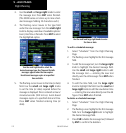
3a. For direct-to planning, verify that the “from”
waypoint field indicates “P.POS” (present
position). If necessary, press CLR to display
“P.POS”. Press ENT and the flashing cursor
moves to the “to” waypoint field. Turn the
small and large right knobs to enter the
identifier of the “to” waypoint and press ENT
to accept the waypoint.