


MAINTENANCE
2.38
CLEANING & STORAGE OF
YOUR A
TV
Cleaning the ATV
Keeping your ATV clean will not only improve its
appearance but it can also extend the life of various
components. With a few precautions, your ATV can
be cleaned much like an automobile.
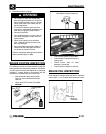
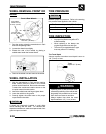
Washing the ATV
The best and safest way to clean your ATV is with a
garden hose and a pail of mild soap and water. Use
a professional type washing mitten, cleaning the
upper body first and the lower parts last. Rinse with
water frequently and dry with a chamois to prevent
water spots. NOTE: If warning and safety labels are
damaged, contact your a Polaris dealer for free
replacement.
Polaris does not recommend the use of a high
pressure type car wash system for washing the ATV.
If a high pressure system is used, exercise extreme
care to avoid water damage to the wheel bearings,
transmission seals, body panels, brakes and warning
labels. NOTE: Grease all zerk fittings immediately
after washing, and allow the vehicle to run for a while
to evaporate any water that may have entered the
engine or exhaust system.
Waxing the ATV
Your ATV can be waxed with any non-abrasive
automotive paste wax. Avoid the use of harsh
cleaners since they can scratch the body finish.
Polaris offers a detailing kit for your ATV, see Page
2.7.
CAUTION: Certain products, including insect
repellants and chemicals, will damage plastic
surfaces. Use caution when using these
products near plastic surfaces.
Storage Tips
See Page 2.7 for the part numbers of Polaris
products.
CAUTION: Starting the engine during the storage
period will disturb the protective film created by
fogging and damage could occur. Never start the
engine during the storage period.
Clean the Exterior
Make necessary repairs and then clean the ATV
thoroughly with mild soap and warm water to remove
all dirt and grime. Don’t use harsh detergents or high
pressure washers. Some detergents deteriorate
rubber parts. Use dish soap type cleaners only. High
pressure washers may force water past seals.
Stabilize the Fuel
Fill the fuel tank. Add Polaris Carbon Clean Fuel
Treatment or Polaris Fuel Stabilizer. Follow the
instructions on the container for the recommended
amount. (Carbon clean will also reduce the possibility of
bacterial growth in the fuel system.) Allow 15-20
minutes of operation for the stabilizer to disperse
through the fuel in the tank and carburetor. Turn the fuel
valve off and drain the carburetor bowl.
Oil and Filter
Warm the engine and change the oil and filter. Follow
the procedure in this chapter for proper oil change.
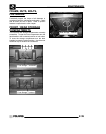
Air Filter / Air Box
Inspect and clean or replace the pre-cleaner and air
filter. Clean the air box and drain the sediment tube.
Breather Filter
Inspect and clean or replace the breather filter.
Fluid Levels
Inspect the following fluid levels and change if
necessary: front gearcase; transmission; brake fluid
(change every two years or as required if fluid looks
dark or contaminated).
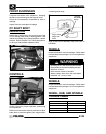
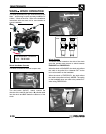
Drain the Recoil Housing
Remove the recoil housing drain plug and drain any
moisture.
Storage Tips
Polaris offers storage kits for you ATV, see Page 2.7
for the part numbers of Polaris products.
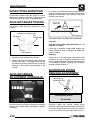
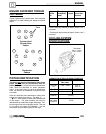
Fog the Engine
Remove the spark plug and add 2-3 tablespoons of
Premium 4 Synthetic 0W--40 engine oil. To access the
plug hole, use a section of clear 1/4” hose and a small
plastic squeeze bottle filled with the pre-measured
amount of oil. Note: Do this carefully! If you miss the
plug hole, oil will drain from the spark plug cavity into the
hole at the front of the cylinder head, and appear to be
an oil leak. Install the spark plug and pull the engineover
slowly with the recoil starter. Oil will be forced in and
around the piston rings and ring lands, coating the
cylinder with a protective film of fresh oil.
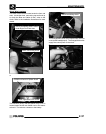
If you choose not to use Polaris Fogging Oil, perform
the following procedure.
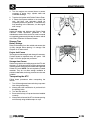
1. Support the front end of the machine so the
engine is level or tilted slightly rearward.
2. Remove the spark plug(s). Rotate the piston to
BDC and pour approximately two ounces of
Polaris oil into the cylinder.
3. Apply dielectric grease to the inside of the spark
plug cap and install the cap onto the plug.