


BODY / STEERING / SUSPENSION
5.8
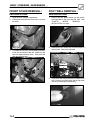
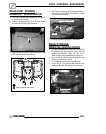
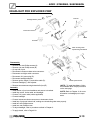
Rear Rack Installation
3. Place spacers on frame.
4. Install rear rack onto rear frame and cab.
5. Install the two bolts (B) and six (A) T--27 screws.
Torque the bolts (A) to 18 in.lbs. (2 Nm) and six
T--27 screws to 36 in.lbs. (4 Nm). Refer to the
illustration for torque values.
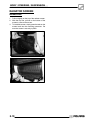
FRONT CAB/FENDER
REMOVAL/INSTALLA
TION
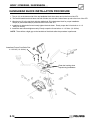
1. Follow the “FRONT RACK / BUMPER
REMOVAL” section to begin removal of the front
cab, rack, and bumper.
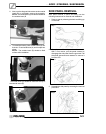
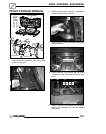
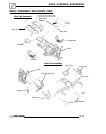
2. Remove the plastic inserts (A) that secure the
front cab to the upper strut support.
A
3. Remove the two screws (B) that secure the front
cab to the frame in the fuel tank mount area.
B
A
B
24 in.lbs.
(2.7 Nm)
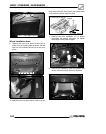
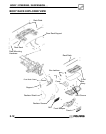
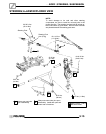
4. Remove the side panels (D), refer to the “SIDE
PANEL REMOVAL” section.
5. Remove the plastic inserts (E) that secure the
front of the foot wells to the front cab.
E
D
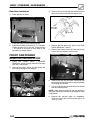
6. Remove the fuel cap and place a clean lint free
shop towel into the tank neck to keep any debris
from falling into the tank.
7. The front cab should now slide back over the fuel
tank and fuel tank neck.
NOTE: When removing the front cab use caution so
the plastic cab does not scratch or getcaught on other
components.
8. Reverse the removal steps for installation.
Torque two front cab to frame screws (B) to 24
in.lbs. (2.7 Nm).