


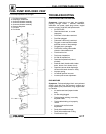
FUEL SYSTEM/CARBURETION
4.12
CARBURETOR CLEANING
WARNING
Protect eyes from contact with cleaner. Take
appropriate safety measures during these
procedures. Safety glasses and chemical resistant
gloves are required. Should you get cleaner in your
eyes or if you swallow cleaner, seek medical attention
immediately.
Carburetor cleaners can be extremely caustic.
Extended periods of soaking can loosen the adhesive
sealer on the passage drill-way plugs. Do not soak
rubber or plastic components (such as the vacuum
slide diaphragm, needle seat screen, or O-Rings in
caustic cleaning solutions. Irreparable damage may
occur. Do not use agitator--type carburetor cleaning
equipment. Rubber parts must be cleaned with mild
detergent and hot water only.
1. Thoroughly clean the carburetor body, jets, and
all passages with carburetor cleaner or electrical
contact cleaner.
2. If the carburetor is extremely dirty or
contaminated with fuel residue and varnish, soak
for short periods only in carburetor cleaner, and
rinse in hot water.
3. Replace the jets if they have a buildup of fuel
residue or bacterial growth that cannot be
removed. Even a small amount of residue will
reduce the flow characteristics of the jet.
4. Verify all passages and jets are unobstructed by
spraying electrical contact cleaner through the
passages. CAUTION: Do not use wire or welding
tip cleaners as the orifice size may be altered.
5. Use low pressure air to dry carburetor body and
all components.
CARBURETOR INSPECTION
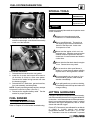
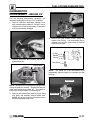
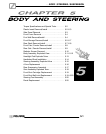
1. Inspect jet needle and needle jet for wear. Look
for discoloration, shiny spots, or an area that
looks different than the rest of the needle. The
middle to upper portion of the needle contacts the
needle jet and is the most likely wear point. If jet
needle shows signs of wear replace both the
needle and needle jet to prevent a rich condition.
TIP: Aworn needle jet isdifficult tospot. Tocheck,
slide a slightly larger new jet needle into the
needle jet and hold it to a light source. Light will be
visible between the needle and needle jet if it is
worn.
Inspect this
area
Jet Needle
Needle Jet
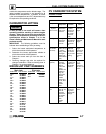
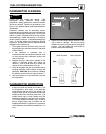
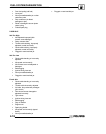
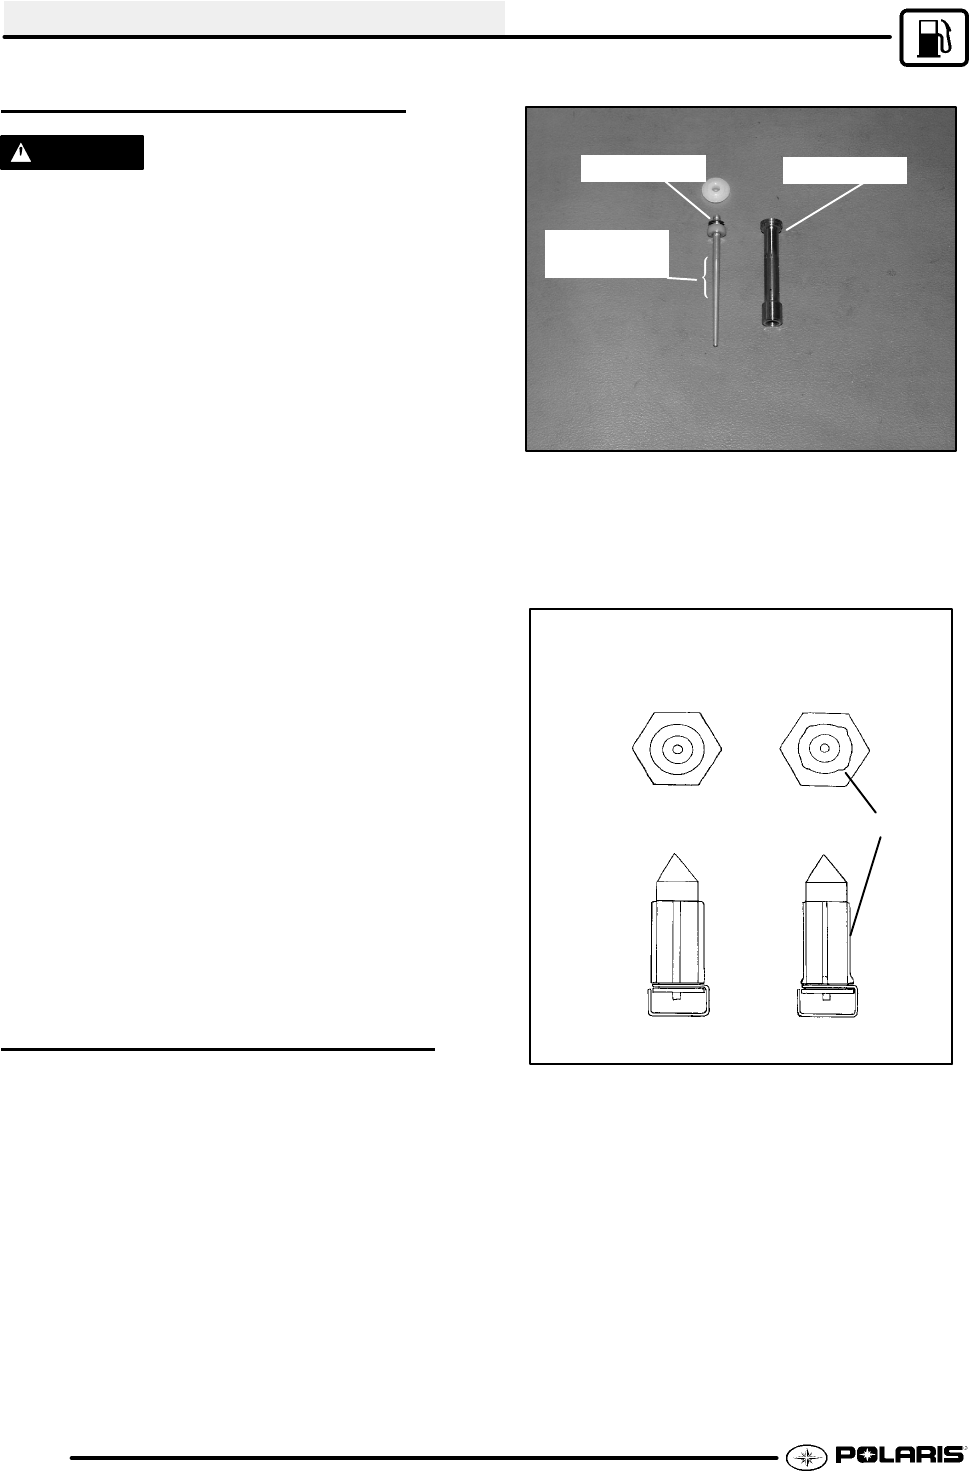
2. Inspect the inlet needle tapered surface for any
sign of wear or damage. Be sure the spring
loaded pin is free moving and returns freely when
pushed. The inlet needle and seat should be
pressure tested after assembly.
Good Condition
Worn, Deposits
Wear areas
Seat
Needle