ENGINE
3.35
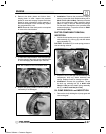
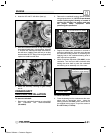
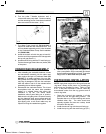
6. Turn the puller T-Handle clockwise until it
contacts the water pump shaft. Continue rotating
until the remaining portion of mechanical seal has
been removed from the cases. (Ill. 5).
Ill. 5
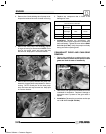
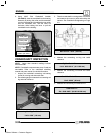
7. The Water Pump Install Kit (PN 5131135)is
required to install the new mechanical seal. This
tool is available separately and it is also included
in the Crankshaft/Water Pump Seal Installation
Kit (PN 2871283).
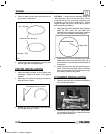
8. Install the bottom rail with the gap at least 30q
from the end of the expander on the side opposite
the top rail gap.(See Ill. 1).
9. Install the second ring with the “R” mark facing up.
Position the end gap toward the rear (intake) side
of the piston.
CRANKCASE REASSEMBLY
1. After reinstalling the crankshaft, balancer, oil tube
and transmission assembly into the stator case
halve, apply a thin layer of Crankcase Sealer (PN
2871557) to all sealing surfaces of the pto half,
being careful not to over apply, as excessive sealant
may clog oil passages or drip into the crankcase.
Allow the sealer to set for a few minutes before
assembling the two halves together.
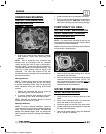
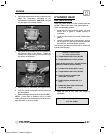
2. Reassemble the crankcase halves. This is best
accomplished with the stator side casehalve
settled in a suitable fixture that allows the
casehalve to lay flat. This allows easier
installation without parts falling out of position.
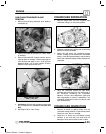
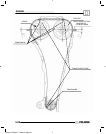
Make sure the oil galley tube is oriented correctly
and the balancer shaft groove aligns with the
water pump shaft. Refer to photos. NOTE: some
light tapping with a soft faced mallet may be
required to bring the casehalves together.
Align balancer shaft and
water pump shaft grooves
Align tube with notch in case
3. Reinstall the (12) flange bolts and tighten in a
criss--cross pattern. Stop occasionally and check
that all rotating assemblies turn freely. Torque the
flange bolts to 80 -97 Inch Lbs.(9-11 Nm).
PISTON RING INSTALLATION
NOTE: Apply clean engine oil to all ring surfaces and
ring lands. Always check piston ring installed gap
before rings are installed on piston. Refer to Page
3.24. If the piston has been in service, clean any
accumulated carbon from the ring grooves and oil
control ring holes.
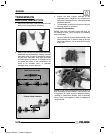
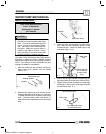
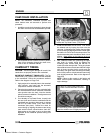
1. Place the oil control ring expander in oil ring
groove with the end gap facing forward. The
expander has no up or down marking and can be
installed either way. The ends should butt
squarely together and must not overlap. Install
the bottom and top rails.
2. Install the second ring with the mark facing up.
3. Install the top ring with the mark facing up (Ill 1).
Enfocus Software - Customer Support


