


ELECTRICAL
7.13
W ARNING
To avoid the possibility of explosion or sparks,
connect positive (red) cable first and negative (black)
cable last.
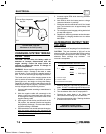
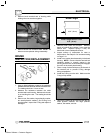
5. After connecting the battery cables, attach the
hold down strap.
6. Route cables so they are tucked away in front and
behind battery.
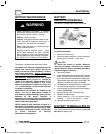
HEADLIGHT ADJUSTMENT
The headlight beam can be adjusted to varied
positions by using the following procedures:
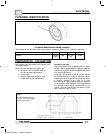
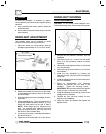
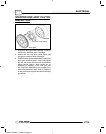
1. Place the vehicle on a level surface with the
headlight approximately 25’ (7.6 m) from a wall.
25’ (7.6 m)
Lamp Center Height
2s (5.1 cm)
1
2. Measure the distance from the floor to the center
of the headlight and make a mark on the wall at
the same height.
3. Start the engine and turn the headlight switch to
high beam.
4. Observe headlight aim. The most intense part of
the headlight beam should be aimed 2s (5.1 cm)
below the mark placed on the wall in Step 2
NOTE: Rider weight must be included on the
seat. On machines with separate low beam
lights, the drop should be 8s (20.3 cm) in 25’ from
the center of the low beam lamp.
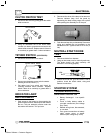
5. Loosen the pivot screw (1) and adjust the beam to
the desired position.
6. Tighten the screw and torque to 27 in. lbs. (3 Nm).
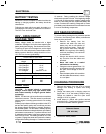
HEADLIGHT HOUSING
REPLACEMENT
CAUTION: Do not service while headlight is hot.
Serious burns may result. Protect lamp during install.
1
2
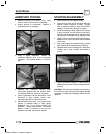
1. Remove the wire harness connector from the
headlights.
2. Remove the front cab. Position the cab upside
down on a soft protective surface to prevent
scratching.
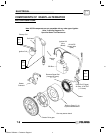
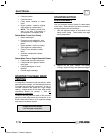
3. Remove the small adjuster bracket (1) and install
it on the new lamp.
4. Remove the large pivot bracket (2) and remove
the headlamp.
5. Install the new headlamp by inserting the
outboard pivot pin in the hole of the mounting tab
on the cab.
6. Install the adjuster bracket onto the inboard pivot
pin of the headlamp.
7. Adjust for approximately 1/16” clearance
between the bracket and the edge of the
headlight. Tighten the mounting screws.
IMPORTANT: Be sure the bracket is 90 degrees
to the pivot pin so the lamp can move freely.
8. Install the adjusting screw, leaving it loose so the
headlight can be adjusted.
9. Reinstall the front cab and connect the wire
harness to the headlamp.
10. Adjust the lamps as needed, then tighten the
adjuster screw.
Enfocus Software - Customer Support