


ELECTRICAL
7.18
ARMATURE TESTING
1. Remove armature from starter casing. Note
order of shims on drive end for reassembly.
2. Inspect surface of commutator. Replace if
excessively worn or damaged.
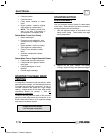
3. Using a digital multitester, measure the
resistance between each of the commutator
segments. The reading should be .3 ohms or
less.
4. Measure the resistance between each
commutator segment and the armature shaft.
The reading should be infinite (no continuity).
5. Check commutator bars for discoloration. Bars
discolored in pairs indicate shorted coils,
requiring replacement of the starter motor.
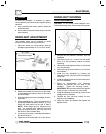
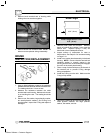
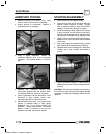
6. Place armature in a growler. Turn growler on and
position a hacksaw blade or feeler gauge
lengthwise 1/8s (.3 cm) above armature coil
laminates. Rotate armature 360q. If hacksaw
blade is drawn to armature on any pole, the
armature is shorted and must be replaced.
STARTER REASSEMBLY
1. Place armature in field magnet casing.
2. Place shims on drive end of armature shaft with
phenolic washer outermost on shaft. Engage
tabs of stationary washer in drive end housing,
holding it in place with a light film of grease.
3. Install case sealing O-Ring. Make sure O-Ring is
in good condition and not twisted on the case.
Lubricate needle bearing and oil seal with a light
film of grease, and install housing, aligning marks.
4. Install O-Ring on other end of field magnet casing.
Make sure it is in good condition and not twisted
on the case.
5. Align casing marks and install housing, pushing
back brushes while installing shaft in bushing.
6. Reinstall starter motor housing bolts. Make sure
O-Rings are in good condition and seated in
groove.
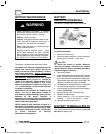
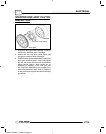
7. Inspect permanent magnets in starter housing.
Make sure they are not cracked or separated from
housing.
CAUTION: Use care when handling starter housing.
Do not drop or strike the housing as magnet damage
is possible. If magnets are damaged, starter must be
replaced.
Enfocus Software - Customer Support