


7 - 8
FI
FUEL INJECTION SYSTEM
TROUBLESHOOTING
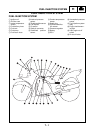
Diagnosis mode troubleshooting 1 (self-diagnostic malfunction detected)
By entering a diagnostic code in the ECU through the use of the “SELECT” and “RESET” buttons on
the multi-function meter, the sensor output values can be displayed and the actuators can be oper-
ated in accordance with the code that has been entered.
The technician determines whether or not the operation is normal by verifying the values displayed
on the multi-function meter or the operating conditions of the actuators. These modes can be used
to detect and check the problems that are otherwise difficult to detect in the diagnosis mode.
Basic operation procedure
Operation preparation
• Verify the self-diagnostic fault code number that is displayed on the meter.
• Based on the self-diagnostic fault code number, select the applicable sensor or actuator from the
diagnostic code table.
• If a diagnostic code is available, proceed with the operation procedure given below in order to
verify the operating conditions of the applicable sensor or actuator.
Operation procedure (make sure to turn “OFF” the main switch upon completing the operation prep-
aration)
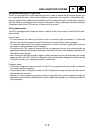
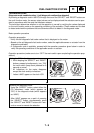
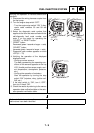
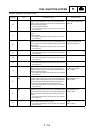
Setting the ECU in the diagnosis mode
1. While keeping the “SELECT” and “RESET”
buttons pressed simultaneously, turn “ON”
the main switch (keep them pressed for 8
seconds or more).
* All indications on the meter disappear
except the clock and trip indications.
* Letters “dIAG” appear on the clock LCD.
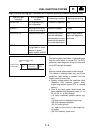
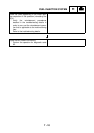
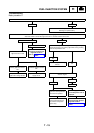
Selecting the diagnosis mode
Using the “SELECT” button, select either the
CO adjustment mode (which appears as
“CO”) or the diagnosis mode (which appears
as “dIAG”).
After “dIAG” appears as a result of pressing
the “SELECT” button, simultaneously press
the “SELECT” and “RESET” buttons for 2 sec-
onds or more to execute the selection.
F
L
L
H
E
SELECT RESET
TRIP
TRIP
km
mile
km
mile
000
OFF
ON
SELECT
RESET
Main switch
F
L
L
H
E
SELECT RESET
TRIP
TRIP
km
mile
km
mile
000
OFF
ON
Main switch