


5 - 102
ENG
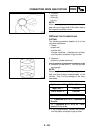
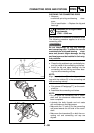
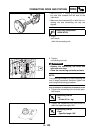
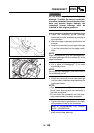
• Make sure the “Y” marks a on the connect-
ing rods face towards the left side of the
crankshaft.
• Make sure the characters b on both the con-
necting rod and connecting rod cap are
aligned.
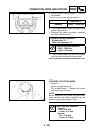
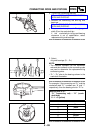
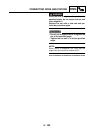
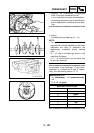
8. Align:
• bolt heads
(with the connecting rod)
Piston ring compressor
90890-05158
6D
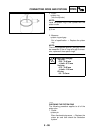
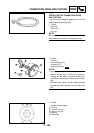
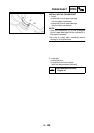
9. Tighten:
• connecting rod nuts
WARNING
@
• Replace the connecting rod bolts and
nuts with new ones.
• Clean the connecting rod bolts and nuts.
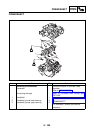
NOTE:
@
The tightening procedure of the connecting rod
nuts is angle controlled, therefore tighten the
nuts using the following procedure.
▼▼▼▼ ▼ ▼▼▼▼ ▼ ▼▼▼▼ ▼ ▼▼▼▼ ▼ ▼▼▼▼ ▼ ▼▼▼▼ ▼▼▼
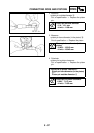
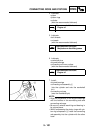
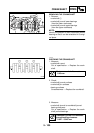
a. Tighten the connecting rod nuts to the spec-
ified torque.
b. Tighten the connecting rod nuts further to
reach the specified angle 120°.
T
R
.
.
Connecting rod nut
1st
20 Nm (2.0 m · kg)
T
R
.
.
Connecting rod nut
Final
Specified angle 120°
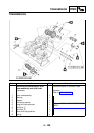
CONNECTING RODS AND PISTONS