


1 - 33
GEN
INFO
FEATURES
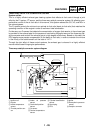
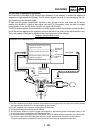
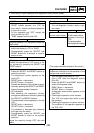
2. DIAG and CO mode inspection and adjustment (multi-function meter)
Mode Selection (Make sure to disconnect the coupler from the fuel pump.)
CO/DIAG mode Normal mode
1. While keeping both the SELECT and
RESET buttons pressed, turn “ON” the
main switch. Keep the buttons pressed for
8 seconds or more.
* All the segments are “OFF” except the
clock and the trip LCD.
* “DIAG” appears on the clock LCD.
Turn “ON” the main switch.
* The self-diagnostic function starts a sys-
tem check.
System normal
Normal meter display
Malfunction detection
A fault code number
appears on the clock
LCD.
The engine trouble
warning light illuminates.
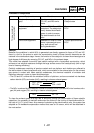
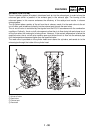
Switching between CO adjustment mode and
DIAG mode
1. Press the SELECT button in order to
switch the display to “CO” or “DIAG”.
2. Simultaneously press the SELECT and
RESET buttons for 2 seconds or more to
select an item.
(The engine cannot be started in this mode.)
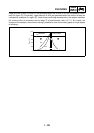
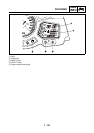
CO adjustment mode
Enables the adjustment of CO for any of the
four cylinders by pressing the SELECT and
RESET buttons.
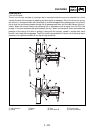
1. Adjustment cylinder selection
* Press the SELECT and RESET buttons to
select the cylinder.
* The adjustment cylinder appears on the
clock LCD.
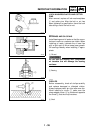
* RESET button = decrement
* SELECT button = increment
* Execute the selection of the cylinder by simul-
taneously pressing the SELECT and RESET
buttons for approximately 2 seconds.
2. CO adjustment
* After selecting the adjustment cylinder,
change the adjustment volume by pressing
the SELECT and RESET buttons.
* The adjustment volume appears on the trip
LCD.
* RESET button = decrement
* SELECT button = increment
* The selection is executed upon releasing
the finger from the switch.
* Simultaneously press the SELECT and
RESET buttons to return to the cylinder
selection.
Cancel the mode by turning “OFF” the main
switch.
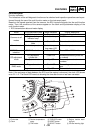
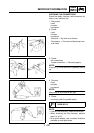
Diagnosis mode
Enables the verification of the operation of the
actuator and various sensors.
* Turn the engine stop switch to “OFF”.
(Turn it “ON” when the diagnostic code is
09 or 03.)
1. Press the SELECT and RESET buttons to
select the Diagnosis mode.
* RESET button = decrement
* SELECT button = increment
* A diagnostic code number appears on the
clock LCD.
2. Checking the operation of the actuator
* Turn “ON” the engine stop switch to start
the operation.
3. Checking the operation of various sensors
* The condition of the operation appears on
the TRIP LCD.