


6.31
CLUTCH SYSTEM
6
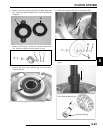
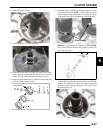
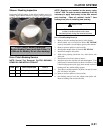
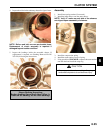
Sheave / Bushing Inspection
Inspect the Teflon coating on the sheave bushings and cover
bushing. Inspect BOTH sheaves for signs of wear, grooving or
cracking. Clean sheave surfaces with a 3M pad if needed.
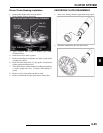
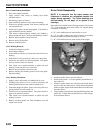
Drive Clutch Bushing Service
NOTE: Special Tool Required: CLUTCH BUSHING
REMOVAL AND INSTALLATION KIT
NOTE: Bushings are installed at the factory using
Loctite
609. In order to remove bushings it will be
necessary to apply heat evenly to the area around
each bushing. Clean all residual Loctite
from
bushing bore prior to installing new bushing.
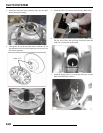
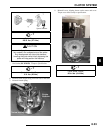
Drive Clutch Bushing Removal
1. Remove clutch as outlined previously in this chapter.
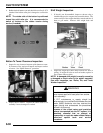
2. Install handle end of Piston Pin Puller (PN 2870386)
securely into bench vise and lightly grease puller threads.
3. Remove nut from puller rod and set aside.
4. Install puller adapter (Item 10 from kit PN 2871226).
5. Install main adapter onto puller.
6. With towers pointing toward the vise, slide sheave onto
puller rod.
7. Install removal tool into center of sheave.
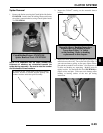
8. Install nut onto end of puller rod and hand tighten. Turn
puller barrel to increase tension on sheave if needed. Using
a hand held propane torch, apply heat around outside of
bushing until tiny smoke tailings appear.
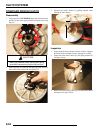
9. Turn sheave counterclockwise on puller rod until it comes
free. Lift sheave off puller.
10. Remove nut from puller rod and set aside.
11. Pull bushing removal tool and adapter from puller rod.
Remove bushing from tool and discard.
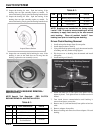
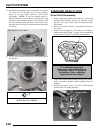
Cover / Sheave Bushing Inspection:
Replace bushing if more brass than Teflon is
visible on the bushing. Do not clean bushings.
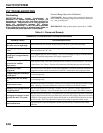
ITEM QTY PART DESCRIPTION PART #
-- 1 Bushing Replacement Kit 2871025
-- 1 Piston Pin Puller 2870386
CAUTION
Clutch components will be hot!
In order to avoid serious burns, wear
insulated gloves during the removal process.