


6.13
CLUTCH SYSTEM
6
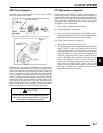
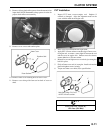
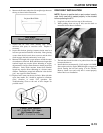
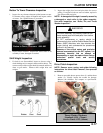
6. Measure the distance where the side straight edges intersect
the top, as shown in the illustration.
7. Inspect belt for loose cords, missing cogs, cracks,
abrasions, thin spots, or excessive wear. Replace if
necessary.
8. Inspect belt for hour glassing (extreme circular wear in at
least one spot and on both sides of the belt). Hour glassing
occurs when the drive train does not move and the drive
clutch engages the belt continuously in one spot.
9. Measure belt length with a tape measure around the outer
circumference of the belt. Belts which measure longer than
nominal length may require driven shimming or engine
adjustment for a longer center distance to obtain proper belt
deflection. Belts which measure shorter than nominal
length may require driven shimming or a shorter center
distance. Remember, proper belt deflection is the desired
goal - not a specific center distance.
10. Replace belt if worn past the service limit. Belts with thin
spots, burn marks, etc., should be replaced to eliminate
noise, vibration, or erratic PVT operation. See
Troubleshooting Chart at the end of this chapter for
possible causes.
DRIVE BELT INSTALLATION
NOTE: Be sure to position belt so part number is easily
read. Verify new belt is seated properly in the clutches
before operating the ATV.
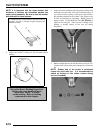
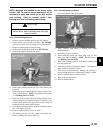
1. Loop belt over drive and over top of driven sheave.
2. While pushing down on top of belt, turn the back or
moveable driven sheave clockwise.
3. The belt then should be able to be pushed down into and
between the sheaves.
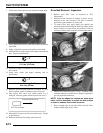
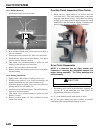
4. Install clutch cover temporarily. Verify engine is in PARK.
Start engine and raise engine RPM enough to engage the
clutch, rotating the belt and seating it in the clutches.
Remove clutch cover and verify belt is seated properly
before final cover installation.
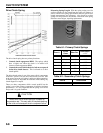
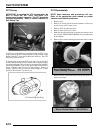
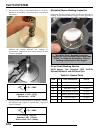
Belt Width:
Wear Limit 1.125" (2.86 cm)
Clutch Center Distance:
10”
.1 -.05 (254 2.51-.3mm)
Belt Nominal Length:
40.875”
cm
Projected Belt Width
Center
Distance