


5.18
BODY / STEERING / SUSPENSION
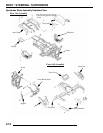
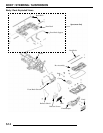
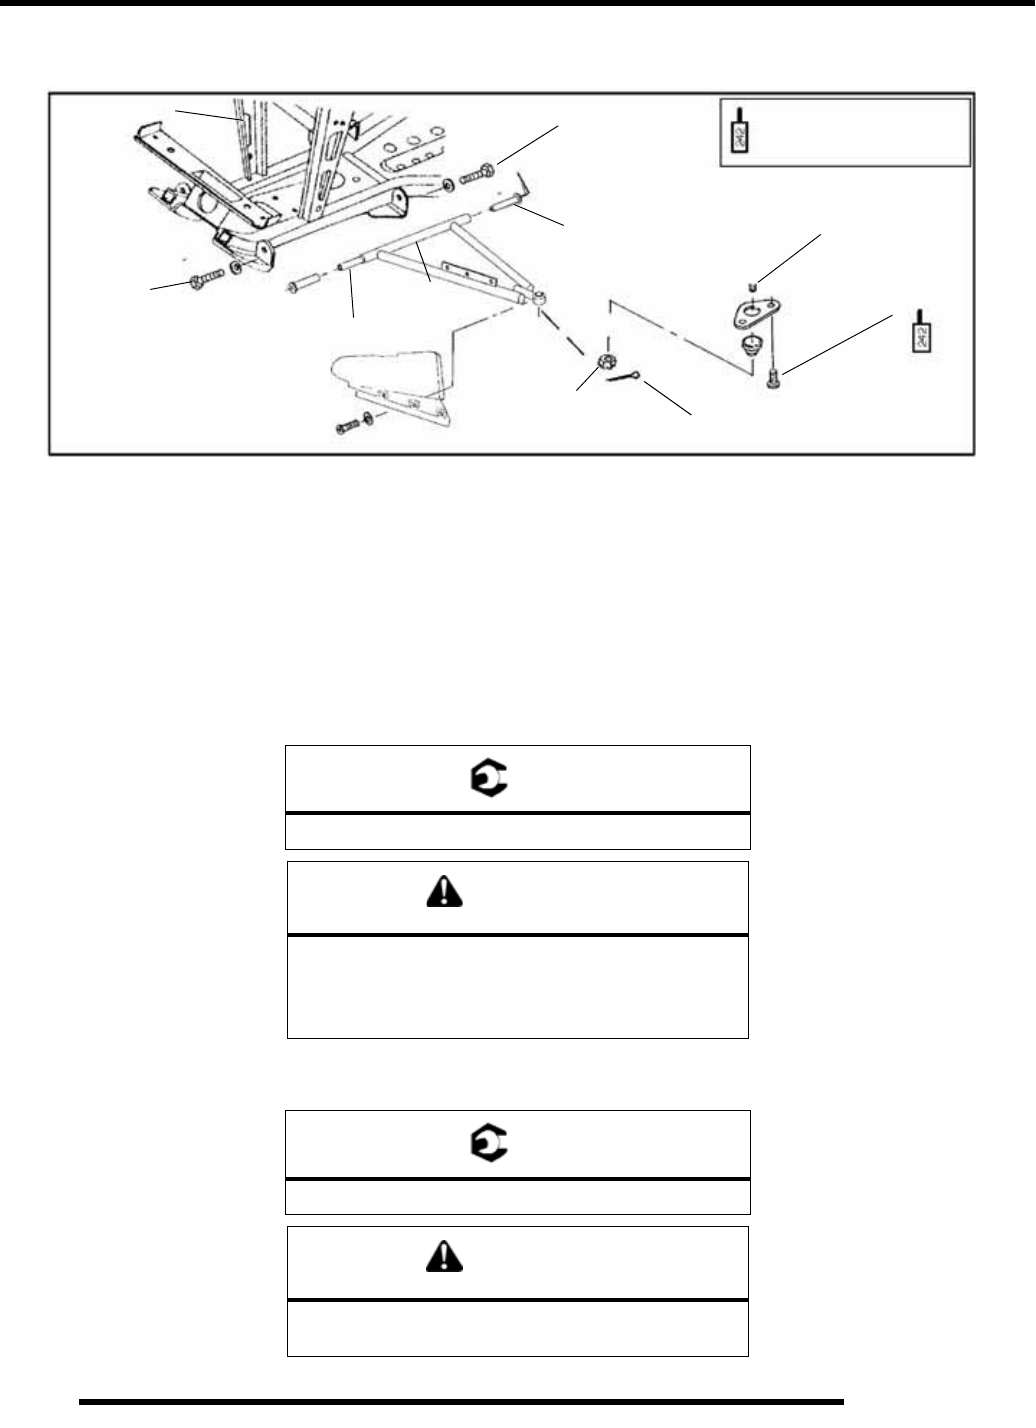
A-Arm Replacement
1. Elevate and safely support vehicle with weight removed from front wheel(s).
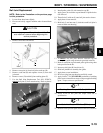
2. Remove cotter pin from ball joint stud at wheel end of A-arm and loosen nut until it is flush with end of stud.
3. Using a soft face hammer, tap nut to loosen A-arm from bolt. Remove nut and A-arm from hub strut assembly.
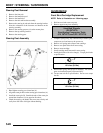
4. Loosen two bolts on A-arm tube by alternating each about 1/3 of the way until A-arm can be removed.
5. Examine A-arm shaft. Replace if worn. Discard hardware.
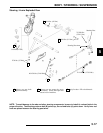
6. Insert A-arm shaft into new A-arm.
7. Install CV joint shields.
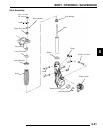
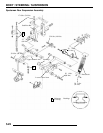
8. Install new A-arm assembly onto vehicle frame. Torque new bolts to specification.
9. Attach A-arm to hub strut assembly. Tighten ball joint nut to specification. If cotter pin holes are not aligned, tighten nut
slightly to align. Install a new cotter pin with open ends toward rear of machine. Bend both ends in opposite directions around nut
= T
A-Arm Bolt Torque: 30 ft. lbs. (41.4 Nm)
WARNING
The locking features on the existing bolts were
destroyed during removal. DO NOT reuse old
bolts. Serious injury or death could result if
fasteners come loose during operation.
= T
Ball Joint Nut Torque: 25 ft. lbs. (35 Nm)
WARNING
Upon A-arm installation completion, test vehicle at
low speeds before putting into regular service.
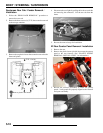
30 ft.lbs. (41 Nm)
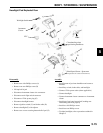
A-arm Shaft
Apply Loctite 242
to the bolt threads.
Vehicle Frame
Bolt - 30 ft.lbs. (41 Nm)
Bushing
Ball Joint Stud
8 ft.lbs. (11 Nm)
Cotter Pin - (Install New)
25 ft.lbs. (35 Nm)
A-Arm Tube