


3.43
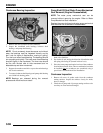
ENGINE
3
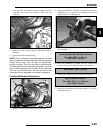
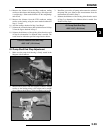
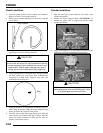
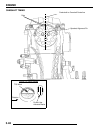
Cam Chain Drive Sprocket Installation
1. Install the Woodruff key, drive sprocket, and slotted nut.
Tighten the nut to the specified torque.
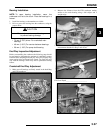
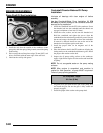
Tensioner Blade Installation
1. Install the tensioner blade and tighten the mounting bolt to
specified torque.
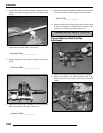
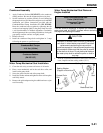
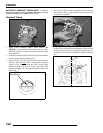
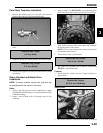
Piston Ring Installation
NOTE: Apply clean engine oil to all ring surfaces and
ring lands. Always check piston ring installed gap before
rings are installed on piston. If the piston has been in
service clean any accumulated carbon from the ring
grooves and oil control ring holes.
1. Place the oil control ring expander in oil ring groove with
the end gap facing forward. The expander has no up or
down marking and can be installed either way. The ends
should butt squarely together and must not overlap.
2. Install the oil ring top rail.
NOTE: The top rail has a locating tab to prevent
rotation. The tab must be positioned in the notch on the
side of the piston as shown (A).
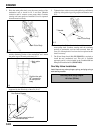
3. Install the bottom rail with the gap at least 30
o
from the end
of the expander on the side opposite the top rail gap.(See
ILL. 1).
4. Install the second ring with the “R” mark facing up.
Position the end gap toward the rear (intake) side of the
piston.
5. Install the top ring (chrome faced) with the “R” mark facing
up and the end gap facing forward (toward the exhaust).
(See ILL. 1).
6. Check to make sure the rings rotate freely in the groove
when compressed.
Slotted Nut Torque:
35-51 ft. lbs. (47-69 Nm)
Tensioner Blade Mounting Bolt Torque:
6 ft. lbs. (8 Nm)
Tighten
A
B
Ring Profile
Top
Mark- up
Second
Mark- up
ILL. 1