


This setting controls the guidance volume
of navigation.
p When set to
, guidance is output.
When set to
, no guidance is output.
! [Phone Ringtone]
This setting controls the incoming ring tone
volume.
! [Phone Voice]
This setting controls the incoming voice vo-
lume.
p Phone Ringtone and Phone Voice adjust-
ments are related to the cellular phone fea-
turing Bluetooth technology. No
adjustment is needed when the cellular
phone featuring Bluetooth technology is
not connected.
p Volume of the AV source is adjusted by
VOL (+/–) button.
= For details, refer to Checking part names
and functions on page 27.
5 To finish the setting, touch [OK].
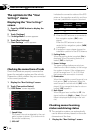
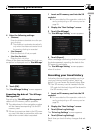
Changing the splash screen
You can change the splash screen to the other
images stored in the navigation system.
1 Display the “System Settings” screen.
2 Touch [Splash Screen].
The “Select Splash Screen” screen appears.
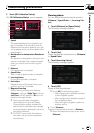
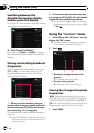
3 Touch the image to use as the splash
screen from the list.
The image is displayed on the screen.
4 Touch [OK].
The image is set as the splash screen, and the
system returns to the “System Settings”
menu.
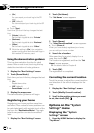
Changing to the splash screen
stored in the SD memory card
You can change the splash screen that ap-
pears when the navigation system starts. Copy
your chosen image to the SD memory card,
and select the image to import.
p Splash screen images should be used with-
in the following formats;
— BMP or JPEG files
— Allowable horizontal and vertical size
are 2592 pixels x 1944 pixels or smaller
— Allowable data size is 6MB or smaller
p Proper compatibility with allowable files is
not guaranteed.
p Imported original images will be stored in
the built-in memory, but the ability to save
these images cannot be guaranteed com-
pletely. If your original image data is de-
leted, insert the SD memory card again
and re-import the original image.
1 Create a folder named “Pictures” on the
top-most directory of the SD memory card
and store the picture files in this folder.
2 Store the picture files in “Pictures”.
3 Insert an SD memory card into the SD
card slot.
= For more details of the operation, refer to In-
serting and ejecting an SD memory card on
page 29.
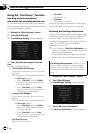
4 Display the “System Settings” screen.
5 Touch [Splash Screen].
The “Select Splash Screen” screen appears.
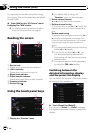
6 Touch [Select from SD].
The “Select Splash Screen” screen appears.
7 Touch the image to use as the splash
screen from the list.
The image is displayed on the screen.
8 Touch [OK].
The image is set as the splash screen, and the
system returns to the “System Settings”
menu.
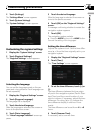
Setting for rear view camera
The following two functions are available. The
rear view camera feature requires a separately
sold rear view camera (e.g. ND-BC2). (For de-
tails, consult your dealer.)
Customizing preferences
En
99
Chapter
13
Customizing preferences