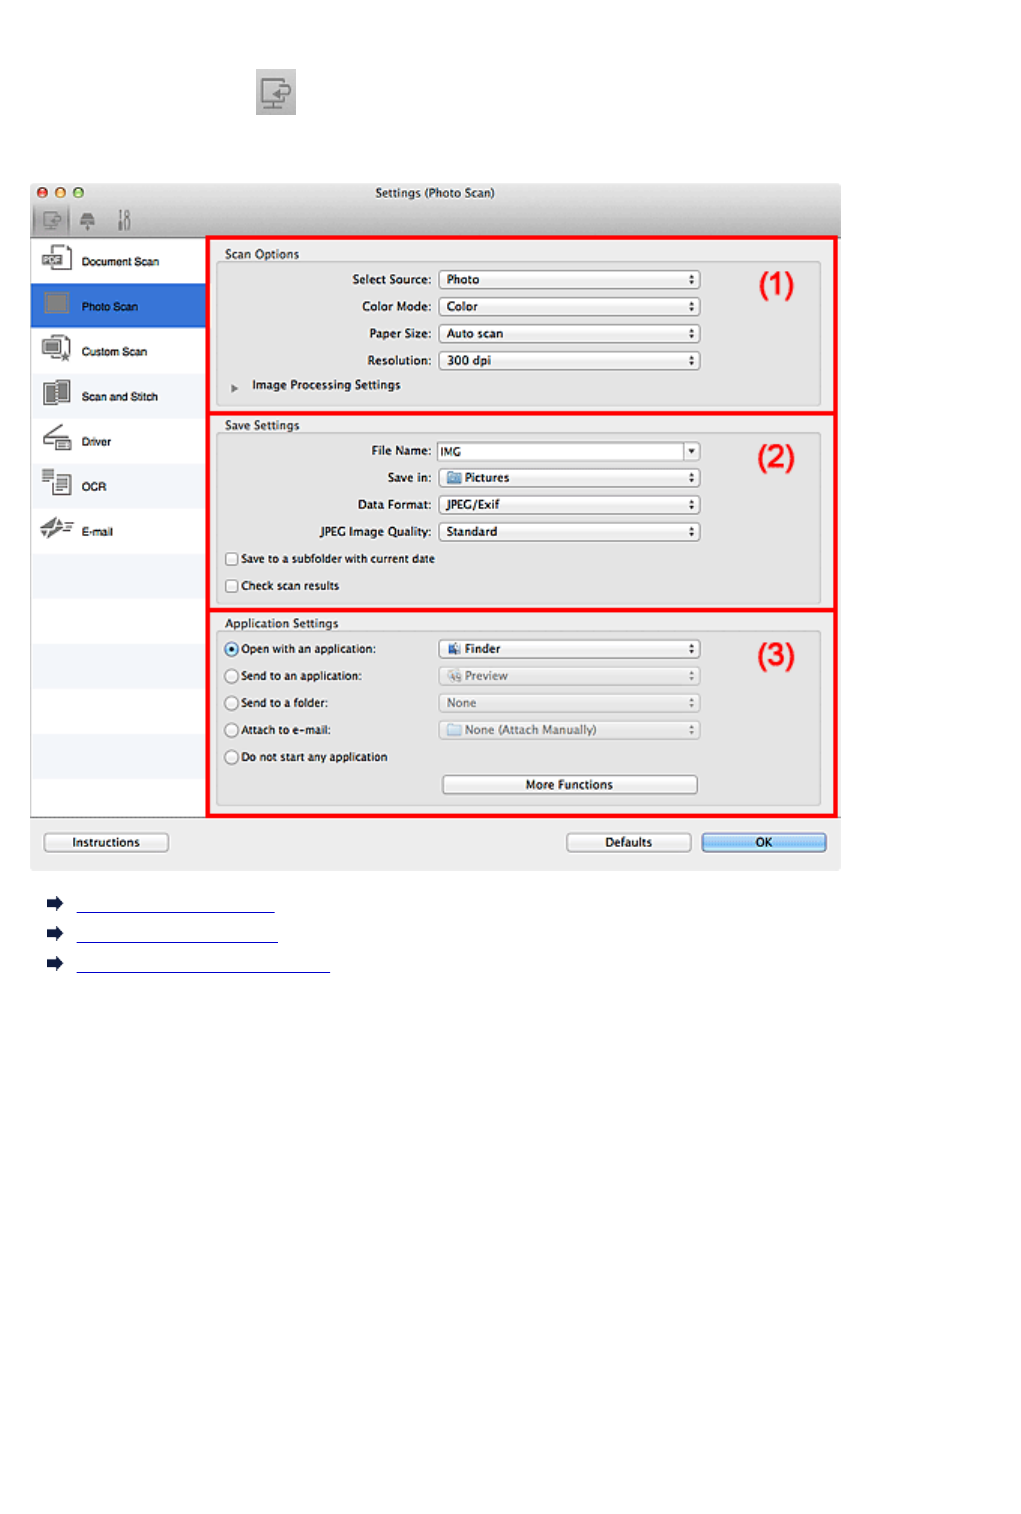
Settings (Photo Scan) Dialog
Click Photo Scan on the (Scanning from a Computer) tab to display the Settings (Photo Scan) dialog.
In the Settings (Photo Scan) dialog, you can make advanced scan settings to scan items as photos.
(1) Scan Options Area
(2) Save Settings Area
(3) Application Settings Area
(1) Scan Options Area
Select Source
Photo is selected.
Color Mode
Select the color mode in which to scan the item.
Paper Size
Select the size of the item to be scanned.
When you select Custom, a screen in which you can specify the paper size appears. Select a Unit,
then enter the Width and Height, and then click OK.
491


