


• 1-1/8–12, 350 to 650 lbf·ft (475 to 881
N·m)
• 1-1/4–12, 500 to 675 lbf·ft (678 to 915
N·m)
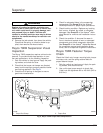
10. Check the steering arm bolts for a minimum
torque of 300 lbf·ft (406 N·m). If the steering arm
bolt torque has fallen below this specification,
remove the bolt, clean all the threads, and apply
new Loctite
®
680. Tighten the bolt 300 to 450
lbf·ft (406 to 610 N·m).
11. Remove the chocks from the tires.
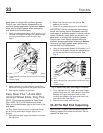
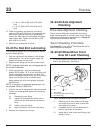
33–03 Tie Rod End Lubricating
This procedure applies to all tie rod ends on Meritor
nondrive steering axles.
1. Park the vehicle with the wheels in the straight-
ahead position. Turn off the engine, apply the
brakes and chock the rear tires.
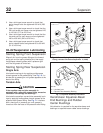
2. Wipe the zerk fitting and the seal or boot clean.
NOTE: Synthetic lubricants are not approved for
tie rod end lubrication.
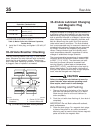
3. Using a grease gun, apply a multipurpose
grease, NLGI grade 1 or 2, to the zerk fitting until
all the old grease is purged from the boot. Dis-
colored old grease should come out of the purge
holes near the boot crimp or bellows area.
Apply grease until all the old grease is purged
from the boot.
NOTE: If using an air pressure grease gun, do
not exceed 150 psi (1035 kPa).
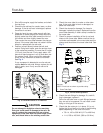
4. If the tie rod end is designed for lube service and
it does not accept grease, perform the following
substeps.
4.1 Remove the zerk fitting.
4.2 Inspect the threaded zerk fitting hole in
the tie rod end and remove any obstruc-
tions.
4.3 Install a new zerk fitting.
4.4 Apply lubrication to the new zerk fitting.
5. Remove the chocks from the tires.
33–04 All-Axle Alignment
Checking
Drive Axle Alignment Checking
Check the axle alignment, parallelism, and thrust
angle measurements for the rear drive axles. Use the
applicable procedure and specifications in Group 35
of the
Acterra
®
Workshop Manual
.
Toe-In Checking, Front Axle
See Group 33 of the
Acterra
®
Workshop Manual
for
wheel alignment procedures.
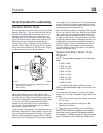
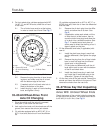
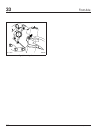
33–05 All-Wheel-Drive Front
Axle Oil Level Checking
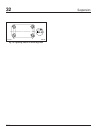
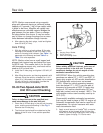
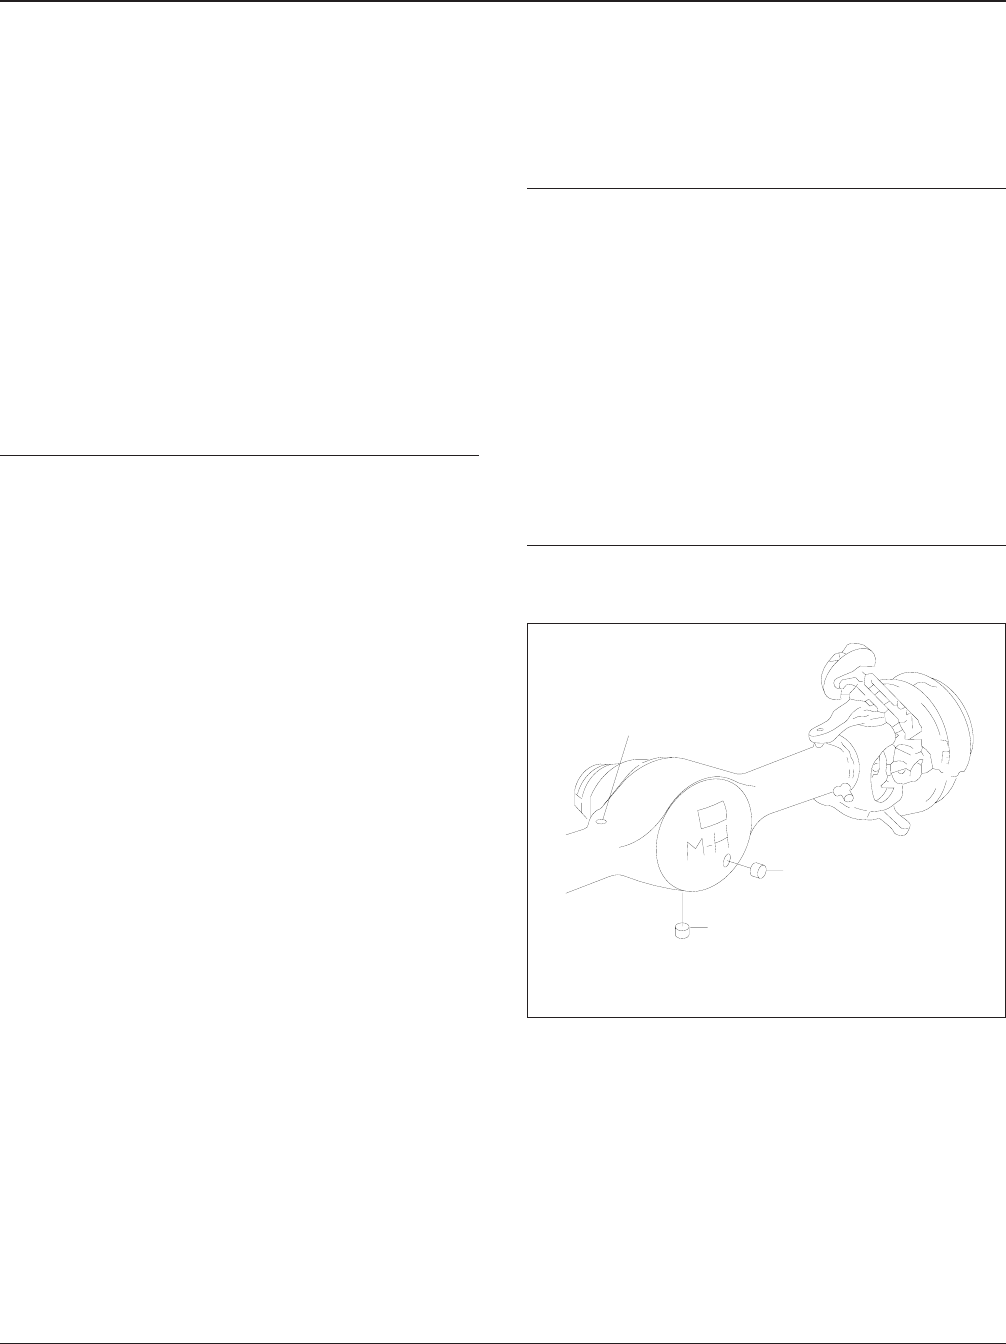
1. On all front-wheel-drive vehicles, check the oil
level in the differential. See Fig. 6.
1.1 Remove the oil level check-and-fill plug,
and make sure the oil level is even with
the bottom of the bore.
1.2 If needed, add oil until the differential is
filled to the bottom of the bore.
1.3 Install the oil level check-and-fill plug, and
tighten it firmly.
04/15/96
f350149
1
2
3
1. Vent Valve
2. Oil Level Check-and-Fill Plug
3. Oil Drain Plug
Fig. 6, All-Wheel-Drive Front Axle Differential
Front Axle33
Acterra Maintenance Manual, September 200233/4