


Lubricate a Haldex automatic slack adjuster at the
grease fitting with any extreme-pressure NLGI Grade
1 or Grade 2 grease if the operating temperature is
–20°F (–29°C) and above. If the operating tempera-
ture is below –20°F (–29°C), use a low-temperature
extreme-pressure grease.
42–23 Bosch Rail-Slide
Hydraulic Brake Caliper
Lubricating
NOTE: This procedure is only for vehicles
equipped with Bosch rail-slide hydraulic brake
calipers.
IMPORTANT: After the vehicle is put into ser-
vice, lubricate the calipers every 6 months or
every 18,000 miles (28 800 km), whichever
comes first.
1. Park the vehicle on a level surface. Shut down
the engine, set the parking brake, and chock the
front or the rear tires, depending on which axle
you are working on.
2. Raise the vehicle off of the ground and securely
support it with jack stands.
3. Remove the wheel from each wheel end. For
instructions, see Group 40 of the
Acterra
®
Work-
shop Manual
.
4. Place a stool near the axle to rest the caliper
upon after the caliper is removed.
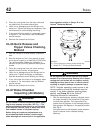
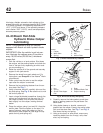
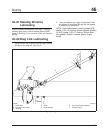
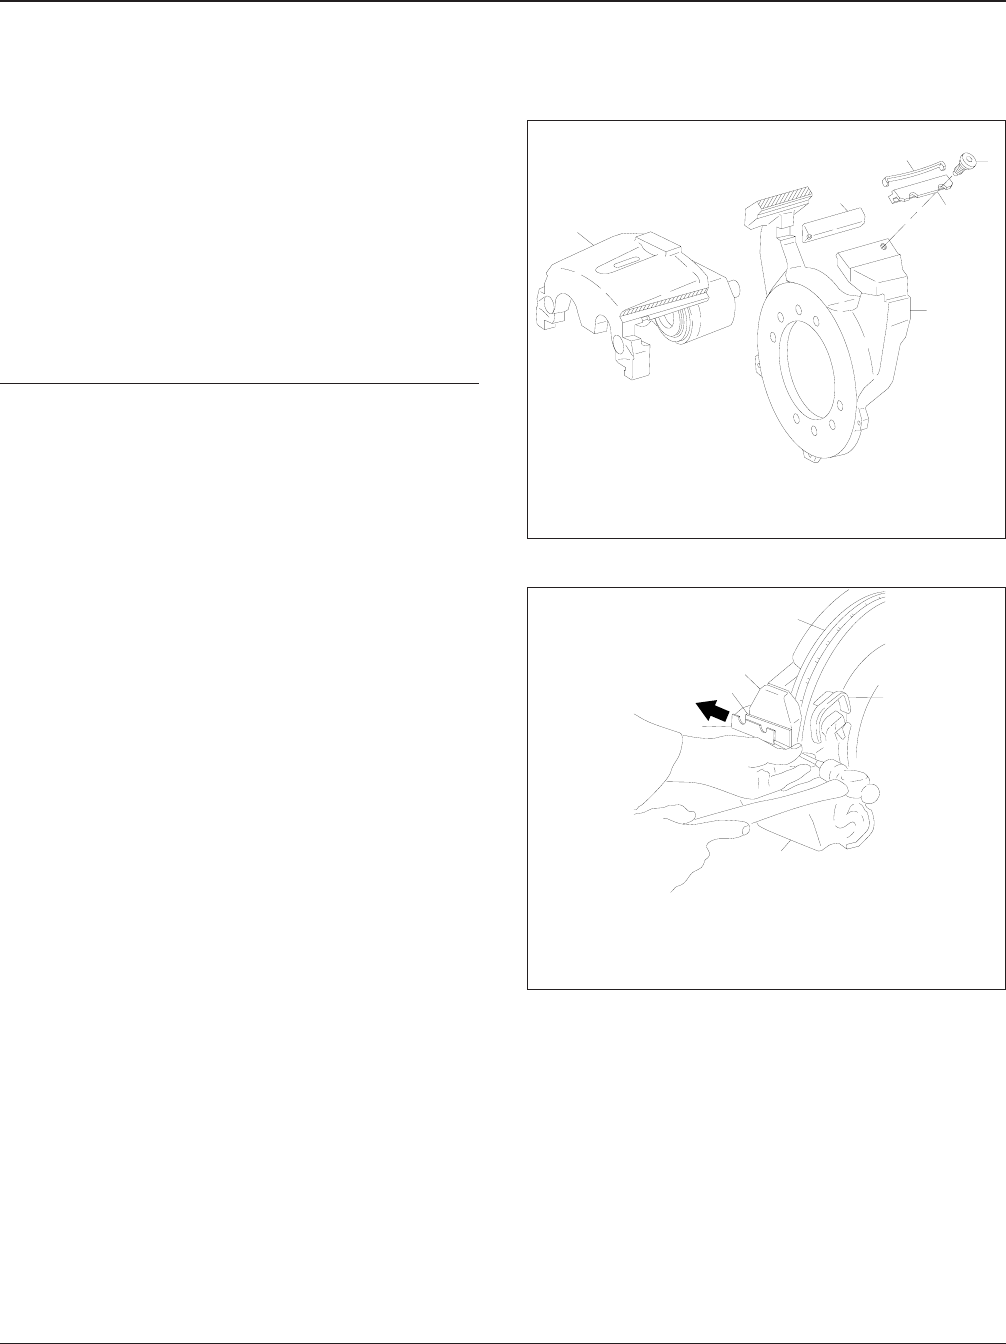
5. Remove the key-retaining fastener from the an-
chor plate. See Fig. 7.
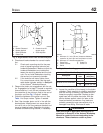
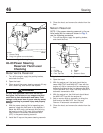
6. Using a hammer and drift, carefully drive out the
key and spring. See Fig. 8. Be careful not to nick
the anchor plate rail.
7. Insert a large flat-bladed screwdriver through the
caliper vent window and into the rotor fins. Pry
the caliper outward; this will push the pistons
back slightly into the caliper, making removal
easier.
8. Grasp the caliper, swing it out and lift it from the
anchor plate. Rest the caliper on the stool. For
ease of removal, swing the caliper on the for-
ward anchor plate torque rail (the large one op-
posite the key and spring rail).
9. Carefully remove the brake pads to avoid dam-
aging or getting grease on the pad faces. Set
them aside.
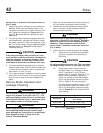
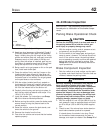
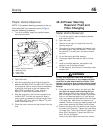
10. Using brake cleaner or alcohol, remove old
grease from the caliper V-ways, the anchor plate
rails, and the shoe slots. See Fig. 7 and Fig. 9.
Also clean the key and spring.
11. Using a wire brush or wire wheel, remove any
remaining debris from the V-ways, rails, shoe
slots, key and spring.
1
2
3
4
5
6
f420565a
10/28/94
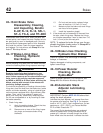
1. Caliper
2. Wear Shim
3. Spring
4. Fastener
5. Key
6. Anchor Plate
Fig. 7, Anchor Plate and Key Fastener
f420546
1
2
3
4
5
6
08/11/93
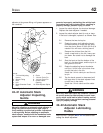
1. Key
2. Spring
3. Anchor Plate Upper
Rail
4. Rotor
5. Outboard Brake Pad
6. Caliper Housing
Fig. 8, Drive Out the Key and Spring
Brakes42
Acterra Maintenance Manual, October 200742/10