


procedures below. Fluid replacement must be done
at an authorized Freightliner service facility.
Draining and Filling
1. Shut down the engine.
2. Apply the parking brakes, chock the front and
rear tires, and open the hood.
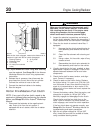
3. Using a flat-tip screwdriver, remove the quick-
disconnect clamp that attaches the hydraulic
hose to the slave cylinder. Retain the clamp for
later installation. See Fig. 3.
WARNING
Clutch hydraulic fluid (DOT 3 brake fluid) is haz-
ardous. It may be a skin irritant and can cause
blindness if it gets in your eyes. Always wear
safety glasses when handling clutch hydraulic
fluid or bleeding hydraulic lines. If you get clutch
hydraulic fluid on your skin, wash it off as soon
as possible.
4. Drain the hydraulic fluid.
4.1 Using a drain pan or other suitable con-
tainer, collect the fluid that drains from the
reservoir, not more than 0.3 quarts (0.3
liters).
4.2 Allow the open end of the drain hose to
remain over the drain pan.
06/17/2002
f250588
1
2
3
4
5
7
6
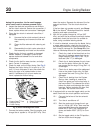
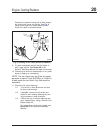
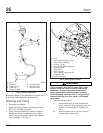
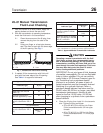
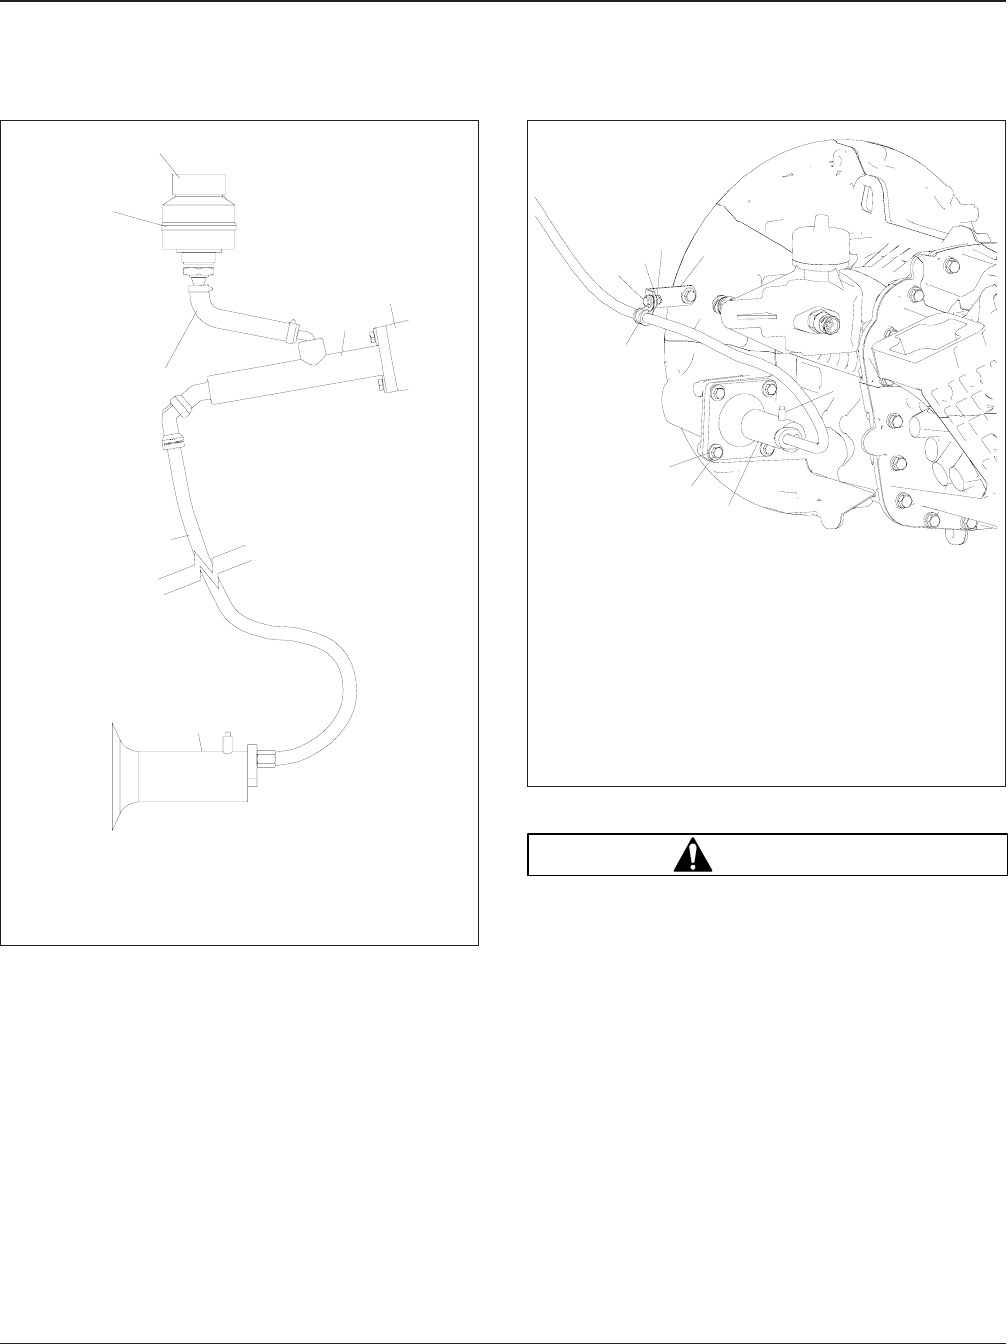
1. Reservoir
2. Reservoir Cap
3. Pedal Unit
4. Master Cylinder
5. Hydraulic Hose
6. Slave Cylinder
7. Reservoir Hose
Fig. 2, Clutch Components
06/17/2002
f250589
1
2
3
4
5
6
7
8
9
10
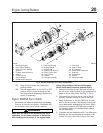
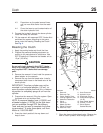
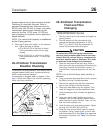
1. Clamp Mounting Bolt, 1/4–20
2. Steel-Plated Flatwasher
3. Locknut, 1/4–20
4. Bell Housing Standoff Bracket
5. Hydraulic Hose
6. Bleed Valve
7. Slave Cylinder
8. Slave Cylinder Capscrew, M8
9. Flatwasher, M8
10. Cushioned Clamp
Fig. 3, Clutch Slave Cylinder
Clutch25
Acterra Maintenance Manual, September 200225/2