


1. Shut off the engine, apply the brakes, and chock
the rear tires.
2. Check the tie rod boot for cracks, tears, or other
damage. If the tie rod boot is damaged, replace
the entire tie rod end.
3. Grasp by hand (or use a pipe wrench with jaw
protectors to avoid gouging the cross tube) and
slightly rotate the cross tube toward the front of
the vehicle and then slightly toward the rear.
Then center the cross tube between the stop po-
sitions. If the cross tube does not rotate in either
direction, replace both tie rod ends.
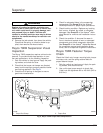
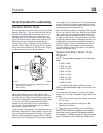
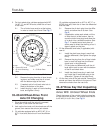
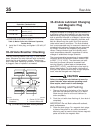
4. Position yourself directly below the ball stud
socket. Using both hands, grab the end as close
to the socket as possible, no more than 6 inches
(15.2 cm) from the end. Firmly apply about 100
pounds of hand pressure in an up and down mo-
tion several times. When moving the assembly,
check for any movement at both tie rod ends.
See Fig. 4.
If any movement is detected at one tie rod end,
replace both tie rod ends. Always replace tie rod
ends in pairs, even if only one tie rod end is
damaged.
CAUTION
Do not attempt to straighten a bent cross tube.
Doing so could result in damage to the axle. Be
sure to replace the cross tube with an original
equipment cross tube with the same length, diam-
eter, and thread size as the existing cross tube.
5. Check the cross tube for cracks or other dam-
age. If the cross tube is bent or damaged, re-
place the cross tube.
6. Check the clamps for damage. If a clamp is
damaged, replace the clamp. Replace the entire
cross tube assembly if either clamp is welded to
the cross tube.
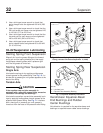
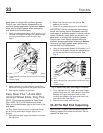
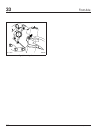
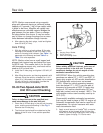
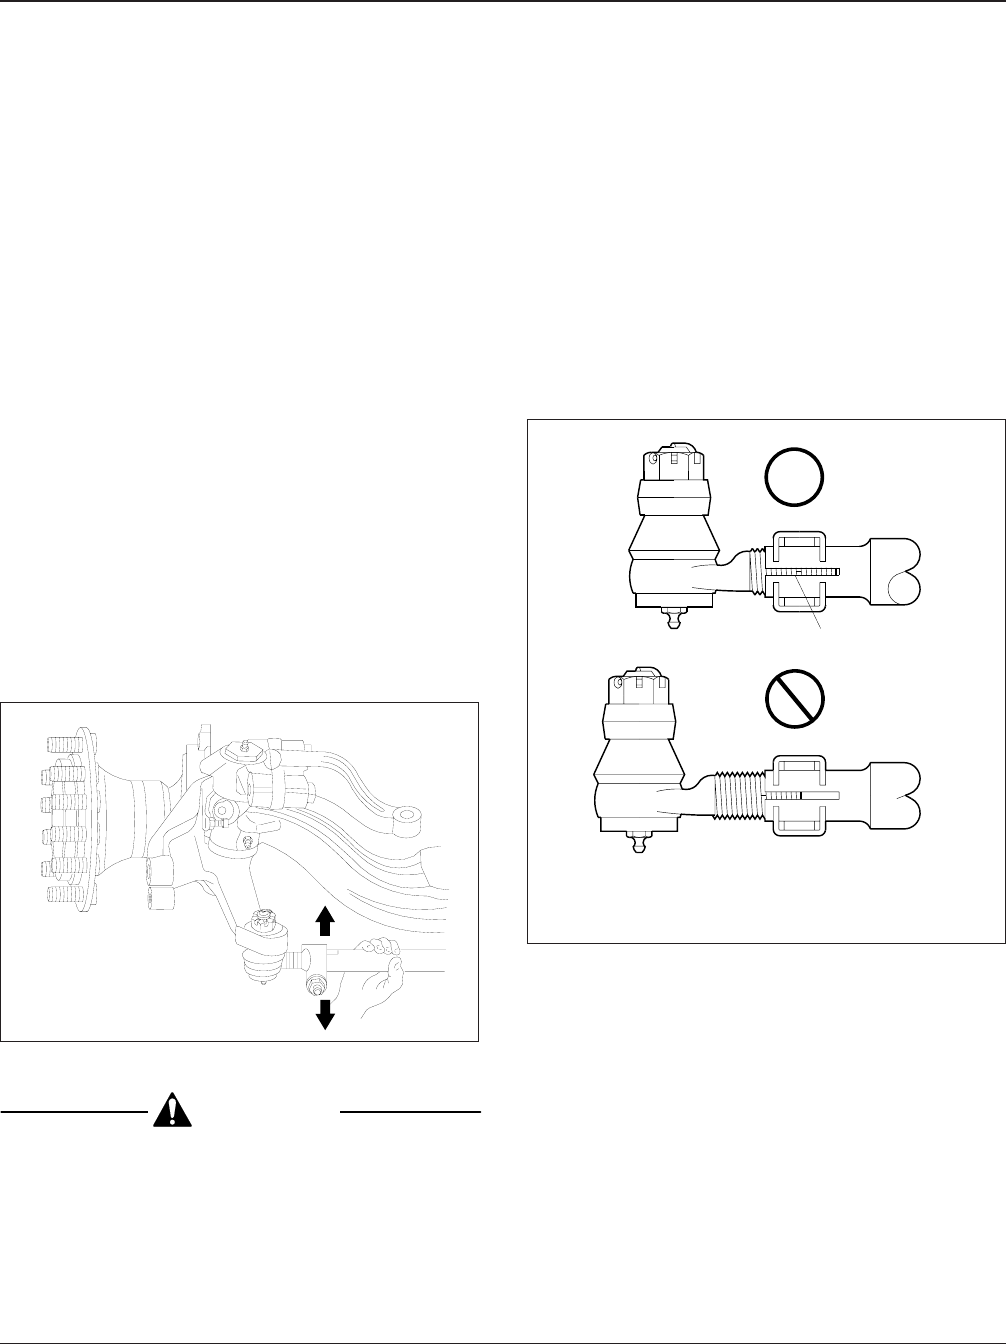
7. Check for proper installation of the tie rod end
clamp to the cross tube. Make sure that the tie
rod ends are threaded in the cross tube past the
clamps and the slots at the cross tube ends. See
Fig. 5.
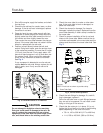
8. Check the zerk fittings for damage. If a zerk fit-
ting is damaged, replace it.
Some tie rod ends have no zerk fittings because
they are not to be greased. Do not install a zerk
fitting on this type of tie rod end.
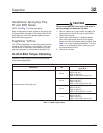
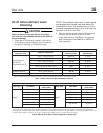
9. Check that the cotter pin is in place. If it is not,
tighten the tie rod end nut to one of the following
specs depending on the size of the stud.
• 7/8–14, 160 to 300 lbf·ft (217 to 406 N·m)
• 1–14, 250 to 450 lbf·ft (339 to 610 N·m)
10/10/2001
f330195
Fig. 4, Check Movement of Tie Rod End
f320033a
1
OK
OK
02/27/2007
NOTE: Pinch bolt not shown to provide clarity.
1. Cross-Tube Split
Fig. 5, Tie-Rod End Adjustment
Front Axle 33
Acterra Maintenance Manual, September 2002 33/3