spring which, if released, could cause serious in-
jury or death.
7. Inspect the exterior surfaces of the chamber for
damage. Make sure the breather holes in the
non-pressure section(s) are open and free of de-
bris. Using the instructions in Group 42 of the
Acterra
®
Workshop Manual
, replace any dam-
aged parts.
8. On parking brake chambers equipped with inte-
gral release bolts, lubricate the bolt with thread
anti-seize compound. Check the tightness of the
bolt. For torque values, see the applicable brake
chamber section in Group 42 of the
Acterra
®
Workshop Manual
.
CAUTION
If the external breather tube is missing or incor-
rectly installed, road dirt and debris can adversely
affect the operation of the brake chamber. Once
inside the chamber, dirt and debris cause the in-
ternal parts to deteriorate and shorten their lives.
9. On brake chambers equipped with an external
breather tube, make sure the flexible elbows are
in place and the connector tube is inserted into
each elbow 1/2 inch (13 mm).
10. On all parking brake installations, check for pres-
ence of an end cover cap or dust plug and make
sure the cap or plug is securely snapped into
place.
Service Brake Operation and
Leakage Checking
WARNING
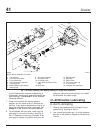
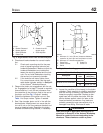
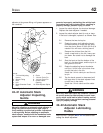
Do not loosen or remove the parking brake clamp
ring for any purpose at any time. See Fig. 1. The
parking/emergency brake section is not intended
to be serviced. Serious injury or death may result
from sudden release of the power spring.
WARNING
Before doing any repairs or adjustments on a
service/parking brake chamber, read the appli-
cable warnings and instructions in the applicable
brake chamber section in Group 42 of the
Acterra
®
Workshop Manual
.
1. Apply the service brakes and check that the pis-
ton rods move out promptly without binding.
2. Release the service brakes and check that the
piston rods return to the released positions
promptly without binding.
WARNING
Read and follow all applicable warnings and in-
structions in Group 42 of the
Acterra
®
Workshop
Manual
for repairs to the service/parking brake
chambers. These chambers contain a power
spring, which if released, could cause serious in-
jury or death.
3. Check the service brake chambers for leakage.
3.1 Apply the service brakes and hold them
on full line pressure of at least 80 psi
(550 kPa).
CAUTION
Do not overtighten the clamp ring. This can distort
the flange sealing surface, or the clamp ring itself.
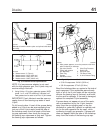
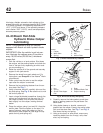
3.2 Using soapy water, coat the service
chamber clamp ring. Leakage is exces-
sive if it produces a 1-inch (25-mm)
bubble within 5 seconds. See Fig. 1.On
Bendix service chambers, tighten the
clamp ring enough to stop the leakage,
but do not exceed the maximum torque
limits in Table 2.
Do not overtighten
.
On other service chamber makes, if leak-
age is detected, tighten the clamp ring;
but do not exceed the maximum torque
limits in Group 42 of the
Acterra
®
Work-
shop Manual
.
Clamp Ring Torque Values (Bendix Chambers)
Description
Torque:
lbf·in (N·cm)
5/16–24 Nut 130–150 (1460–1700)
3/8–16 Nut 140–180 (1580–2040)
Table 2, Clamp Ring Torque Values (Bendix
Chambers)
Brakes42
Acterra Maintenance Manual, October 200742/4


