


the transmission and remove the drain plug. Ex-
amine the fluid as it drains. If only the filter is
being changed, do not drain the fluid.
4. Remove the 12 mounting bolts (six each) from
the two filter covers.
NOTE: A lot of fluid will drain when the filter
covers are removed.
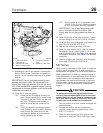
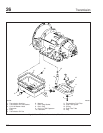
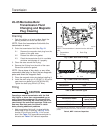
5. Remove the filter covers, O-rings, and two
square-cut seals from the transmission. See
Fig. 5.
6. Remove the filters from the bottom of the control
module.
7. Lubricate the new O-rings with transmission fluid,
and install them on the cover assemblies.
8. Install a new square-cut seal on each cover as-
sembly, and install the fluid filter elements on the
cover assemblies.
9. Install the filter and cover assemblies into the
filter compartment.
10. Align each cover assembly with the holes in the
channel plate sump, and push the cover assem-
blies in by hand to seat the seals.
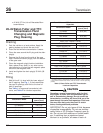
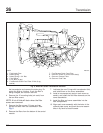
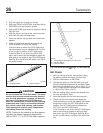
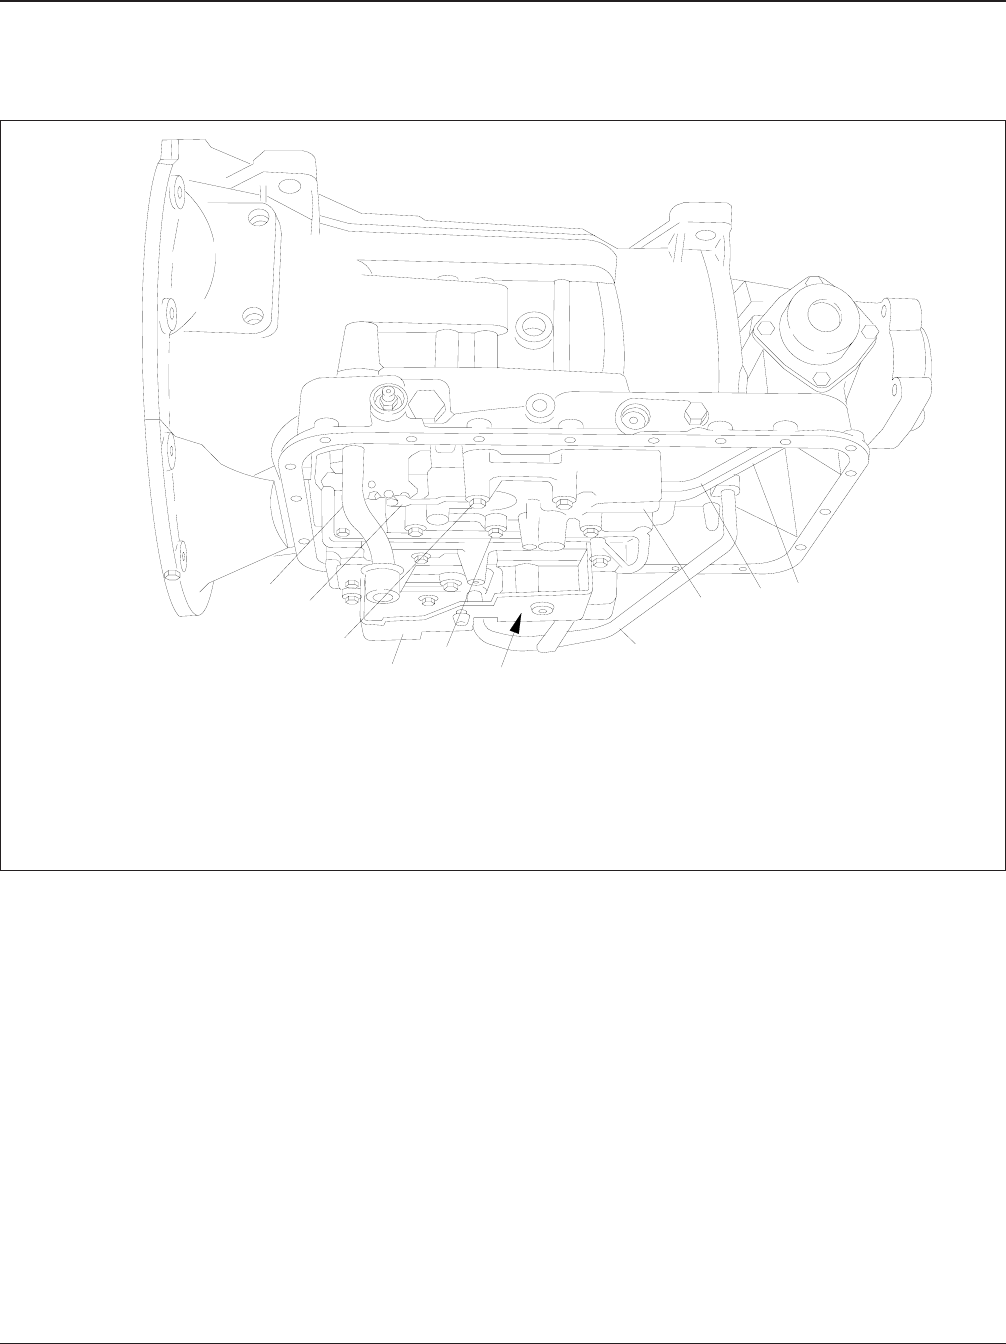
f260132a
1
2
3
4
5
6
7
8
9
10
10/05/94
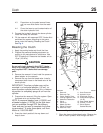
1. Fluid Intake Tube
2. Detent Spring
3. Detent Spring 1-3/4" Bolt
4. Filter Spacer
5. 2-1/4" Bolt (16 qty.)
6. First/Reverse Clutch Feed Tube 3" Bolt (2 qty.,
behind)
7. First/Reverse Clutch Feed Tube
8. Governor Screen (in control valve body)
9. Governor Pressure Tube
10. Governor Feed Tube
Fig. 4, Allison AT Series Transmission Governor
Transmission26
Acterra Maintenance Manual, March 200526/6