


10.5 Apply the foot brake, and release the
parking brakes.
10.6 Set the toggle switch to the AUTO or OFF
position; the air should exhaust and the
fan clutch should disengage. Replace the
switch, if necessary.
Kysor K22RA Fan Clutch
1. Disconnect the electrical cables from the battery.
Drain all air from the air system. If equipped with
an air starter, drain the air starter reservoir.
WARNING
Make sure the batteries are disconnected, and if
applicable, the air starter reservoir is drained be-
fore checking the fan clutch. If the engine starts
during this procedure, the fan could engage,
which could result in serious personal injury.
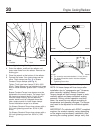
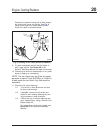
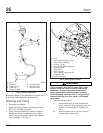
2. Measure the distance from the back surface of
the fan clutch retaining plate to the forward-most
edge of the fan belt pulley. See Fig. 7, Ref. A.
3. Disconnect the line from the air inlet of the air
cylinder. Connect a shop air hose to the inlet.
4. Apply a minimum of 100 psi (690 kPa) air pres-
sure to the air cylinder—the bearing housing will
move backwards, disengaging the clutch. Again,
measure the distance from the back surface of
the retaining plate to the forward-most edge of
the fan belt pulley.
5. Compare the two measurements; if the difference
between the two measurements exceeds 0.150
inches (3.8 mm), the clutch lining is worn and
f200194a
1
2
3
4
5
6
7
8
9
10
11
12
13
14
15
16
17
18
19
20
21
23
22
24
03/30/95
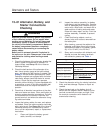
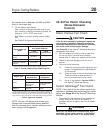
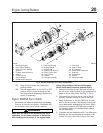
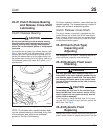
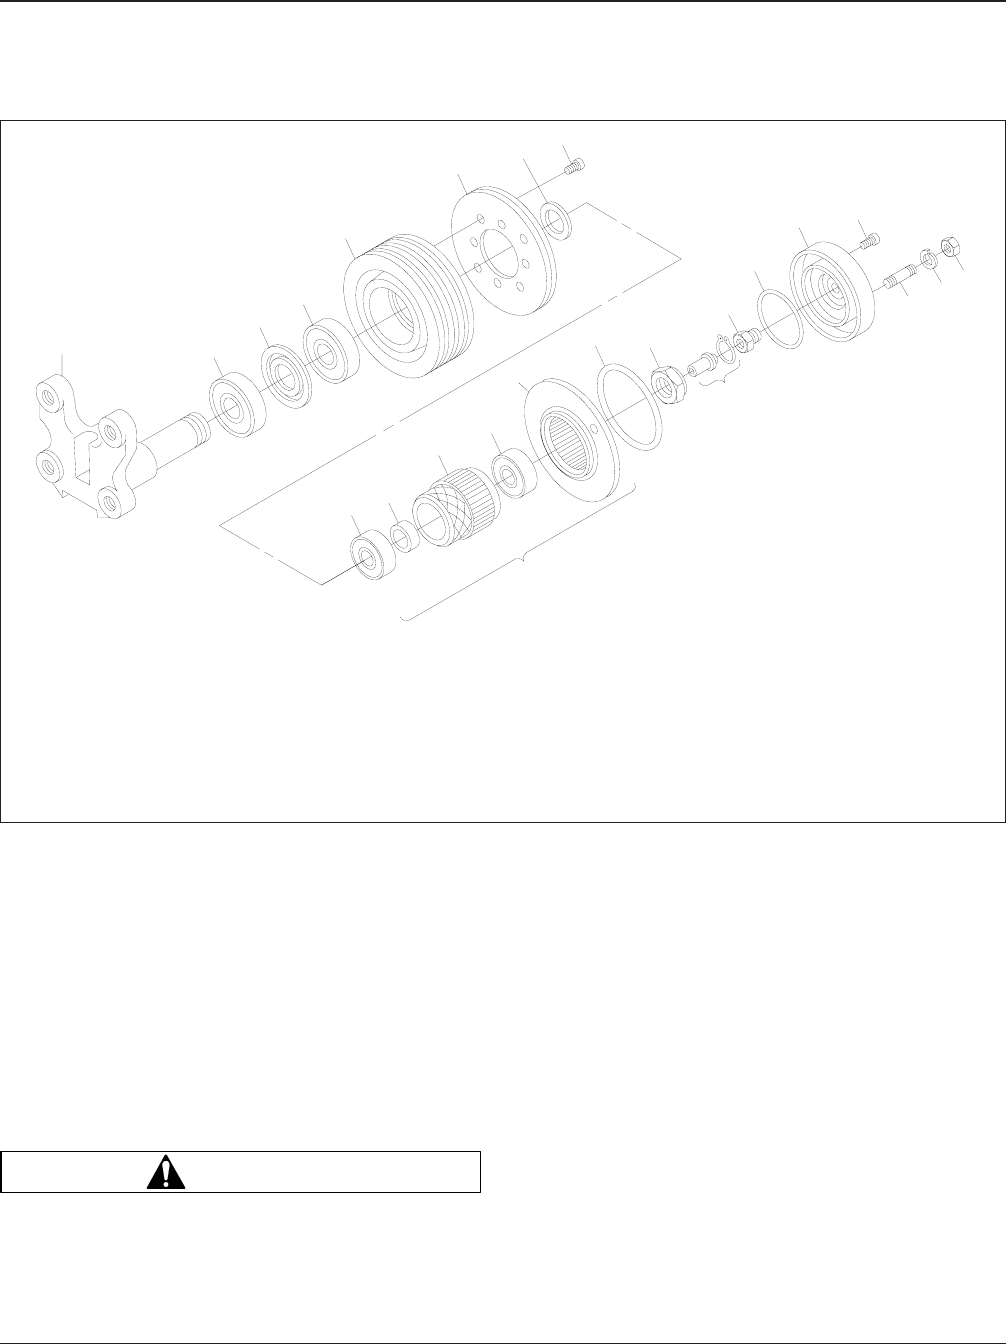
1. Mounting Bracket
2. Rear Sheave Bearing
3. Inner and Outer Bearing
Spacers
4. Forward Sheave Bearing
5. Sheave
6. Friction Facing
7. Journal Spacer
8. Socket-Head Capscrew
9. Rear Hub Bearing
10. Bearing Spacer
11. Splined Hub
12. Forward Hub Bearing
13. Piston Friction Disc
14. Large O-Ring
15. Locknut
16. Cartridge Assembly
17. Face Seal
18. Small O-Ring
19. Air Chamber
20. Socket-Head Capscrew
21. Stud Bolt
22. Lockwasher
23. Hexnut
24. Piston Assembly
Fig. 6, Horton Advantage Fan Clutch Components
Engine Cooling/Radiator 20
Acterra Maintenance Manual, January 2007 20/5