12.2
Section 12
Clutch
Service
On this type, an oil “splash” type lubrication system is
used. The proper oil level must be maintained to
provide efficient lubrication. The oil should be changed
after each 100 hours of operation. When refilling, use
0.47 L (1 pt.) of motor oil of proper viscosity. See chart
below.
2. After adjustment is made, engage clutch and
check to make sure rollers go over center to lock
the unit in engaged position and prevent releasing
under load. If trouble persists after readjustment,
clutch reconditioning is indicated.
Reconditioning
Drain the oil, remove the nameplate, and use the
following procedure.
1. Remove capscrews (2) from clutch yoke and
remove spacers.
2. Remove cross shaft.
3. Remove housing bolts (4) and slide housing off.
4. Loosen bolts securing clutch assembly to
crankshaft, then remove locking screw.
5. Pull clutch assembly off.
6. To replace clutch, simply turn adjusting collar off
and remove plate.
Reverse procedure for reassembly. Adjust and
lubricate following previous instructions.
Adjustment
Slight readjustment may be needed after a few hours
on a new clutch to accommodate normal run-in wear.
Firm pressure should be required to engage clutch
(40-45 pounds pull at lever handle). Readjust if clutch
slips and overheats, or if clutch handle jumps out after
engagement. Use the following procedure:
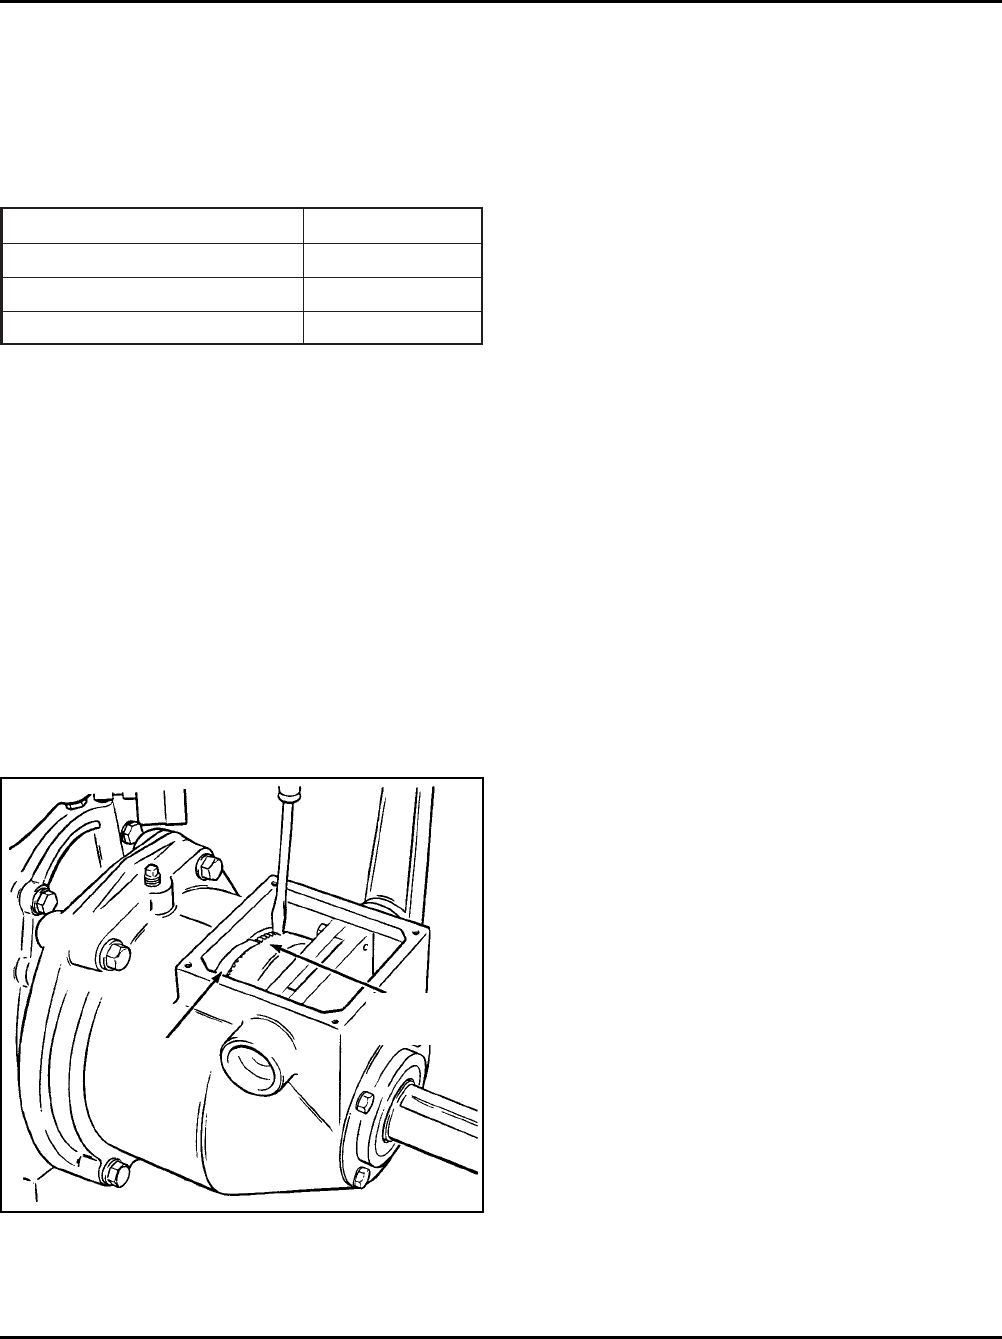
1. Release clutch and remove nameplate. Using a
large screwdriver, turn adjusting ring clockwise,
one notch at a time, until firm pressure is required
to engage clutch. See Figure 12-2. Adjusting ring
is spring loaded and does not have to be
loosened before adjustment is made. Do not
attempt to pry or force spring lock away from the
ring.
Figure 12-2. Adjusting Clutch.
Adjustment
Ring
Spring
Lock
erutarepmeTytisocsiVEAS
)F°05(C°01evobA03EAS
)F°05(C°01ot)F°0(C°8.71-02EAS
)F°0(C°8.71-woleB01EAS
